
一、概述
1.官方文档
1
2
3
4
# Deploying HA CloudCore
https://release-1-13.docs.kubeedge.io/docs/setup/deploy-ha
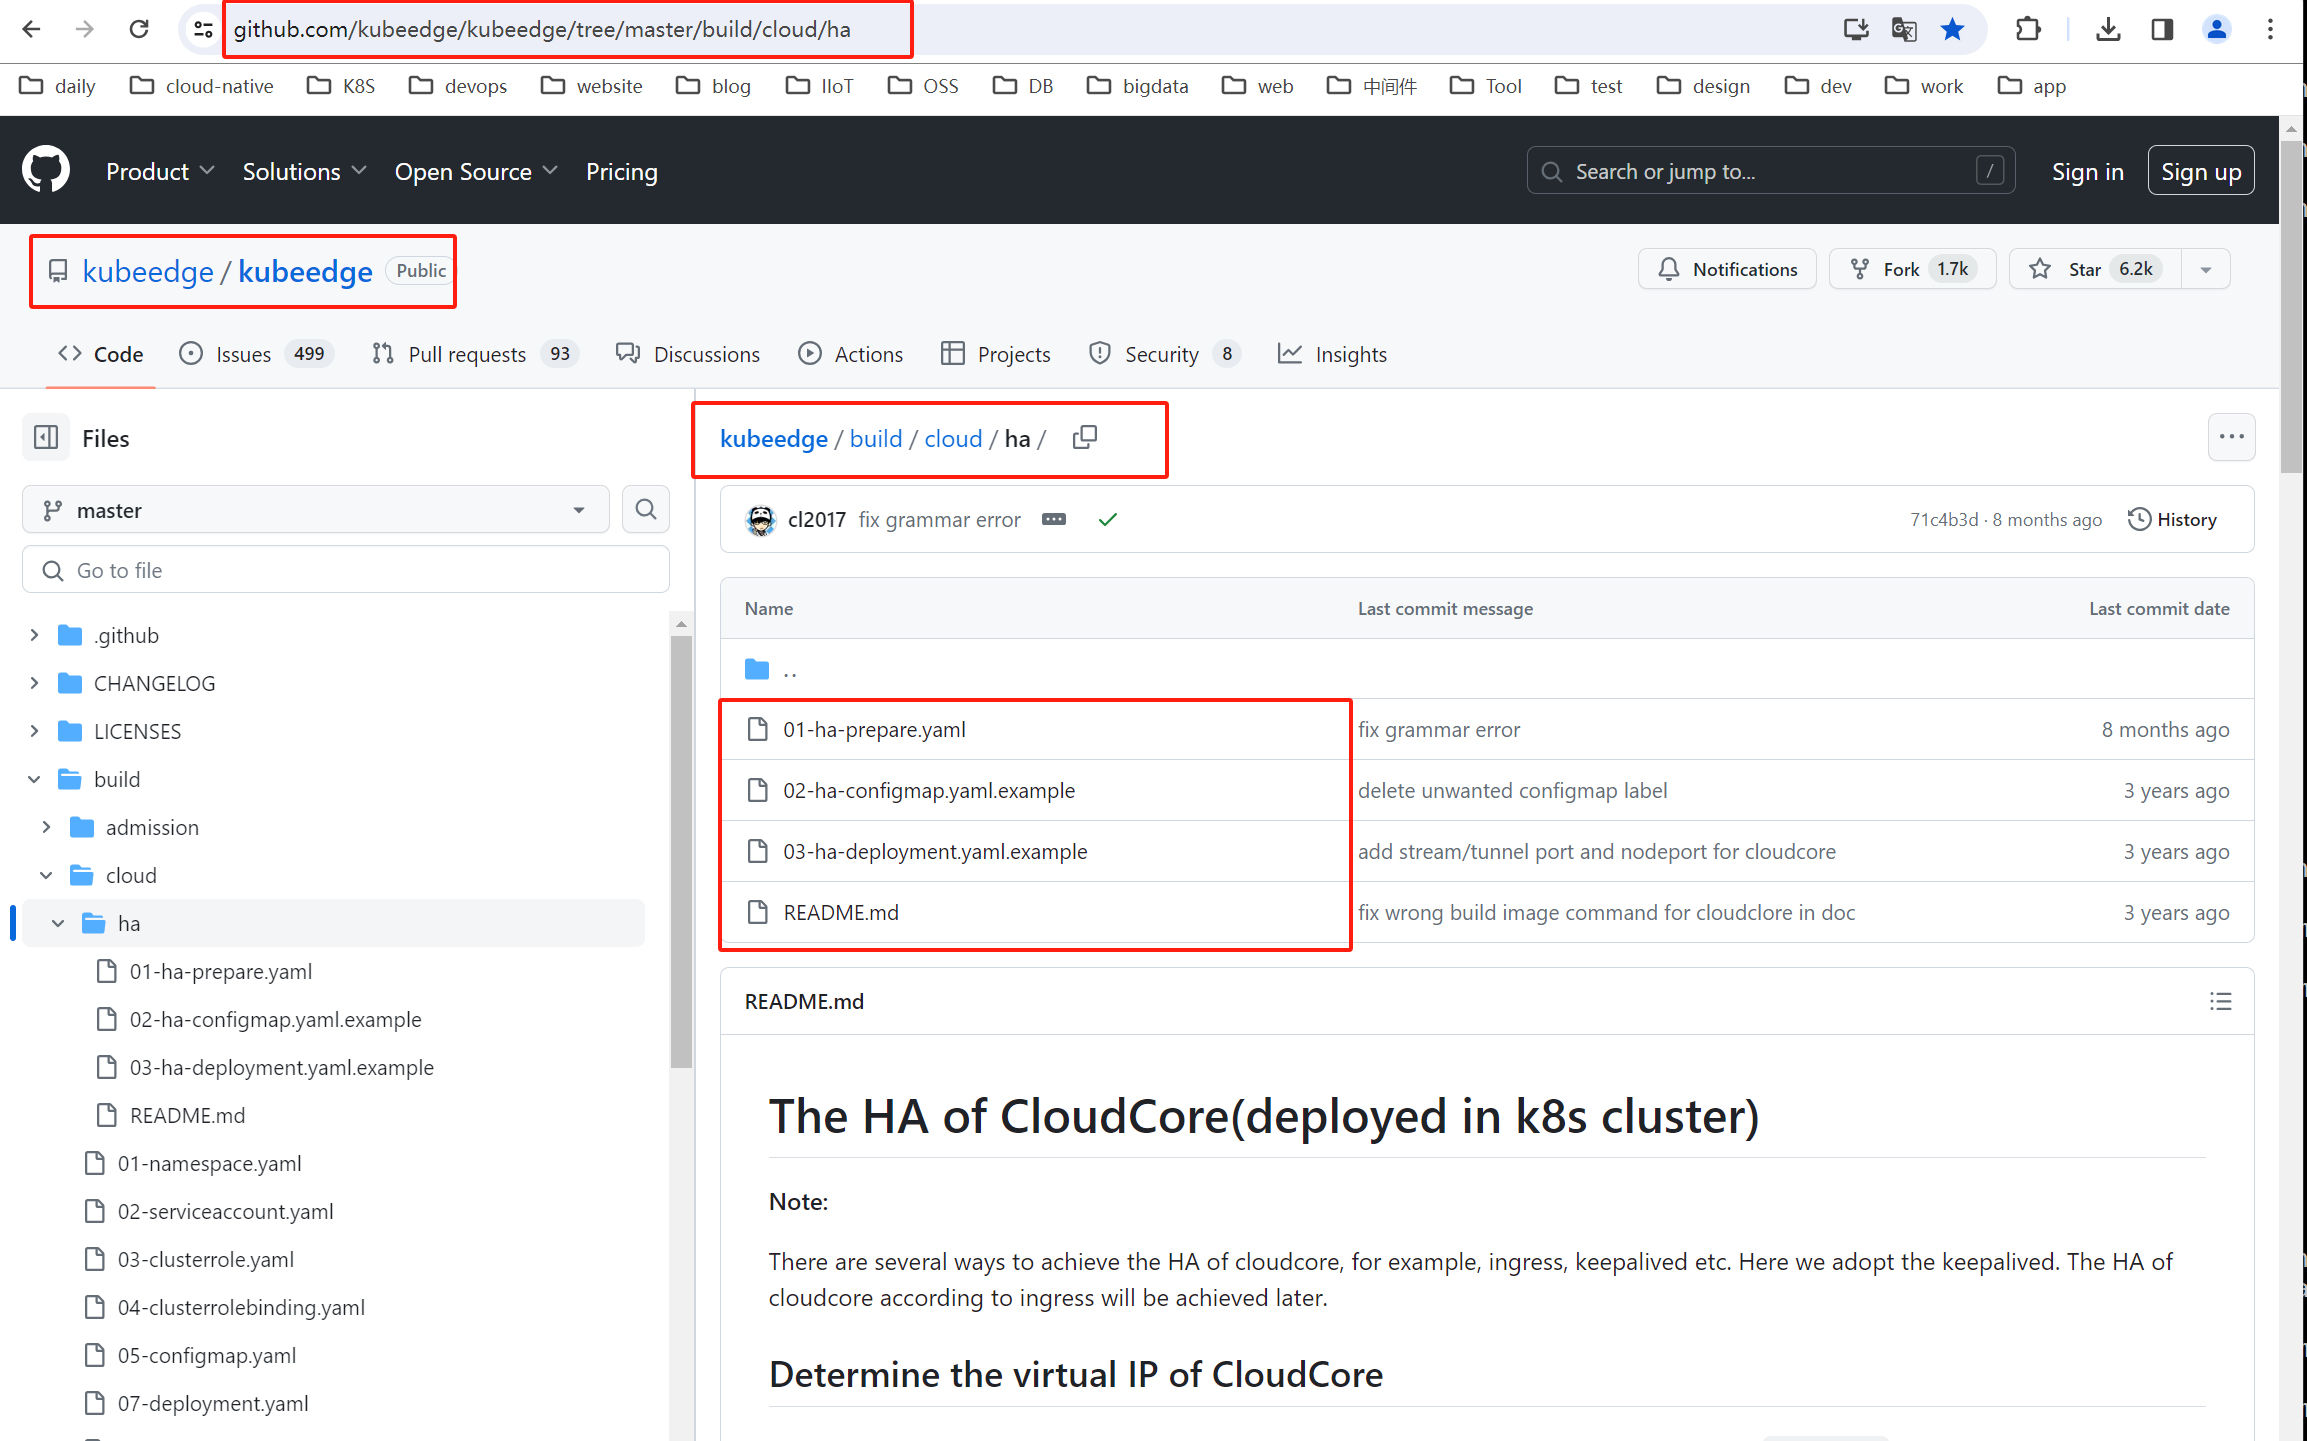
https://github.com/kubeedge/kubeedge/tree/master/build/cloud/ha
2.安装步骤
2.1.Node节点添加标签
1
2
3
4
5
6
7
8
9
10
11
12
13
14
15
16
17
18
19
[root@k8s-master kubeedge]# kubectl get node
NAME         STATUS   ROLES                  AGE   VERSION
k8s-master   Ready    control-plane,master   16d   v1.23.12
k8s-node1    Ready    <none>                 16d   v1.23.12
k8s-node2    Ready    <none>                 16h   v1.23.12


#添加标签
# kubectl label nodes k8s-node1 kubeedge=cloudcore
# kubectl label nodes k8s-node2 kubeedge=cloudcore

[root@k8s-master kubeedge]# kubectl label nodes k8s-node1 kubeedge=cloudcore
node/k8s-node1 labeled
[root@k8s-master kubeedge]# kubectl label nodes k8s-node2 kubeedge=cloudcore
node/k8s-node2 labeled


# 查看所有node 标签
# kubectl get nodes --show-labels

2.2.修改配置文件
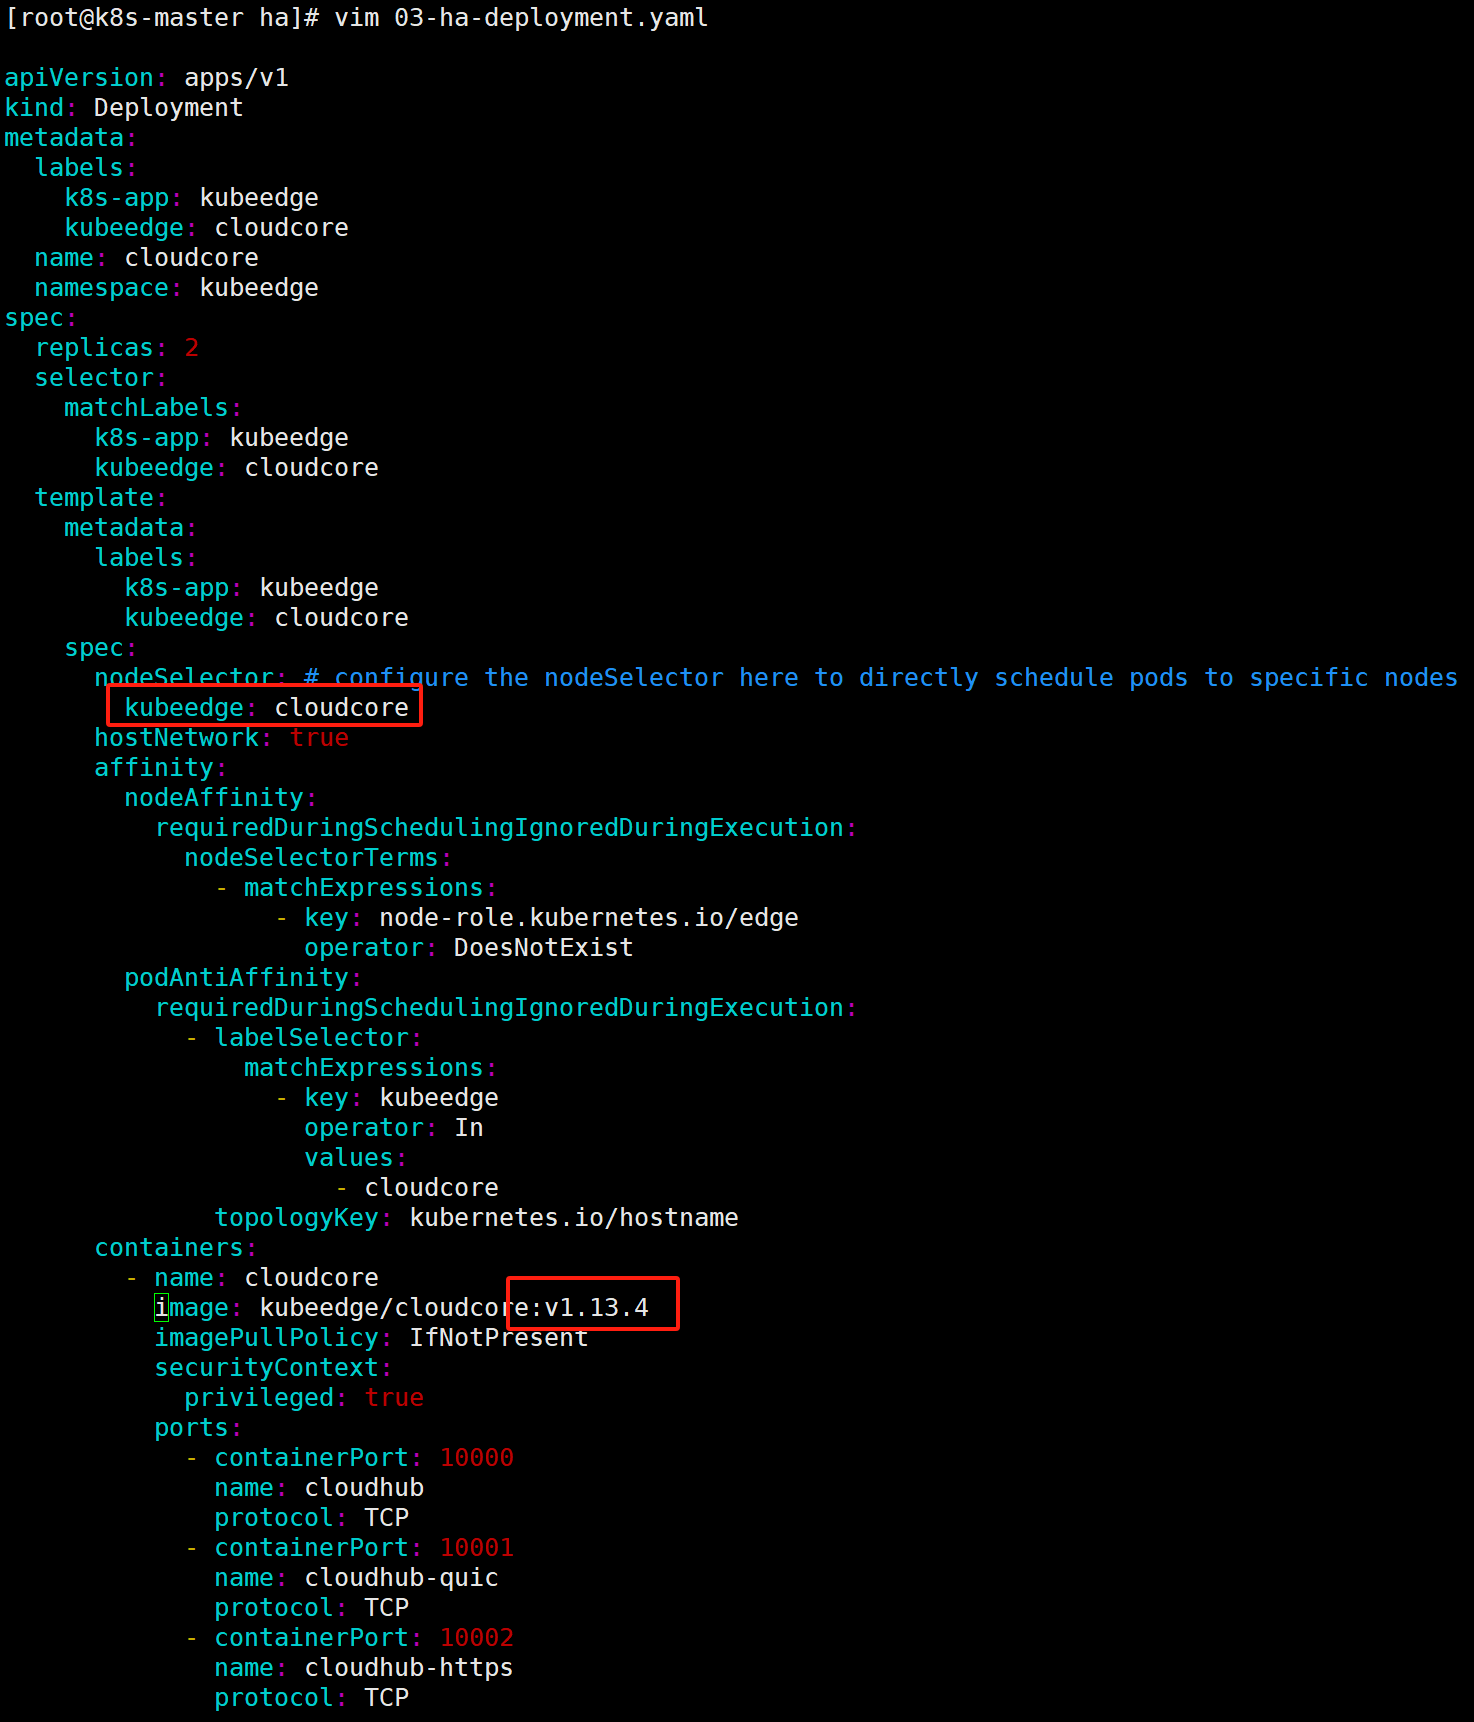
03-ha-deployment.yaml
1
2
3
4
5
6
7
8
9
10
11
12
13
14
15
16
17
18
apiVersion: apps/v1
kind: Deployment
metadata:
  name: cloudcore
spec:
  template:
    spec:
      nodeSelector: # configure the nodeSelector here!
        kubeedge: cloudcore

......

      containers:
        - name: cloudcore
          image: kubeedge/cloudcore:v1.13.4
          imagePullPolicy: IfNotPresent
          securityContext:
            privileged: true
02-ha-configmap.yaml
1
2
3
4
modules:
  cloudHub:
    advertiseAddress:
    - 192.168.202.188  # VIP虚拟IP
2.3.创建资源
1
2
3
cd build/cloud/ha

for resource in $(ls *.yaml); do kubectl create -f $resource; done
2.4.安装keepalived
1
2
3
yum install -y conntrack-tools libseccomp libtool-ltdl

yum install -y keepalived
keepalived.conf:
- master:
1
2
3
4
5
6
7
8
9
10
11
12
13
14
15
16
17
18
19
20
21
22
23
24
25
26
27
28
29
30
31
! Configuration File for keepalived

global_defs {
  router_id lb01
  vrrp_mcast_group4 224.0.0.19
}
# CloudCore
vrrp_script CloudCore_check {
  script "/etc/keepalived/check_cloudcore.sh" # the script for health check
  interval 2
  weight 2
  fall 2
  rise 2
}
vrrp_instance CloudCore {
  state MASTER
  interface eth0 # based on your host
  virtual_router_id 167
  priority 100
  advert_int 1
  authentication {
    auth_type PASS
    auth_pass 1111
  }
  virtual_ipaddress {
    10.10.102.242/24 # VIP
  }
  track_script {
    CloudCore_check
 }
}
- backup:
1
2
3
4
5
6
7
8
9
10
11
12
13
14
15
16
17
18
19
20
21
22
23
24
25
26
27
28
29
30
31
! Configuration File for keepalived

global_defs {
  router_id lb02
  vrrp_mcast_group4 224.0.0.19
}
# CloudCore
vrrp_script CloudCore_check {
  script "/etc/keepalived/check_cloudcore.sh" # the script for health check
  interval 2
  weight 2
  fall 2
  rise 2
}
vrrp_instance CloudCore {
  state BACKUP
  interface eth0 # based on your host
  virtual_router_id 167
  priority 99
  advert_int 1
  authentication {
    auth_type PASS
    auth_pass 1111
  }
  virtual_ipaddress {
    10.10.102.242/24 # VIP
  }
  track_script {
    CloudCore_check
 }
}
check_cloudcore.sh:
1
2
3
4
5
6
7
#!/usr/bin/env bash
http_code=`curl -k -o /dev/null -s -w %{http_code} https://127.0.0.1:10002/readyz`
if [ $http_code == 200 ]; then
    exit 0
else
    exit 1
fi
2.5.安装keadm
master节点安装keadm
1
2
3
4
5
6
7
8
9
10
11
# 1.下载安装文件
wget https://github.com/kubeedge/kubeedge/releases/download/v1.13.4/keadm-v1.13.4-linux-amd64.tar.gz

# 2.解压
tar -zxvf keadm-v1.13.4-linux-amd64.tar.gz

# 3.移动文件
mv keadm-v1.13.4-linux-amd64/keadm/keadm /usr/local/bin/

keadm
keadm version
二、cloudcore安装部署
1.安装K8S集群
安装准备:
- 安装k8s集群
- 安装metrics-server
软件版本:
- Kubernetes:v1.23.12
- KubeEdge:v1.13.4

2.Node节点添加标签
1
2
3
4
5
6
7
8
9
10
11
12
13
14
15
16
17
18
19
[root@k8s-master kubeedge]# kubectl get node
NAME         STATUS   ROLES                  AGE   VERSION
k8s-master   Ready    control-plane,master   16d   v1.23.12
k8s-node1    Ready    <none>                 16d   v1.23.12
k8s-node2    Ready    <none>                 16h   v1.23.12


#添加标签
# kubectl label nodes k8s-node1 kubeedge=cloudcore
# kubectl label nodes k8s-node2 kubeedge=cloudcore
:::
[root@k8s-master kubeedge]# kubectl label nodes k8s-node1 kubeedge=cloudcore
node/k8s-node1 labeled
[root@k8s-master kubeedge]# kubectl label nodes k8s-node2 kubeedge=cloudcore
node/k8s-node2 labeled


# 查看所有node 标签
# kubectl get nodes --show-labels

3.修改配置文件
1
2
3
4
5
6
7
8
[root@k8s-master ha]# mv 02-ha-configmap.yaml.example 02-ha-configmap.yaml
[root@k8s-master ha]# mv 03-ha-deployment.yaml.example 03-ha-deployment.yaml
[root@k8s-master ha]# ll
total 56
-rw-r--r-- 1 root root 41409 Jan  1 11:01 01-ha-prepare.yaml
-rw-r--r-- 1 root root  3002 Jan  1 11:01 02-ha-configmap.yaml
-rw-r--r-- 1 root root  2482 Jan  1 11:01 03-ha-deployment.yaml
-rw-r--r-- 1 root root  3824 Jan  1 11:01 README.md
03-ha-deployment.yaml
1
2
3
4
5
6
7
8
9
10
11
12
13
14
15
16
17
18
apiVersion: apps/v1
kind: Deployment
metadata:
  name: cloudcore
spec:
  template:
    spec:
      nodeSelector: # configure the nodeSelector here!
        kubeedge: cloudcore

......

      containers:
        - name: cloudcore
          image: kubeedge/cloudcore:v1.13.4
          imagePullPolicy: IfNotPresent
          securityContext:
            privileged: true
02-ha-configmap.yaml
1
2
3
4
modules:
  cloudHub:
    advertiseAddress:
    - 192.168.202.188  # VIP虚拟IP
4.创建资源
1
2
3
cd build/cloud/ha

for resource in $(ls *.yaml); do kubectl create -f $resource; done
1
2
3
4
5
6
7
8
9
10
11
12
13
14
15
16
17
18
19
20
21
22
[root@k8s-master ha]# pwd
/kubeedge/ha
[root@k8s-master ha]# ll
total 56
-rw-r--r-- 1 root root 41409 Jan  1 11:01 01-ha-prepare.yaml
-rw-r--r-- 1 root root  2990 Jan  1 11:26 02-ha-configmap.yaml
-rw-r--r-- 1 root root  2489 Jan  1 11:23 03-ha-deployment.yaml
-rw-r--r-- 1 root root  3824 Jan  1 11:01 README.md


[root@k8s-master ha]# for resource in $(ls *.yaml); do kubectl create -f $resource; done
namespace/kubeedge created
serviceaccount/cloudcore created
clusterrole.rbac.authorization.k8s.io/cloudcore created
clusterrolebinding.rbac.authorization.k8s.io/cloudcore created
customresourcedefinition.apiextensions.k8s.io/devices.devices.kubeedge.io created
customresourcedefinition.apiextensions.k8s.io/devicemodels.devices.kubeedge.io created
customresourcedefinition.apiextensions.k8s.io/clusterobjectsyncs.reliablesyncs.kubeedge.io created
customresourcedefinition.apiextensions.k8s.io/objectsyncs.reliablesyncs.kubeedge.io created
configmap/cloudcore created
deployment.apps/cloudcore created
1
2
3
4
5
6
7
8
9
10
[root@k8s-master ha]# kubectl get all -n kubeedge
NAME                             READY   STATUS    RESTARTS   AGE
pod/cloudcore-59d6489bdc-fd9c4   1/1     Running   0          95s
pod/cloudcore-59d6489bdc-j9qnv   1/1     Running   0          95s

NAME                        READY   UP-TO-DATE   AVAILABLE   AGE
deployment.apps/cloudcore   2/2     2            2           95s

NAME                                   DESIRED   CURRENT   READY   AGE
replicaset.apps/cloudcore-59d6489bdc   2         2         2       95s

5.安装keepalived
5.1.安装keepalived
1
2
3
4
5
6
# k8s-node1、k8s-node2分别安装
# vip: 192.168.202.188


yum install -y conntrack-tools libseccomp libtool-ltdl
yum install -y keepalived
5.2.配置keepalived
1
2
3
4
# 配置路径
/etc/keepalived/keepalived.conf

/etc/keepalived/check_cloudcore.sh
keepalived.conf:
- master:
1
2
3
4
5
6
7
8
9
10
11
12
13
14
15
16
17
18
19
20
21
22
23
24
25
26
27
28
29
30
31
! Configuration File for keepalived

global_defs {
  router_id node1
  vrrp_mcast_group4 224.0.0.19
}
# CloudCore
vrrp_script CloudCore_check {
  script "/etc/keepalived/check_cloudcore.sh" # the script for health check
  interval 2
  weight 2
  fall 2
  rise 2
}
vrrp_instance CloudCore {
  state MASTER
  interface ens33 # based on your host
  virtual_router_id 167
  priority 100
  advert_int 1
  authentication {
    auth_type PASS
    auth_pass 1111
  }
  virtual_ipaddress {
    192.168.202.188/24 # VIP
  }
  track_script {
    CloudCore_check
 }
}
- backup:
1
2
3
4
5
6
7
8
9
10
11
12
13
14
15
16
17
18
19
20
21
22
23
24
25
26
27
28
29
30
31
! Configuration File for keepalived

global_defs {
  router_id node2
  vrrp_mcast_group4 224.0.0.19
}
# CloudCore
vrrp_script CloudCore_check {
  script "/etc/keepalived/check_cloudcore.sh" # the script for health check
  interval 2
  weight 2
  fall 2
  rise 2
}
vrrp_instance CloudCore {
  state BACKUP
  interface ens33 # based on your host
  virtual_router_id 167
  priority 99
  advert_int 1
  authentication {
    auth_type PASS
    auth_pass 1111
  }
  virtual_ipaddress {
    192.168.202.188/24 # VIP
  }
  track_script {
    CloudCore_check
 }
}
check_cloudcore.sh:
1
2
3
4
5
6
7
#!/usr/bin/env bash
http_code=`curl -k -o /dev/null -s -w %{http_code} https://127.0.0.1:10002/readyz`
if [ $http_code == 200 ]; then
    exit 0
else
    exit 1
fi
5.3.运行
1
2
3
4
5
6
7
8
# 启动keepalived
$ systemctl start keepalived.service

# 设置开机启动
$ systemctl enable keepalived.service

# 查看启动状态
$ systemctl status keepalived.service
查看网卡信息
1
2
3
4
5
6
7
8
9
10
11
12
13
14
15
16
17
18
19
20
21
22
23
24
25
26
27
28
29
30
31
32
33
34
35
36
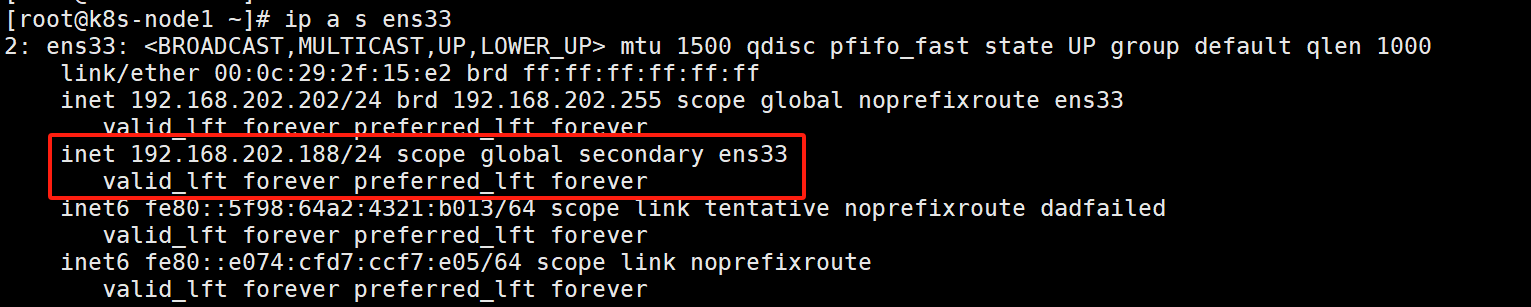
# ip a s ens33
[root@k8s-node1 ~]# ip a s ens33
2: ens33: <BROADCAST,MULTICAST,UP,LOWER_UP> mtu 1500 qdisc pfifo_fast state UP group default qlen 1000
link/ether 00:0c:29:2f:15:e2 brd ff:ff:ff:ff:ff:ff
inet 192.168.202.202/24 brd 192.168.202.255 scope global noprefixroute ens33
valid_lft forever preferred_lft forever
inet 192.168.202.188/24 scope global secondary ens33
valid_lft forever preferred_lft forever
inet6 fe80::5f98:64a2:4321:b013/64 scope link tentative noprefixroute dadfailed
valid_lft forever preferred_lft forever
inet6 fe80::e074:cfd7:ccf7:e05/64 scope link noprefixroute
valid_lft forever preferred_lft forever
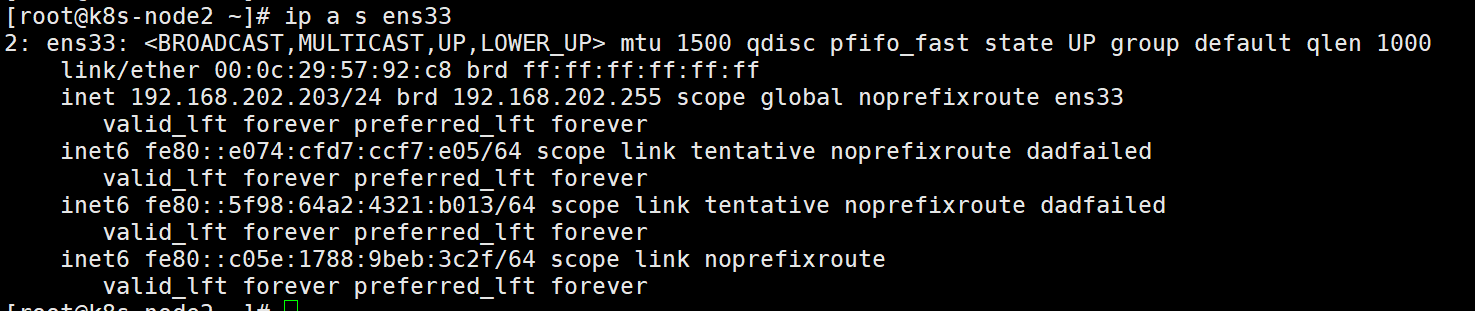
[root@k8s-node2 ~]# ip a s ens33
2: ens33: <BROADCAST,MULTICAST,UP,LOWER_UP> mtu 1500 qdisc pfifo_fast state UP group default qlen 1000
link/ether 00:0c:29:57:92:c8 brd ff:ff:ff:ff:ff:ff
inet 192.168.202.203/24 brd 192.168.202.255 scope global noprefixroute ens33
valid_lft forever preferred_lft forever
inet6 fe80::e074:cfd7:ccf7:e05/64 scope link tentative noprefixroute dadfailed
valid_lft forever preferred_lft forever
inet6 fe80::5f98:64a2:4321:b013/64 scope link tentative noprefixroute dadfailed
valid_lft forever preferred_lft forever
inet6 fe80::c05e:1788:9beb:3c2f/64 scope link noprefixroute
valid_lft forever preferred_lft forever
[root@k8s-master ha]# ping 192.168.202.188
PING 192.168.202.188 (192.168.202.188) 56(84) bytes of data.
64 bytes from 192.168.202.188: icmp_seq=1 ttl=64 time=0.591 ms
64 bytes from 192.168.202.188: icmp_seq=2 ttl=64 time=0.306 ms
64 bytes from 192.168.202.188: icmp_seq=3 ttl=64 time=0.200 ms
64 bytes from 192.168.202.188: icmp_seq=4 ttl=64 time=0.326 ms
64 bytes from 192.168.202.188: icmp_seq=5 ttl=64 time=0.238 ms
64 bytes from 192.168.202.188: icmp_seq=6 ttl=64 time=0.195 ms
6.安装keadm
master节点安装keadm
1
2
3
4
5
6
7
8
9
10
11
# 1.下载安装文件
wget https://github.com/kubeedge/kubeedge/releases/download/v1.13.4/keadm-v1.13.4-linux-amd64.tar.gz

# 2.解压
tar -zxvf keadm-v1.13.4-linux-amd64.tar.gz

# 3.移动文件
mv keadm-v1.13.4-linux-amd64/keadm/keadm /usr/local/bin/

keadm
keadm version
1
2
3
4
5
6
7
8
9
10
# 解压
[root@k8s-master kubeedge]# tar -xf keadm-v1.13.4-linux-amd64.tar.gz


# 移动文件
[root@k8s-master kubeedge]# mv keadm-v1.13.4-linux-amd64/keadm/keadm /usr/local/bin/


[root@k8s-master kubeedge]# keadm version
version: version.Info{Major:"1", Minor:"13", GitVersion:"v1.13.4", GitCommit:"043bd224ff34c44c10990e1ecbe50dd33f80b52b", GitTreeState:"clean", BuildDate:"2023-11-30T12:53:38Z", GoVersion:"go1.17.13", Compiler:"gc", Platform:"linux/amd64"}
7.打标签
1
2
3
4
5
6
7
8
# 因为边缘计算的硬件条件都不好,这里我们需要打上标签,让一些应用不扩展到edge节点上去


kubectl get daemonset -n kube-system |grep -v NAME |awk '{print $1}' | xargs -n 1 kubectl patch daemonset -n kube-system --type='json' -p='[{"op": "replace","path": "/spec/template/spec/affinity","value":{"nodeAffinity":{"requiredDuringSchedulingIgnoredDuringExecution":{"nodeSelectorTerms":[{"matchExpressions":[{"key":"node-role.kubernetes.io/edge","operator":"DoesNotExist"}]}]}}}}]'


# 暂时不用
kubectl get daemonset -n metallb-system |grep -v NAME |awk '{print $1}' | xargs -n 1 kubectl patch daemonset -n metallb-system --type='json' -p='[{"op": "replace","path": "/spec/template/spec/affinity","value":{"nodeAffinity":{"requiredDuringSchedulingIgnoredDuringExecution":{"nodeSelectorTerms":[{"matchExpressions":[{"key":"node-role.kubernetes.io/edge","operator":"DoesNotExist"}]}]}}}}]'
1
2
3
[root@k8s-master kubeedge]# kubectl get daemonset -n kube-system |grep -v NAME |awk '{print $1}' | xargs -n 1 kubectl patch daemonset -n kube-system --type='json' -p='[{"op": "replace","path": "/spec/template/spec/affinity","value":{"nodeAffinity":{"requiredDuringSchedulingIgnoredDuringExecution":{"nodeSelectorTerms":[{"matchExpressions":[{"key":"node-role.kubernetes.io/edge","operator":"DoesNotExist"}]}]}}}}]'
daemonset.apps/calico-node patched
daemonset.apps/kube-proxy patched
8.查看端口
1
2
3
4
5
6
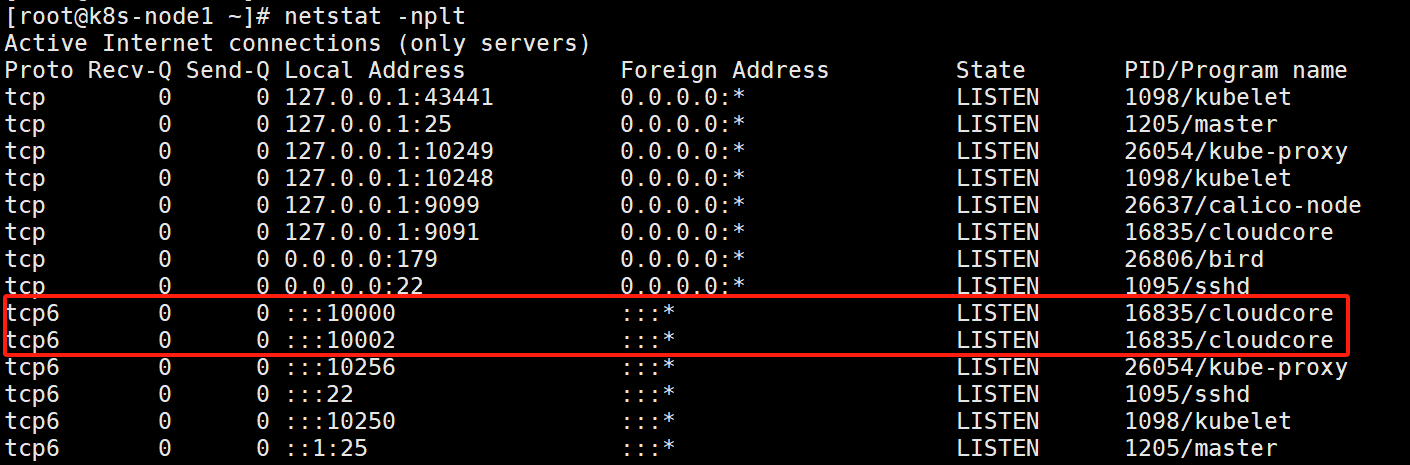
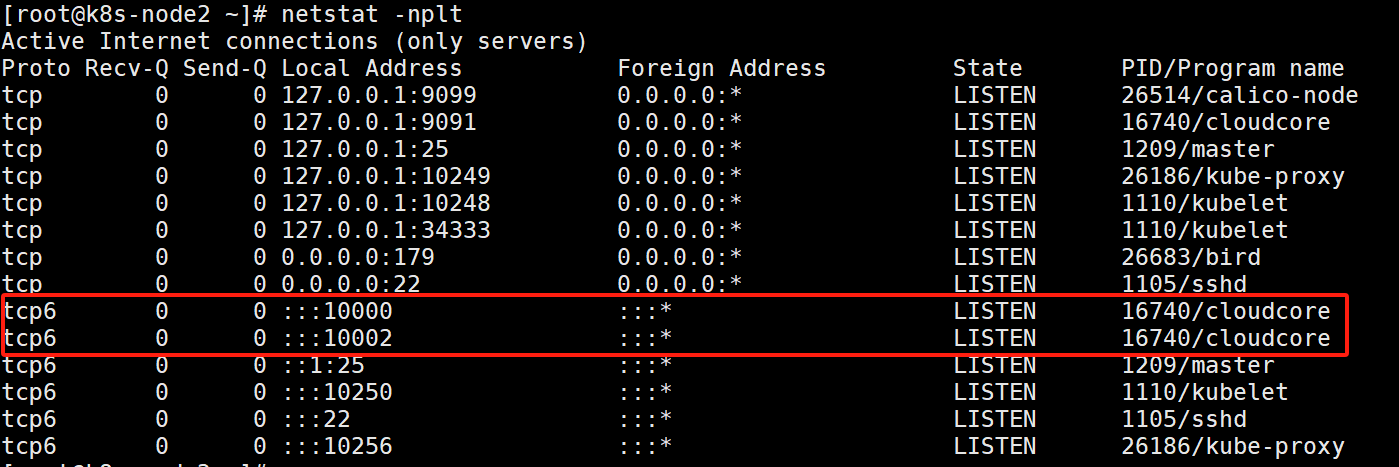
# 查看端口
netstat -nplt
[root@k8s-node1 ~]# netstat -nplt
[root@k8s-node2 ~]# netstat -nplt
三、edgecore安装部署
1. 安装准备
1
2
3
4
5
6
7
8
9
10
11
#克隆机器

cd /etc/sysconfig/network-scripts

vim ifcfg-ens33

#关闭防火墙
systemctl stop firewalld
systemctl disable firewalld

hostnamectl set-hostname edge-1
2.安装keadm
1
2
3
4
5
6
7
8
9
10
# 解压
[root@edge-1 kubeedge]# tar -xf keadm-v1.13.4-linux-amd64.tar.gz


# 移动文件
[root@edge-1 kubeedge]# mv keadm-v1.13.4-linux-amd64/keadm/keadm /usr/local/bin/


[root@edge-1 kubeedge]# keadm version
version: version.Info{Major:"1", Minor:"13", GitVersion:"v1.13.4", GitCommit:"043bd224ff34c44c10990e1ecbe50dd33f80b52b", GitTreeState:"clean", BuildDate:"2023-11-30T12:53:38Z", GoVersion:"go1.17.13", Compiler:"gc", Platform:"linux/amd64"}
3.安装Docker
安装版本19.03.*
1
2
3
4
5
6
7
$ wget https://mirrors.aliyun.com/docker-ce/linux/centos/docker-ce.repo -O /etc/yum.repos.d/docker-ce.repo

$ yum -y install docker-ce

$ systemctl enable docker && systemctl start docker

$ docker --version
- 添加阿里云加速镜像
1
2
3
4
5
6
7
8
# 添加阿里云加速镜像

cat > /etc/docker/daemon.json << EOF
{
   "registry-mirrors": ["https://gcctk8ld.mirror.aliyuncs.com"],
   "exec-opts": ["native.cgroupdriver=cgroupfs"]
}
EOF
- 重启docker
1
2
#重启docker
systemctl restart docker
4.加入Edge节点
1
2
3
4
# 在master节点上获取token

[root@k8s-master kubeedge]# keadm gettoken
58af829fff435f1363b8084b475f44c90d54f959af3f5837032c4ce6095939b3.eyJhbGciOiJIUzI1NiIsInR5cCI6IkpXVCJ9.eyJleHAiOjE3MDQ2ODA5NDJ9.0Xcx0Bxwdu44XSZ3YTSY1GTAJeEs74Dlk5pJGJmiVco
1
2
3
4
5
6
7
8
9
10
11
12
13
14
15
16
17
18
19
20
21
22
23
24
25
26
27
28
29
30
31
32
33
34
35
36
37
# 加入edge节点


[root@edge-1 kubeedge]# TOKEN=58af829fff435f1363b8084b475f44c90d54f959af3f5837032c4ce6095939b3.eyJhbGciOiJIUzI1NiIsInR5cCI6IkpXVCJ9.eyJleHAiOjE3MDQ2ODA5NDJ9.0Xcx0Bxwdu44XSZ3YTSY1GTAJeEs74Dlk5pJGJmiVco
[root@edge-1 kubeedge]# echo $TOKEN
58af829fff435f1363b8084b475f44c90d54f959af3f5837032c4ce6095939b3.eyJhbGciOiJIUzI1NiIsInR5cCI6IkpXVCJ9.eyJleHAiOjE3MDQ2ODA5NDJ9.0Xcx0Bxwdu44XSZ3YTSY1GTAJeEs74Dlk5pJGJmiVco


[root@edge-1 kubeedge]# SERVER=192.168.202.188:10000
[root@edge-1 kubeedge]# echo $SERVER
192.168.202.188:10000


# keadm join --token=$TOKEN --cloudcore-ipport=$SERVER --kubeedge-version=v1.13.4 --runtimetype=docker --edgenode-name=edge-1


[root@edge-1 kubeedge]# keadm join --token=$TOKEN --cloudcore-ipport=$SERVER --kubeedge-version=v1.13.4 --runtimetype=docker --edgenode-name=edge-1
I0101 20:55:17.939482    1913 command.go:845] 1. Check KubeEdge edgecore process status
I0101 20:55:17.963380    1913 command.go:845] 2. Check if the management directory is clean
I0101 20:55:17.963440    1913 join.go:107] 3. Create the necessary directories
I0101 20:55:17.965121    1913 join.go:184] 4. Pull Images
Pulling kubeedge/installation-package:v1.13.4 ...
Successfully pulled kubeedge/installation-package:v1.13.4
Pulling eclipse-mosquitto:1.6.15 ...
Successfully pulled eclipse-mosquitto:1.6.15
Pulling kubeedge/pause:3.6 ...
Successfully pulled kubeedge/pause:3.6
I0101 20:57:07.670983    1913 join.go:184] 5. Copy resources from the image to the management directory
I0101 20:57:08.165878    1913 join.go:184] 6. Start the default mqtt service
I0101 20:57:08.166401    1913 join.go:107] 7. Generate systemd service file
I0101 20:57:08.166932    1913 join.go:107] 8. Generate EdgeCore default configuration
I0101 20:57:08.166948    1913 join.go:270] The configuration does not exist or the parsing fails, and the default configuration is generated
W0101 20:57:08.251000    1913 validation.go:71] NodeIP is empty , use default ip which can connect to cloud.
I0101 20:57:08.251963    1913 join.go:107] 9. Run EdgeCore daemon
I0101 20:57:08.378383    1913 join.go:435]
I0101 20:57:08.378395    1913 join.go:436] KubeEdge edgecore is running, For logs visit: journalctl -u edgecore.service -xe
1
2
3
4
5
6
7
8
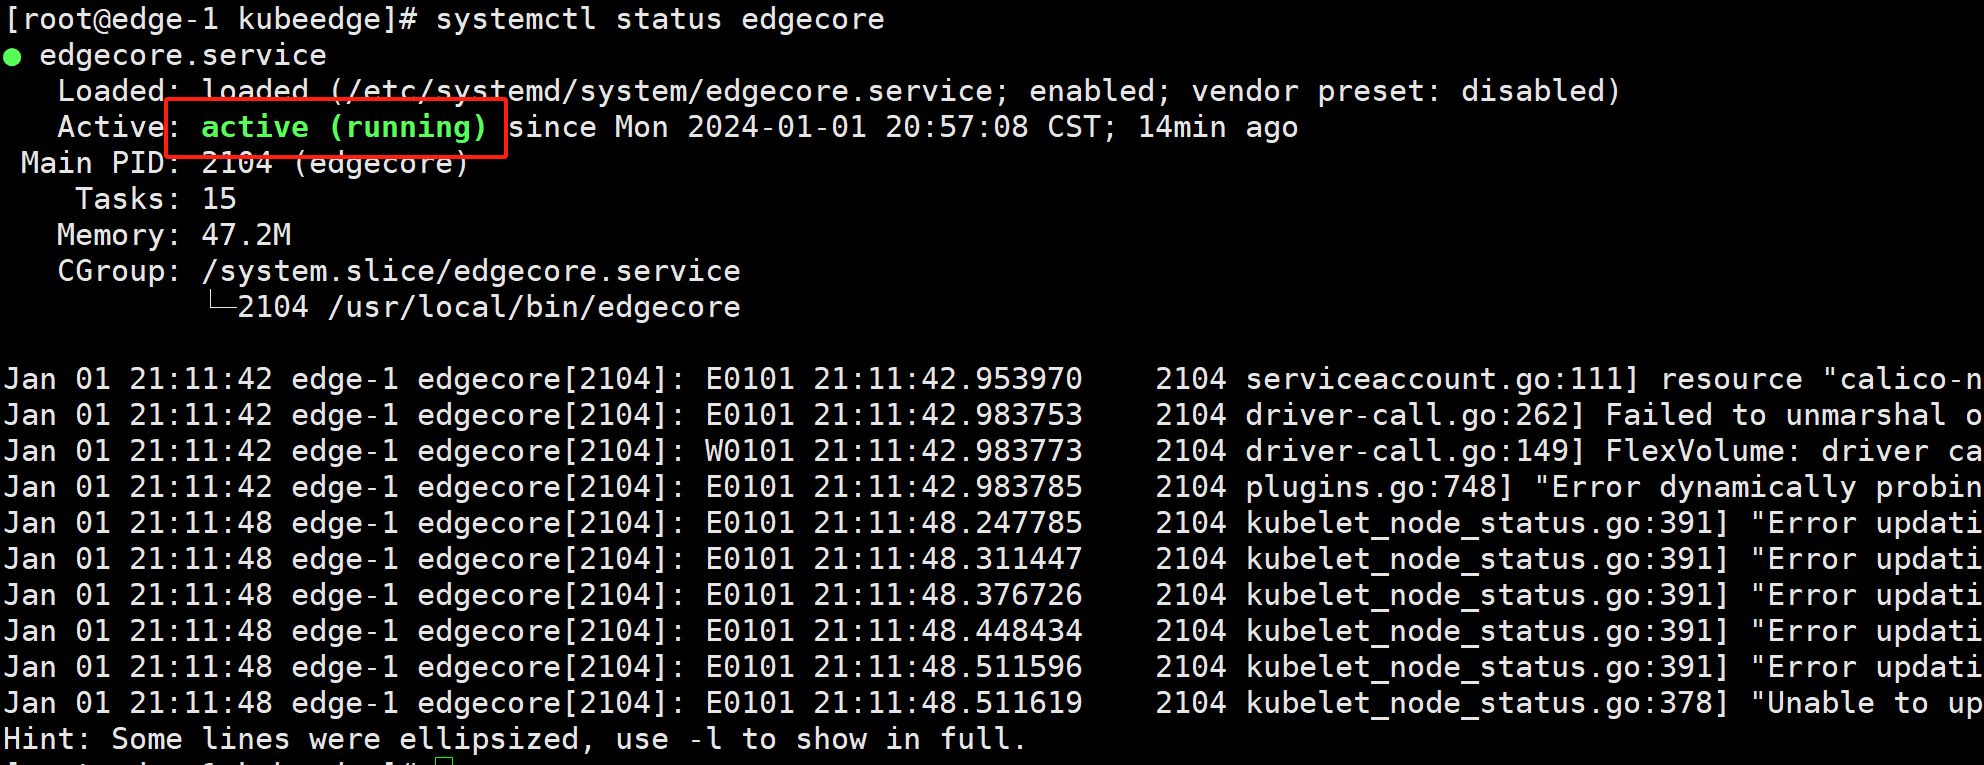
9
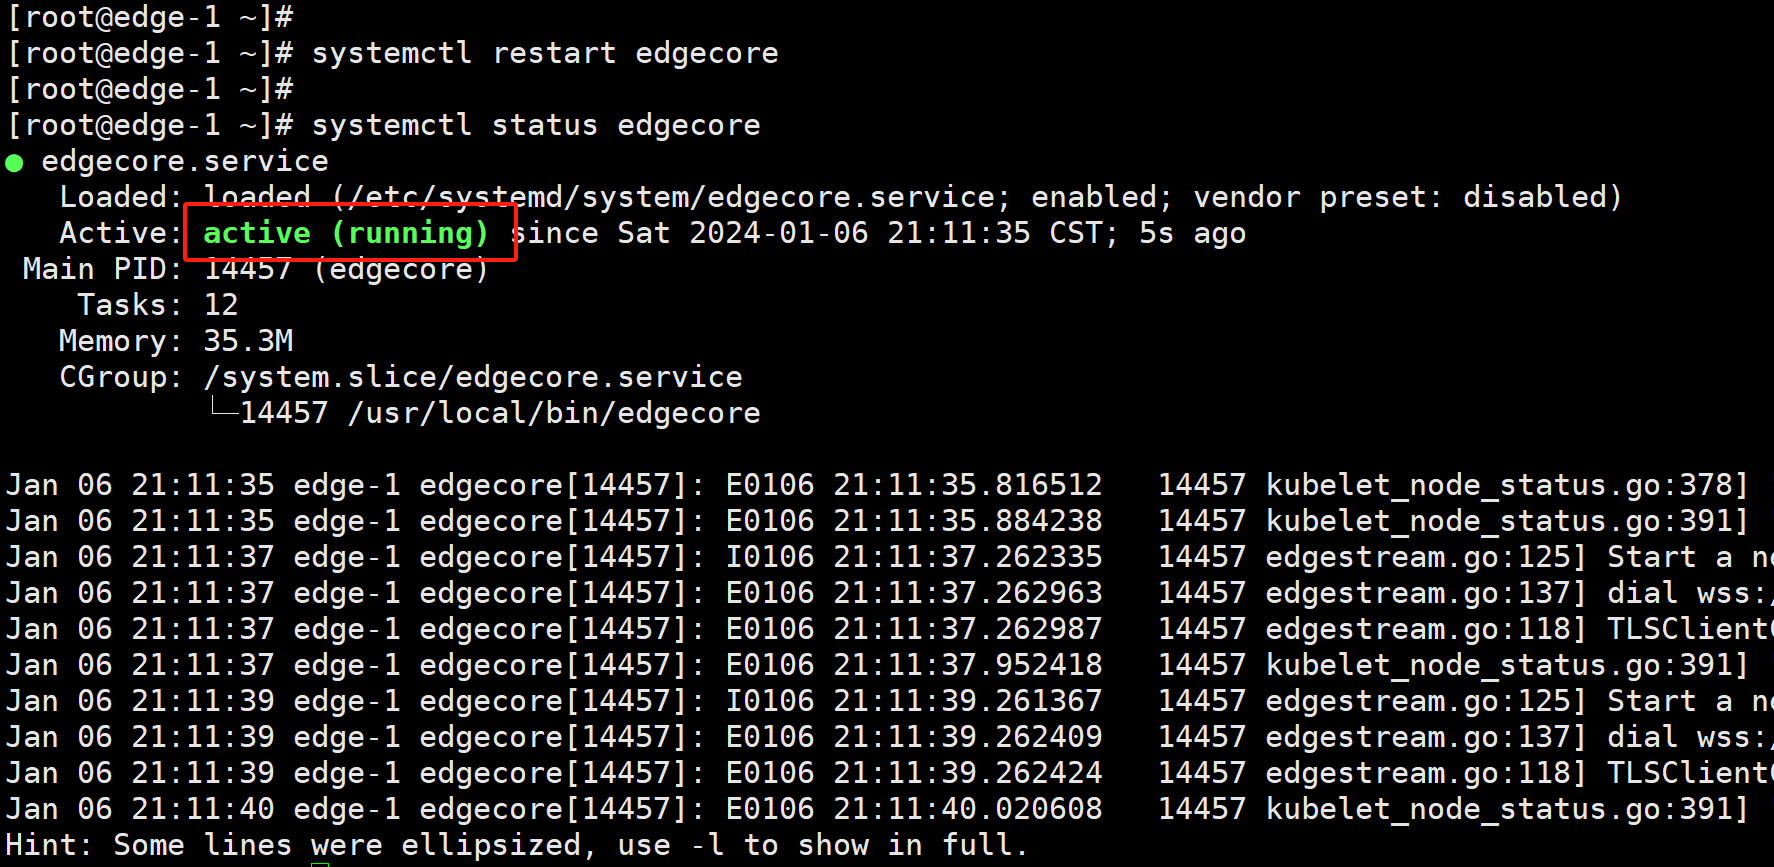
[root@edge-1 kubeedge]# systemctl status edgecore
[root@k8s-master ha]# kubectl get node
NAME STATUS ROLES AGE VERSION
edge-1 Ready agent,edge 15m v1.23.17-kubeedge-v1.13.4
k8s-master Ready control-plane,master 16d v1.23.12
k8s-node1 Ready <none> 16d v1.23.12
k8s-node2 Ready <none> 19h v1.23.12

四、常规操作
1.高可用测试
1
2
3
4
5
6
7
8
9
10
11
12
13
# keepalived主节点 k8s-node1

[root@k8s-node1 ~]# ip a s ens33
2: ens33: <BROADCAST,MULTICAST,UP,LOWER_UP> mtu 1500 qdisc pfifo_fast state UP group default qlen 1000
    link/ether 00:0c:29:2f:15:e2 brd ff:ff:ff:ff:ff:ff
    inet 192.168.202.202/24 brd 192.168.202.255 scope global noprefixroute ens33
       valid_lft forever preferred_lft forever
    inet 192.168.202.188/24 scope global secondary ens33
       valid_lft forever preferred_lft forever
    inet6 fe80::5f98:64a2:4321:b013/64 scope link tentative noprefixroute dadfailed
       valid_lft forever preferred_lft forever
    inet6 fe80::e074:cfd7:ccf7:e05/64 scope link noprefixroute
       valid_lft forever preferred_lft forever
1
2
3
4
5
6
7
8
9
10
11
12
13
14
15
16
17
18
19
20
21
22
23
[root@k8s-master kubeedge]# kubectl get node
NAME         STATUS   ROLES                  AGE   VERSION
edge-2       Ready    agent,edge             28m   v1.23.17-kubeedge-v1.13.4
k8s-master   Ready    control-plane,master   17d   v1.23.12
k8s-node1    Ready    <none>                 17d   v1.23.12
k8s-node2    Ready    <none>                 22h   v1.23.12


# 关闭 k8s-node1
# keepalived主节点切换到 k8s-node2
[root@k8s-node2 ~]# ip a s ens33
2: ens33: <BROADCAST,MULTICAST,UP,LOWER_UP> mtu 1500 qdisc pfifo_fast state UP group default qlen 1000
    link/ether 00:0c:29:57:92:c8 brd ff:ff:ff:ff:ff:ff
    inet 192.168.202.203/24 brd 192.168.202.255 scope global noprefixroute ens33
       valid_lft forever preferred_lft forever
    inet 192.168.202.188/24 scope global secondary ens33
       valid_lft forever preferred_lft forever
    inet6 fe80::e074:cfd7:ccf7:e05/64 scope link tentative noprefixroute dadfailed
       valid_lft forever preferred_lft forever
    inet6 fe80::5f98:64a2:4321:b013/64 scope link tentative noprefixroute dadfailed
       valid_lft forever preferred_lft forever
    inet6 fe80::c05e:1788:9beb:3c2f/64 scope link noprefixroute
       valid_lft forever preferred_lft forever
2.部署Nginx
1
2
3
4
5
6
7
8
9
10
11
12
13
14
15
16
17
18
19
20
21
22
23
[root@k8s-master kubeedge]# vim nginx-nodename.yaml

apiVersion: apps/v1
kind: Deployment
metadata:
  name: nginx-nodename
spec:
  replicas: 1
  selector:
    matchLabels:
      app: nginx
  template:
    metadata:
      labels:
        app: nginx
    spec:
      nodeName: edge-1    #调度到指定机器
      hostNetwork: true   # 使用主机网络
      containers:
      - name: nginx
        image: nginx
        ports:
        - containerPort: 80
1
2
3
4
5
6
7
[root@k8s-master kubeedge]# kubectl apply -f nginx-nodename.yaml
deployment.apps/nginx-nodename created


[root@k8s-master kubeedge]# kubectl get pod -owide
NAME                              READY   STATUS    RESTARTS   AGE   IP                NODE     NOMINATED NODE   READINESS GATES
nginx-nodename-846f55748c-x8xqx   1/1     Running   0          63s   192.168.202.211   edge-1   <none>           <none>
1
2
3
4
5
6
7
8
9
10
11
12
13
14
15
16
17
18
19
20
21
22
23
24
[root@k8s-master kubeedge]# curl 192.168.202.211
<!DOCTYPE html>
<html>
<head>
<title>Welcome to nginx!</title>
<style>
html { color-scheme: light dark; }
body { width: 35em; margin: 0 auto;
font-family: Tahoma, Verdana, Arial, sans-serif; }
</style>
</head>
<body>
<h1>Welcome to nginx!</h1>
<p>If you see this page, the nginx web server is successfully installed and
working. Further configuration is required.</p>

<p>For online documentation and support please refer to
<a href="http://nginx.org/">nginx.org</a>.<br/>
Commercial support is available at
<a href="http://nginx.com/">nginx.com</a>.</p>

<p><em>Thank you for using nginx.</em></p>
</body>
</html>
3.查看日志
3.1.修改EdgeCore配置
修改edge-1配置
1
2
3
4
5
6
7
8
9
10
11
12
13
14
15
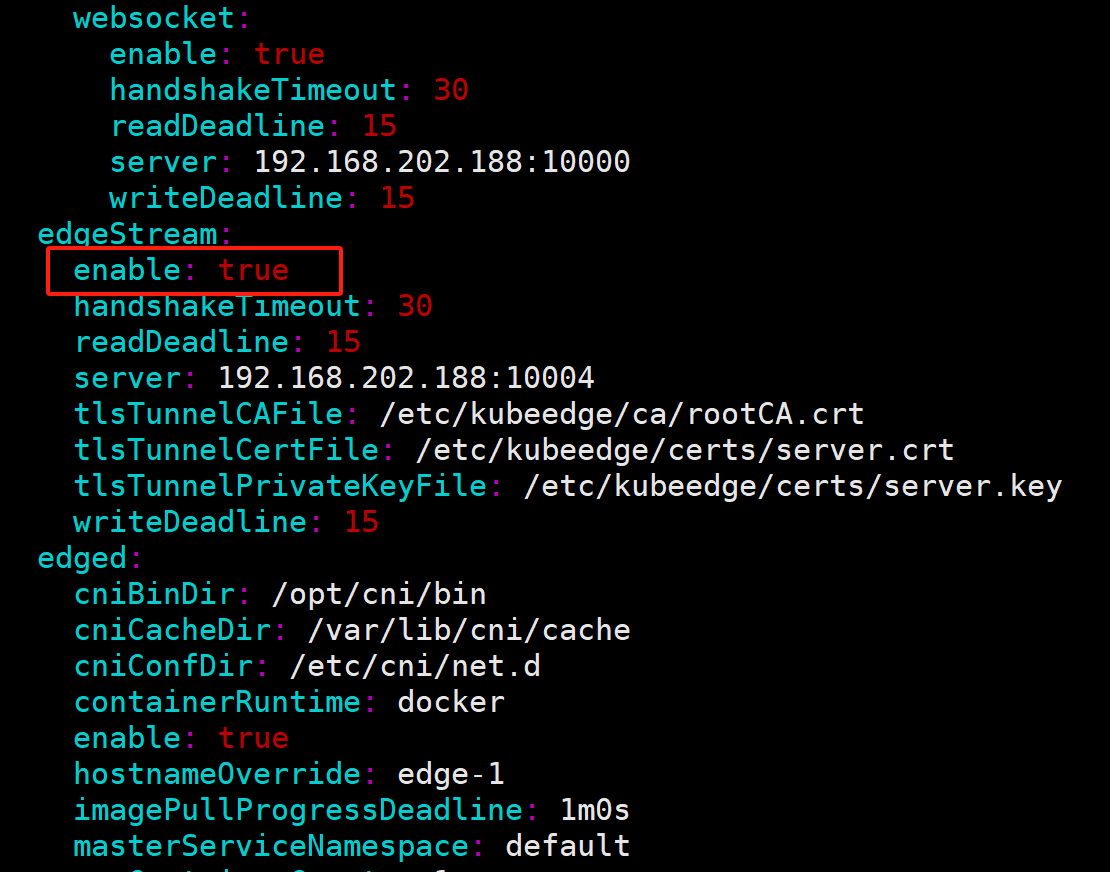
[root@edge-1 ~]# vim /etc/kubeedge/config/edgecore.yaml
......
edgeStream:
enable: true
handshakeTimeout: 30
readDeadline: 15
server: 192.168.202.188:10004
tlsTunnelCAFile: /etc/kubeedge/ca/rootCA.crt
tlsTunnelCertFile: /etc/kubeedge/certs/server.crt
tlsTunnelPrivateKeyFile: /etc/kubeedge/certs/server.key
writeDeadline: 15
......
1
2
3
# systemctl restart edgecore

# systemctl status edgecore
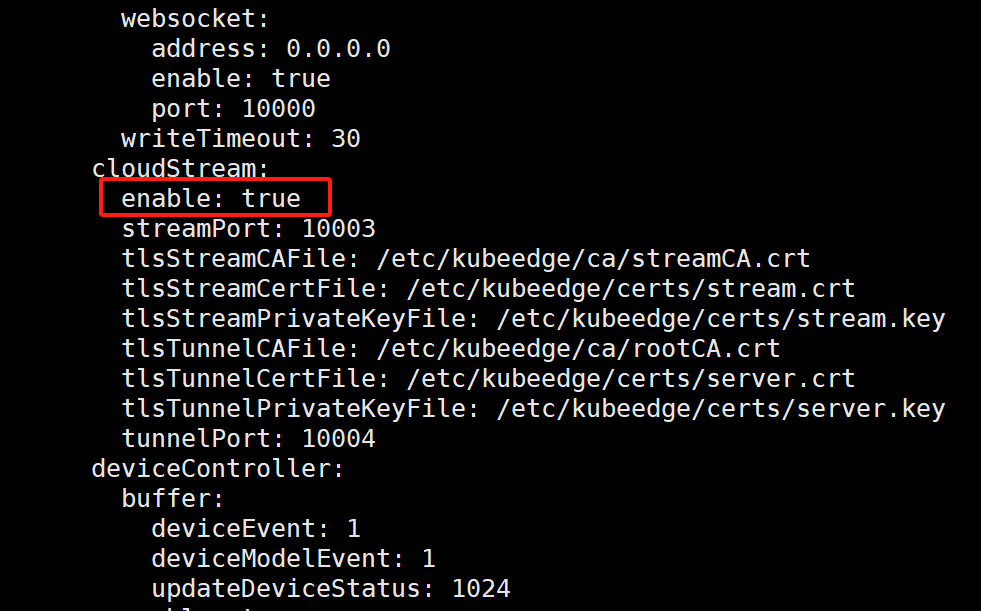
3.2.修改CloudCore配置
1
2
3
4
5
6
7
8
9
10
11
12
13
14
15
16
17
18
19
# kubectl edit configmap cloudcore -n kubeedge


[root@k8s-master kubeedge]# kubectl edit configmap cloudcore -n kubeedge

...
      cloudStream:

        enable: true

        streamPort: 10003
        tlsStreamCAFile: /etc/kubeedge/ca/streamCA.crt
        tlsStreamCertFile: /etc/kubeedge/certs/stream.crt
        tlsStreamPrivateKeyFile: /etc/kubeedge/certs/stream.key
        tlsTunnelCAFile: /etc/kubeedge/ca/rootCA.crt
        tlsTunnelCertFile: /etc/kubeedge/certs/server.crt
        tlsTunnelPrivateKeyFile: /etc/kubeedge/certs/server.key
        tunnelPort: 10004
...
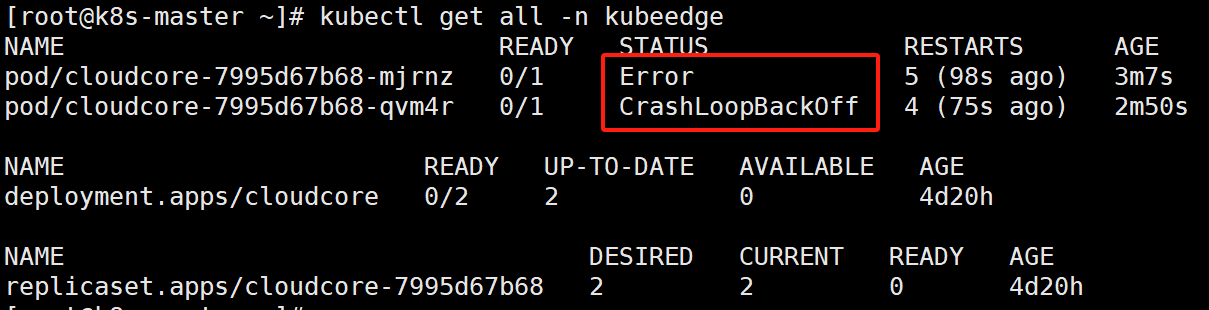
备注:
1
2
3
4
5
6
7
8
9
10
11
12
13
# 容器无法正常运行

[root@k8s-master ~]# kubectl get all -n kubeedge
NAME                             READY   STATUS             RESTARTS      AGE
pod/cloudcore-7995d67b68-mjrnz   0/1     Error              5 (98s ago)   3m7s
pod/cloudcore-7995d67b68-qvm4r   0/1     CrashLoopBackOff   4 (75s ago)   2m50s

NAME                        READY   UP-TO-DATE   AVAILABLE   AGE
deployment.apps/cloudcore   0/2     2            0           4d20h

NAME                                   DESIRED   CURRENT   READY   AGE
replicaset.apps/cloudcore-7995d67b68   2         2         0       4d20h
3.3.设置iptables
1
2
3
4
5
6
7
8
9
10
11
12
13
14
15
16
17
18
# kubectl get cm tunnelport -nkubeedge -oyaml

[root@k8s-master ~]# kubectl get cm tunnelport -nkubeedge -oyaml
apiVersion: v1
kind: ConfigMap
metadata:
  annotations:
    tunnelportrecord.kubeedge.io: '{"ipTunnelPort":{"192.168.202.202":10351,"192.168.202.203":10352},"port":{"10351":true,"10352":true}}'
  creationTimestamp: "2024-01-01T13:41:33Z"
  name: tunnelport
  namespace: kubeedge
  resourceVersion: "13957"
  uid: 7a86a9e9-4121-47f4-a8b6-96439016036d


"192.168.202.202":10351
"192.168.202.203":10352

1
2
3
4
5
6
7
8
9
10
11
12
13
14
15
16
17
18
19
# 系统重新启动,需要重新设置iptables
iptables -t nat -A OUTPUT -p tcp --dport $YOUR-TUNNEL-PORT -j DNAT --to $YOUR-CLOUDCORE-IP:10003

iptables -t nat -A OUTPUT -p tcp --dport 10351 -j DNAT --to 192.168.202.202:10003
iptables -t nat -A OUTPUT -p tcp --dport 10352 -j DNAT --to 192.168.202.203:10003

iptables -t nat -A OUTPUT -p tcp --dport 10351 -j DNAT --to 192.168.202.188:10003
iptables -t nat -A OUTPUT -p tcp --dport 10352 -j DNAT --to 192.168.202.188:10003


# 清除 iptables
[root@k8s-master kubeedge]# iptables -F && iptables -t nat -F && iptables -t mangle -F && iptables -X


# 设置iptables
[root@k8s-master ~]# iptables -t nat -A OUTPUT -p tcp --dport 10351 -j DNAT --to 192.168.202.202:10003

[root@k8s-master ~]# iptables -t nat -A OUTPUT -p tcp --dport 10352 -j DNAT --to 192.168.202.203:10003
1
2
3
4
5
# kubectl logs nginx-deployment-6fb75cb954-2cw59
# kubectl exec -it nginx-deployment-6fb75cb954-2cw59 -- /bin/bash
# kubectl exec -it -n test nginx-deployment-6748d54874-62jmm -- /bin/bash
# kubectl exec -it nginx-deployment-5585cb6658-z2qdb bash
# kubectl exec -it nginx-deployment-5585cb6658-z2qdb /bin/bash
3.4.查看日志失败
1
2
3
# 查看日志失败

修改CloudCore配置后,CloudCore的Pod无法正常运行
