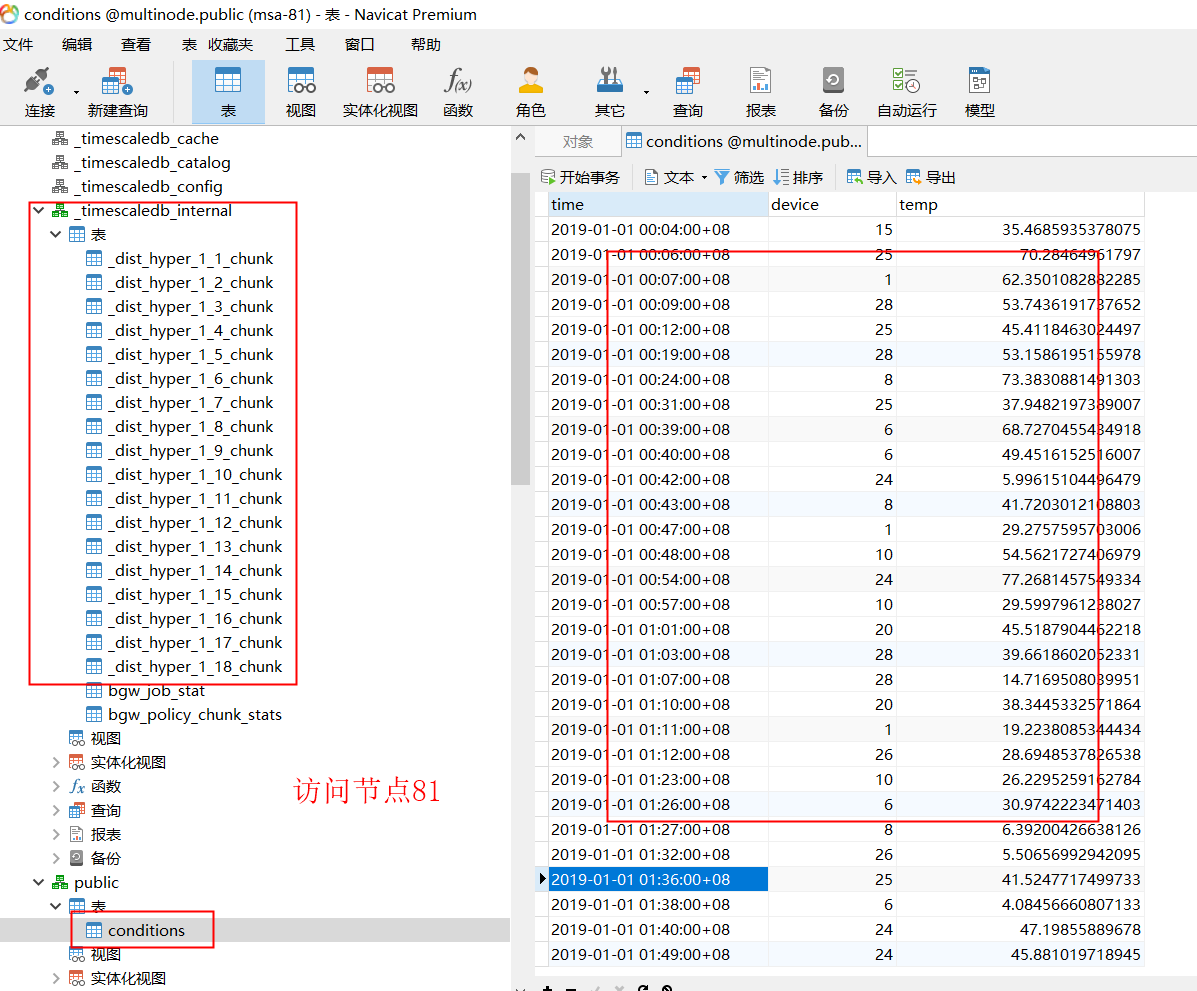
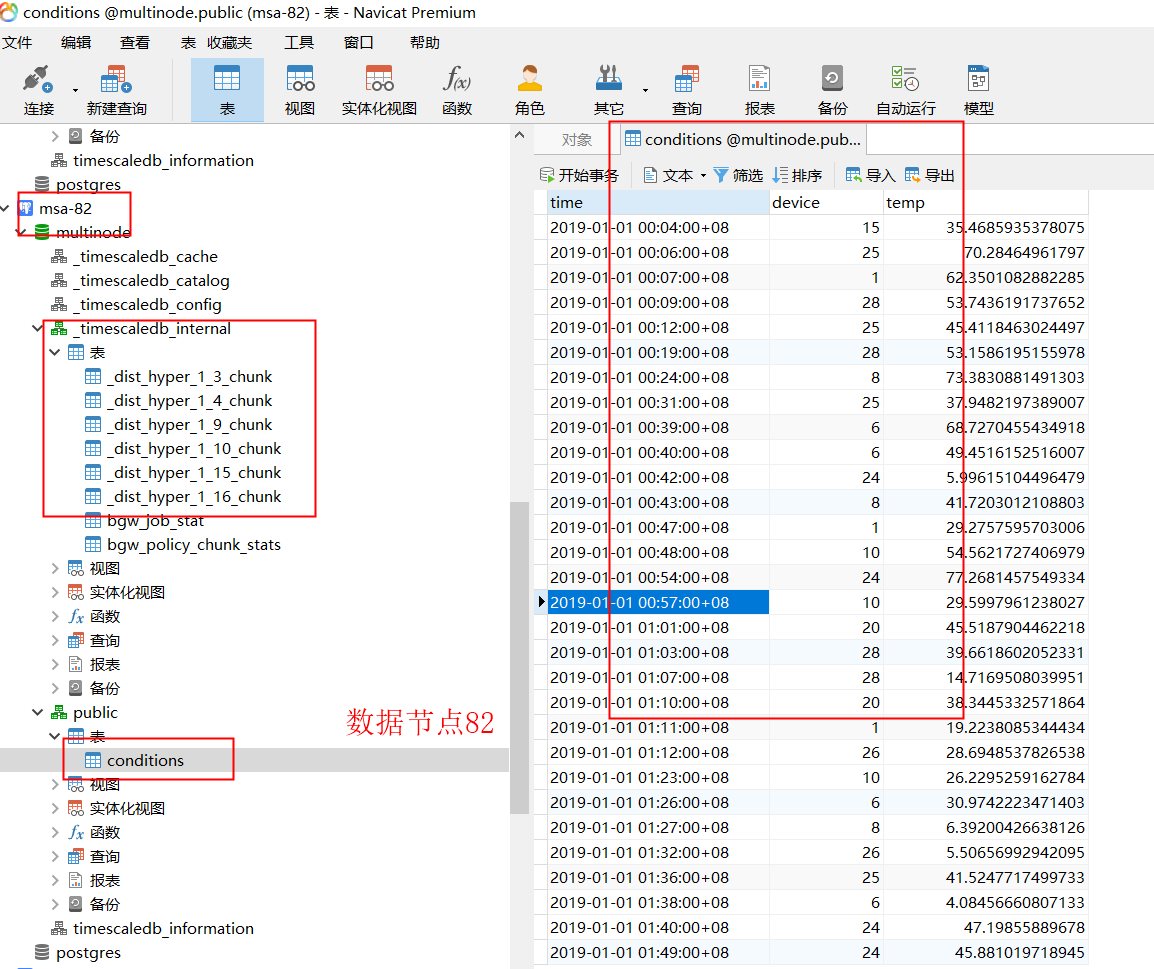
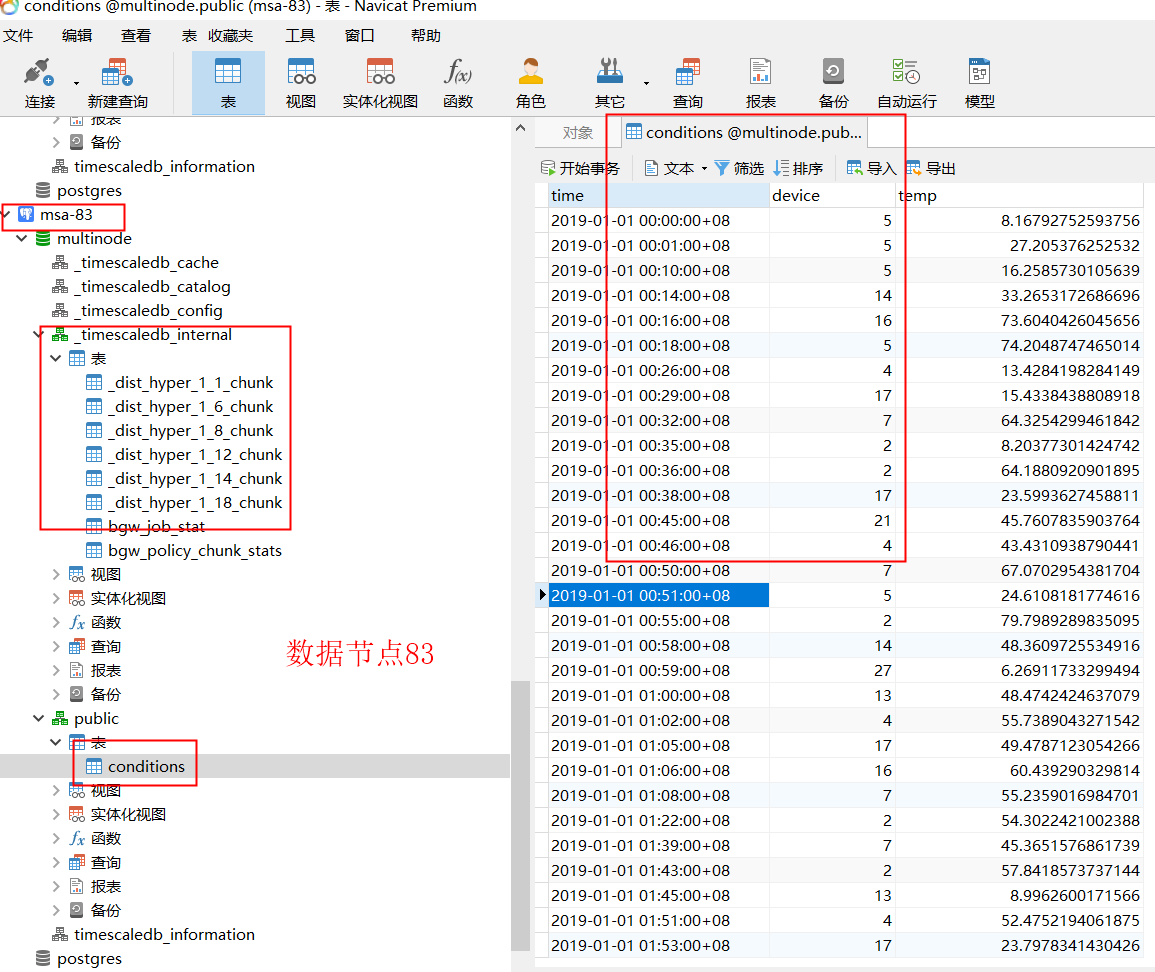
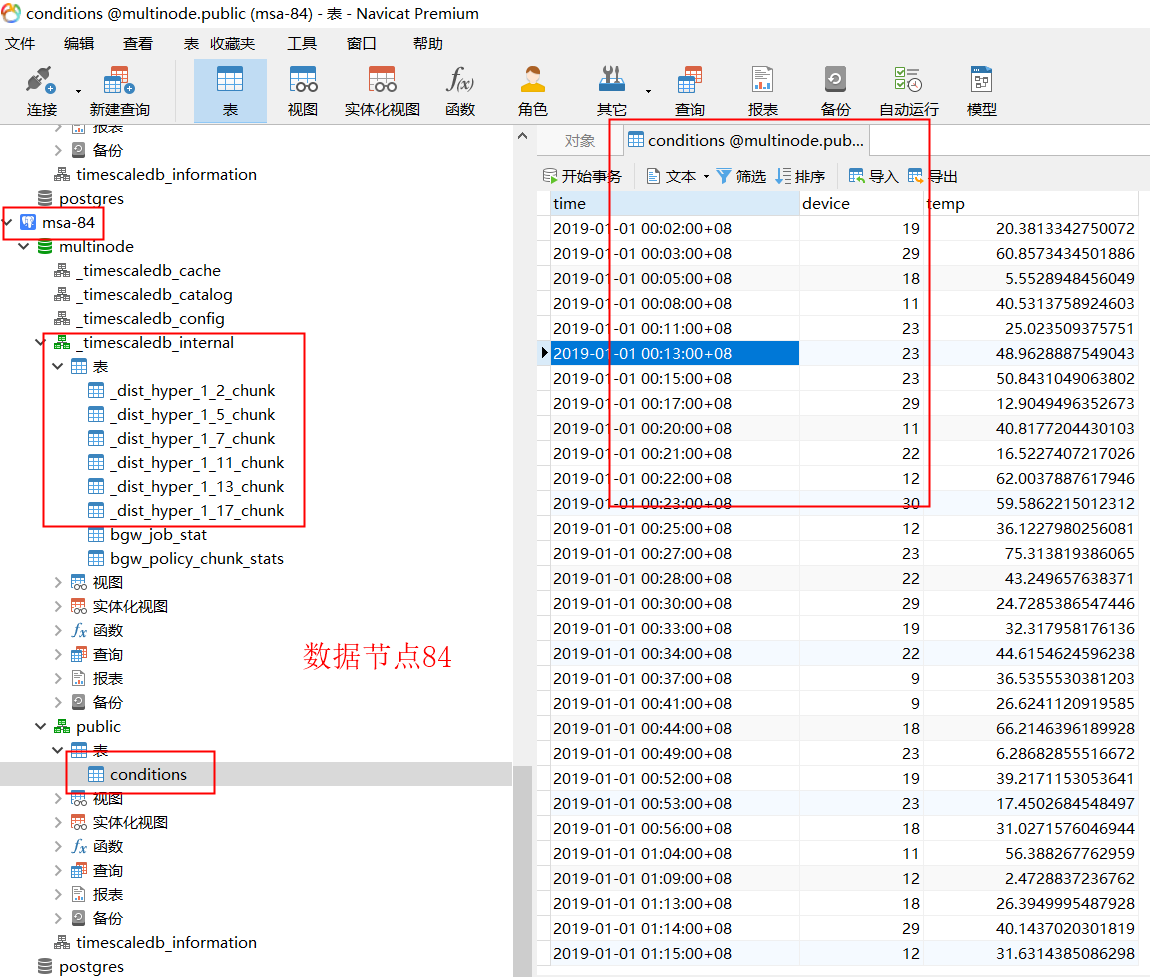
1.安装环境
1
2
3
4
5
6
7
访问节点:172.51.216.81
数据节点:172.51.216.82
数据节点:172.51.216.83
数据节点:172.51.216.84

操作系统:centos7.5
数据库:  PostgreSQL11、Timescaledb-v2.0
2.安装TimescaleDB
2.1. 安装PostgreSQL
1
2
3
4
5
6
7
8
9
10
11
12
13
14
15
16
17
18
19
20
21
22
23
24
1.安装EPEL仓库(安装数据库有些包依赖EPEL仓库)
# yum install epel-release

2.安装postgresql
# yum install -y https://download.postgresql.org/pub/repos/yum/reporpms/EL-7-x86_64/pgdg-redhat-repo-latest.noarch.rpm

# yum install -y postgresql11-server

3.关闭防火墙
firewall-cmd --state                         #查看默认防火墙状态(关闭后显示notrunning,开启后显示running)
systemctl stop firewalld.service      #停止firewall
systemctl start firewalld.service      #开启防火墙
systemctl disable firewalld.service  #禁止firewall开机启动
systemctl enable firewalld.service   #开启firewall开机启动

4.主库初始化
# /usr/pgsql-11/bin/postgresql-11-setup initdb

启动服务
# systemctl start postgresql-11

服务自启动
# systemctl enable postgresql-11
# systemctl status postgresql-11
2.2.安装Timescaledb插件
- 安装TimeScaleDB
1
2
3
4
5
6
7
8
9
10
11
12
13
14
15
cat > /etc/yum.repos.d/timescale_timescaledb.repo <<EOL
[timescale_timescaledb]
name=timescale_timescaledb
baseurl=https://packagecloud.io/timescale/timescaledb/el/$(rpm -E %{rhel})/\$basearch
repo_gpgcheck=1
gpgcheck=0
enabled=1
gpgkey=https://packagecloud.io/timescale/timescaledb/gpgkey
sslverify=1
sslcacert=/etc/pki/tls/certs/ca-bundle.crt
metadata_expire=300
EOL

# yum update -y
# yum install -y timescaledb-2-postgresql-11
- 配置Timescaledb
1
2
3
4
5
6
7
8
9
10
11
12
13
14
15
16
17
18
19
20
21
22
23
24
25
26
27
28
29
30
31
32
33
34
# 运行以下命令以启动配置向导:


# timescaledb-tune --pg-config=/usr/pgsql-11/bin/pg_config --quiet --yes

[root@iZ2ze72jggg737pb9vp1g6Z ~]# timescaledb-tune --pg-config=/usr/pgsql-11/bin/pg_config --quiet --yes
Using postgresql.conf at this path:
/var/lib/pgsql/11/data/postgresql.conf

Writing backup to:
/tmp/timescaledb_tune.backup202103291649

Recommendations based on 7.64 GB of available memory and 2 CPUs for PostgreSQL 11
shared_preload_libraries = 'timescaledb'# (change requires restart)
shared_buffers = 1955MB
effective_cache_size = 5866MB
maintenance_work_mem = 1001211kB
work_mem = 10012kB
timescaledb.max_background_workers = 8
max_worker_processes = 13
max_parallel_workers_per_gather = 1
max_parallel_workers = 2
wal_buffers = 16MB
min_wal_size = 512MB
default_statistics_target = 500
random_page_cost = 1.1
checkpoint_completion_target = 0.9
max_locks_per_transaction = 64
autovacuum_max_workers = 10
autovacuum_naptime = 10
effective_io_concurrency = 200
timescaledb.last_tuned = '2021-03-29T16:49:56+08:00'
timescaledb.last_tuned_version = '0.11.0'
Saving changes to: /var/lib/pgsql/11/data/postgresql.conf
2.3.配置TimescaleDB
- 配置数据库
1
2
3
4
5
6
7
8
切换用户,设置数据库密码
# su - postgres

$ psql
# ALTER USER postgres with encrypted password 'postgres';

postgres=# \q
#-bash-4.2$ exit
- 修改数据库配置文件
1
2
3
4
5
6
7
8
9
10
11
12
13
14
15
1.修改连接权限
# vim /var/lib/pgsql/11/data/pg_hba.conf

# 客户端访问
host    all             all             all                     md5

2.修改数据库配置:
# vim /var/lib/pgsql/11/data/postgresql.conf

listen_addresses = '*'            # what IP address(es) to listen on;
port = 5432                       # (change requires restart)

# 多节点必须配置:
max_prepared_transactions = 150
enable_partitionwise_aggregate = on
- 重启服务
1
2
# systemctl restart postgresql-11
# systemctl status postgresql-11
3.集群配置
1
2
3
4
5
6
7
8
9
10
11
12
13
14
15
16
17
18
19
20
1.设置访问节点

# su - postgres
-bash-4.2$ vim /var/lib/pgsql/.pgpass

*:*:*:testuser:testuser
*:*:*:postgres:postgres

-bash-4.2$ chmod 600  /var/lib/pgsql/.pgpass

2.设置数据节点(三个数据节点)
在数据节点上编辑身份验证配置文件pg_hba.conf

# TYPE  DATABASE        USER            ADDRESS                 METHOD
host    all             all             172.51.216.81/32        trust
host    all             all             all                     md5

重启主库服务
# systemctl restart postgresql-11
# systemctl status postgresql-11
4.创建数据库
- 创建数据库(访问节点)
1
2
3
4
5
6
7
8
9
10
11
12
13
14
15
16
17
1.创建数据库
CREATE DATABASE multinode;
\c multinode
CREATE EXTENSION timescaledb;

2.添加数据节点
在服务器(访问节点:172.51.216.81)
SELECT add_data_node('dn2', host => '172.51.216.82');
SELECT add_data_node('dn3', host => '172.51.216.83');
SELECT add_data_node('dn4', host => '172.51.216.84');

3.创建新角色(访问节点创建)
CREATE ROLE testuser WITH LOGIN PASSWORD 'testuser';
CALL distributed_exec($$ CREATE ROLE testuser WITH LOGIN PASSWORD 'testuser' $$);

授予该用户访问Postgres的外部服务器对象的权限:
GRANT USAGE ON FOREIGN SERVER dn2, dn3, dn4 to testuser;
- 创建分布式超表
1
2
3
4
5
SET ROLE testuser;

CREATE TABLE conditions (time timestamptz NOT NULL, device integer, temp float);

SELECT create_distributed_hypertable('conditions', 'time', 'device');
5.测试
1
2
3
4
5
6
7
# 插入数据
INSERT INTO conditions
SELECT time, (random()*30)::int, random()*80
FROM generate_series('2019-01-01 00:00:00'::timestamptz, '2019-02-01 00:00:00', '1 min') AS time;

# 查询
SELECT * FROM conditions;


