一、概述
1.GitLab 简介
GitLab 是由 GitLabInc.开发,使用 MIT 许可证的基于网络的 Git 仓库管理工具,且具有wiki 和 issue 跟踪功能。使用 Git 作为代码管理工具,并在此基础上搭建起来的 web 服务。
GitLab 由乌克兰程序员 DmitriyZaporozhets 和 ValerySizov 开发,它使用 Ruby 语言写成。后来,一些部分用 Go 语言重写。截止 2018 年 5 月,该公司约有 290 名团队成员,以及 2000 多名开源贡献者。 GitLab 被 IBM, Sony, JülichResearchCenter, NASA, Alibaba,Invincea, O’ReillyMedia, Leibniz-Rechenzentrum(LRZ), CERN, SpaceX 等组织使用。
官网: https://about.gitlab.com/
GitLab 是一个用于仓库管理系统的开源项目,使用Git作为代码管理工具,并在此基础上搭建起来的web服务。
GitLab和GitHub一样属于第三方基于Git开发的作品,免费且开源(基于MIT协议),与Github类似,可以注册用户,任意提交你的代码,添加SSHKey等等。不同的是,GitLab是可以部署到自己的服务器上,数据库等一切信息都掌握在自己手上,适合团队内部协作开发,你总不可能把团队内部的智慧总放在别人的服务器上吧?简单来说可把GitLab看作个人版的GitHub。
2.GitLab 官网地址
1
2
3
4
5
# 官网地址

https://about.gitlab.com/
https://about.gitlab.com/install/
https://about.gitlab.com/install/#centos-7
二、基础
1.Gitlab服务管理
1
2
3
4
5
6
7
[root@qfedu.com ~]# gitlab-ctl start                        # 启动所有 gitlab 组件;
[root@qfedu.com ~]# gitlab-ctl stop                         # 停止所有 gitlab 组件;
[root@qfedu.com ~]# gitlab-ctl restart                      # 重启所有 gitlab 组件;
[root@qfedu.com ~]# gitlab-ctl status                       # 查看服务状态;
[root@qfedu.com ~]# gitlab-ctl reconfigure                  # 初始化服务;
[root@qfedu.com ~]# vim /etc/gitlab/gitlab.rb               # 修改默认的配置文件;
[root@qfedu.com ~]# gitlab-ctl tail                         # 查看日志;
2.配置GitLab
2.1.去掉自动注册功能
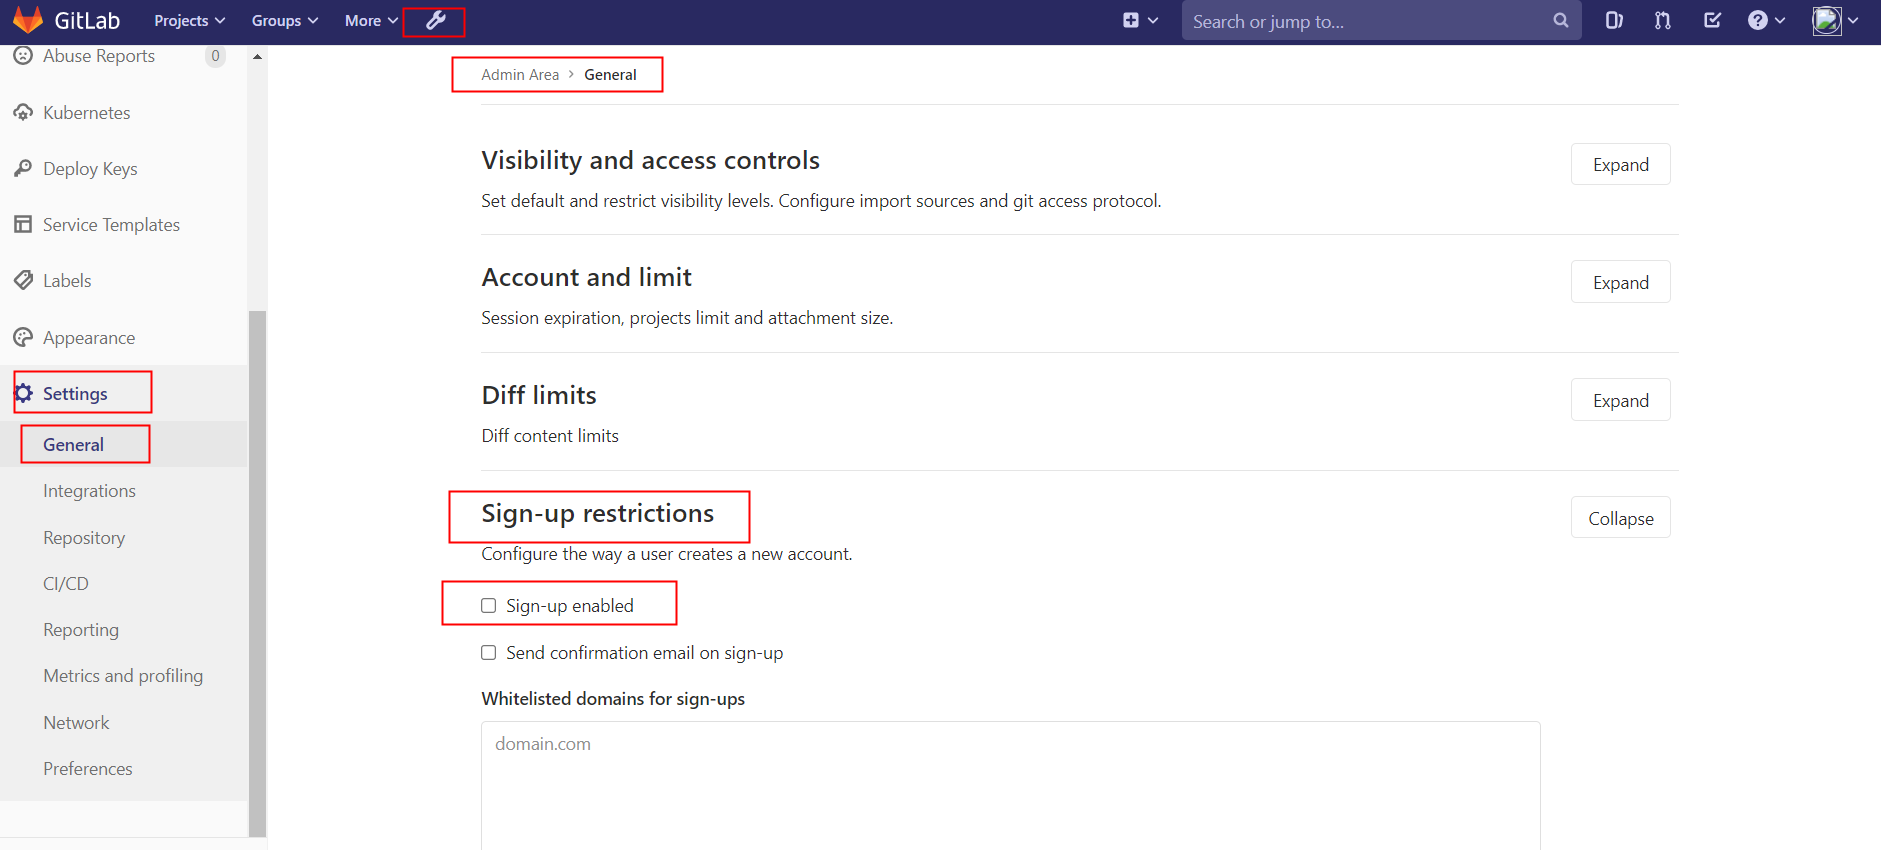
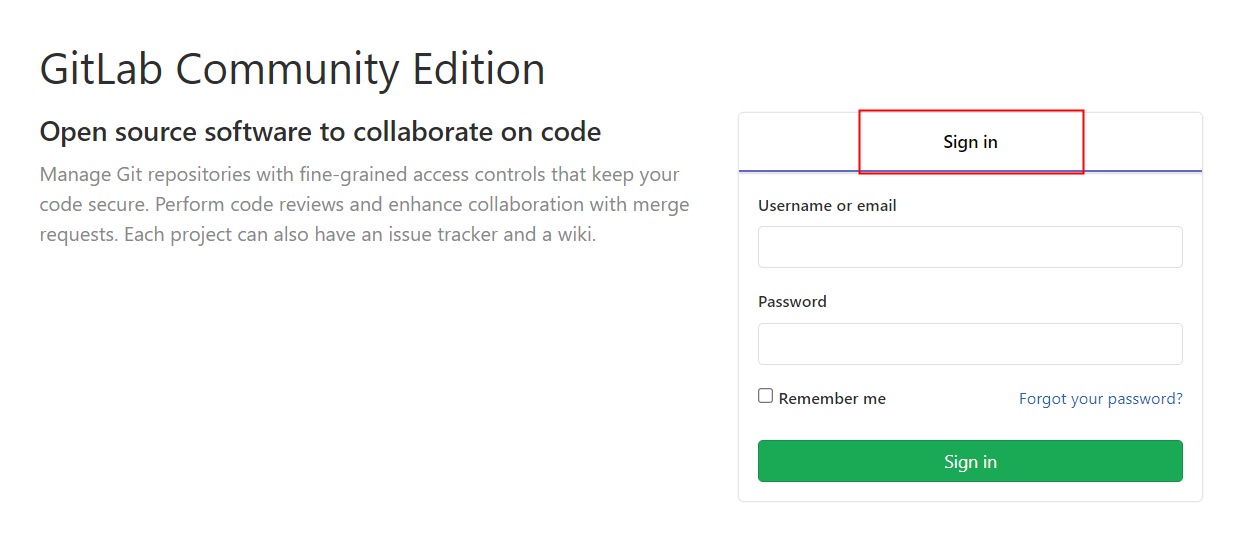
admin are -> settings -> Sign-up Restrictions 去掉钩钩,然后拉到最下面保存,重新登录
3.Gitlab 备份与恢复
3.1.查看系统版本和软件版本
1
2
3
4
5
[root@qfedu.com gitlab]# cat /etc/redhat-release
CentOS Linux release 7.3.1611 (Core)

[root@qfedu.com gitlab]# cat /opt/gitlab/embedded/service/gitlab-rails/VERSION
8.15.4
3.2数据备份
1.查看备份相关的配置项
1
2
3
[root@qfedu.com ~]# vim /etc/gitlab/gitlab.rb
gitlab_rails['manage_backup_path'] = true
gitlab_rails['backup_path'] = "/data/gitlab/backups"
该项定义了默认备份出文件的路径,可以通过修改该配置,并执行 gitlab-ctl reconfigure 或者 gitlab-ctl restart 重启服务生效。
2.执行备份命令进行备份
1
[root@qfedu.com ~]# /opt/gitlab/bin/gitlab-rake gitlab:backup:create
3.添加到 crontab 中定时执行
1
2
[root@qfedu.com ~]# crontab -e
0 2 * * * bash /opt/gitlab/bin/gitlab-rake gitlab:backup:create
可以到/data/gitlab/backups找到备份包,解压查看,会发现备份的还是比较全面的,数据库、repositories、build、upload等分类还是比较清晰的。
4.设置备份保留时长
防止每天执行备份,有目录被爆满的风险,打开/etc/gitlab/gitlab.rb配置文件,找到如下配置:
1
2
[root@qfedu.com ~]# vim /etc/gitlab/gitlab.rb
gitlab_rails['backup_keep_time'] = 604800
设置备份保留7天(7360024=604800),秒为单位,如果想增大或减小,可以直接在该处配置,并通过gitlab-ctl restart 重启服务生效。
备份完成,会在备份目录中生成一个当天日期的tar包。
3.3.数据恢复
1.安装部署 gitlab server
具体步骤参见上面:gitlab server 搭建过程
2.恢复 gitlab
1、查看备份相关的配置项
1
2
[root@qfedu.com ~]# vim /etc/gitlab/gitlab.rb
gitlab_rails['backup_path'] = "/data/gitlab/backups"
修改该配置,定义了默认备份出文件的路径,并执行 gitlab-ctl reconfigure 或者 gitlab-ctl restart 重启服务生效。
2、恢复前需要先停掉数据连接服务
1
2
[root@qfedu.com ~]# gitlab-ctl stop unicorn
[root@qfedu.com ~]# gitlab-ctl stop sidekiq
- 如果是台新搭建的主机,不需要操作,理论上不停这两个服务也可以。停这两个服务是为了保证数据一致性。
3、同步备份文件到新服务器
将老服务器/data/gitlab/backups目录下的备份文件拷贝到新服务器上的/data/gitlab/backups
1
[root@qfedu.com gitlab]# rsync -avz 1530773117_2019_03_05_gitlab_backup.tar 192.168.95.135:/data/gitlab/backups/
- 注意权限:600权限是无权恢复的。 实验环境可改成了777,生产环境建议修改属主属组
1
2
3
4
5
6
[root@qfedu.com backups]# pwd
/data/gitlab/backups
[root@qfedu.com backups]# chown -R git.git 1530773117_2019_03_05_gitlab_backup.tar
[root@qfedu.com backups]# ll
total 17328900
-rwxrwxrwx 1 git git 17744793600 Jul  5 14:47 1530773117_2018_07_05_gitlab_backup.tar
4、执行命令进行恢复
后面再输入两次 yes 就完成恢复了。
1
2
[root@qfedu.com ~]# gitlab-rake gitlab:backup:restore BACKUP=1530773117_2018_07_05_gitlab_backup.tar
注意:backups 目录下保留一个备份文件可直接执行
5、恢复完成启动服务
恢复完成后,启动刚刚的两个服务,或者重启所有服务,再打开浏览器进行访问,发现数据和之前的一致:
1
2
3
4
[root@qfedu.com ~]# gitlab-ctl start unicorn
[root@qfedu.com ~]# gitlab-ctl start sidekiq
或
[root@qfedu.com ~]# gitlab-ctl restart
注意:通过备份文件恢复gitlab必须保证两台主机的gitlab版本一致,否则会提示版本不匹配
4.Gitlab 发送邮件
开启邮件服务
1
2
[root@qfedu.com ~]# systemctl start  postfix
[root@qfedu.com ~]# systemctl enable postfix
4.1.Gitlab 添加smtp邮件功能
1
2
3
4
5
6
7
8
9
10
11
12
13
14
15
16
17
18
19
20
21
22
23
24
25
26
27
28
29
30
31
32
33
34
35
36
37
38
39
40
41
42
43
44
45
46
47
48
49
50
51
[git@qfedu.com ~]# vim /etc/gitlab/gitlab.rb
postfix 并非必须的;根据具体情况配置,以 SMTP 的为例配置邮件服务器来实现通知;参考配置如下:
### Email Settings
gitlab_rails['gitlab_email_enabled'] = true
gitlab_rails['gitlab_email_from'] = '276267003@qq.com'
gitlab_rails['gitlab_email_display_name'] = 'gitlab'
gitlab_rails['gitlab_email_reply_to'] = '276267003@qq.com'
gitlab_rails['gitlab_email_subject_suffix'] = '[gitlab]'
gitlab_rails['smtp_enable'] = true
gitlab_rails['smtp_address'] = "smtp.qq.com"
gitlab_rails['smtp_port'] = 465
gitlab_rails['smtp_user_name'] = "276267003@qq.com"
gitlab_rails['smtp_password'] = "kktohrvdryglbjjh" #这是我的qq邮箱授权码
gitlab_rails['smtp_domain'] = "smtp.qq.com"
gitlab_rails['smtp_authentication'] = "login"
gitlab_rails['smtp_enable_starttls_auto'] = true
gitlab_rails['smtp_tls'] = true

#修改配置后需要初始化配置,先关掉服务再重新初始化
[git@qfedu.com ~]# gitlab-ctl stop
ok: down: gitaly: 0s, normally up
ok: down: gitlab-monitor: 1s, normally up
ok: down: gitlab-workhorse: 0s, normally up
ok: down: logrotate: 1s, normally up
ok: down: nginx: 0s, normally up
ok: down: node-exporter: 1s, normally up
ok: down: postgres-exporter: 0s, normally up
ok: down: postgresql: 0s, normally up
ok: down: prometheus: 0s, normally up
ok: down: redis: 0s, normally up
ok: down: redis-exporter: 1s, normally up
ok: down: sidekiq: 0s, normally up
ok: down: unicorn: 1s, normally up

[git@qfedu.com ~]# gitlab-ctl reconfigure
......

[git@qfedu.com ~]# gitlab-ctl start
ok: run: gitaly: (pid 37603) 0s
ok: run: gitlab-monitor: (pid 37613) 0s
ok: run: gitlab-workhorse: (pid 37625) 0s
ok: run: logrotate: (pid 37631) 0s
ok: run: nginx: (pid 37639) 1s
ok: run: node-exporter: (pid 37644) 0s
ok: run: postgres-exporter: (pid 37648) 1s
ok: run: postgresql: (pid 37652) 0s
ok: run: prometheus: (pid 37660) 1s
ok: run: redis: (pid 37668) 0s
ok: run: redis-exporter: (pid 37746) 0s
ok: run: sidekiq: (pid 37750) 1s
ok: run: unicorn: (pid 37757) 0s
4.2.Gitlab 发送邮件测试
1
2
3
4
5
6
7
8
9
10
11
12
13
14
15
16
17
18
19
20
21
22
23
24
25
26
27
28
29
30
31
[git@qfedu.com ~]# gitlab-rails console
[root@wing ~]# gitlab-rails console
---------------------------------------------------------------------
 GitLab:       12.10.1 (e658772bd63) FOSS
 GitLab Shell: 12.2.0
 PostgreSQL:   11.7
---------------------------------------------------------------------
Loading production environment (Rails 6.0.2)
irb(main):003:0>
irb(main):004:0> Notify.test_email('276267003@qq.com', 'Message Subject', 'Message Body').deliver_now  //输入测试命令,回车

Notify#test_email: processed outbound mail in 5.2ms
Delivered mail 5eafceaa250a_1d063fb777add9a08601a@wing.mail (1430.1ms)
Date: Mon, 04 May 2020 16:13:30 +0800
From: gitlab <276267003@qq.com>
Reply-To: gitlab <276267003@qq.com>
To: 276267003@qq.com
Message-ID: <5eafceaa250a_1d063fb777add9a08601a@wing.mail>
Subject: Message Subject
Mime-Version: 1.0
Content-Type: text/html;
 charset=UTF-8
Content-Transfer-Encoding: 7bit
Auto-Submitted: auto-generated
X-Auto-Response-Suppress: All

<!DOCTYPE html PUBLIC "-//W3C//DTD HTML 4.0 Transitional//EN" "http://www.w3.org/TR/REC-html40/loose.dtd">
<html><body><p>Message Body</p></body></html>

=> #<Mail::Message:70056859616080, Multipart: false, Headers: <Date: Mon, 04 May 2020 16:13:30 +0800>, <From: gitlab <276267003@qq.com>>, <Reply-To: gitlab <276267003@qq.com>>, <To: 276267003@qq.com>, <Message-ID: <5eafceaa250a_1d063fb777add9a08601a@wing.mail>>, <Subject: Message Subject>, <Mime-Version: 1.0>, <Content-Type: text/html; charset=UTF-8>, <Content-Transfer-Encoding: 7bit>, <Auto-Submitted: auto-generated>, <X-Auto-Response-Suppress: All>>
irb(main):005:0>
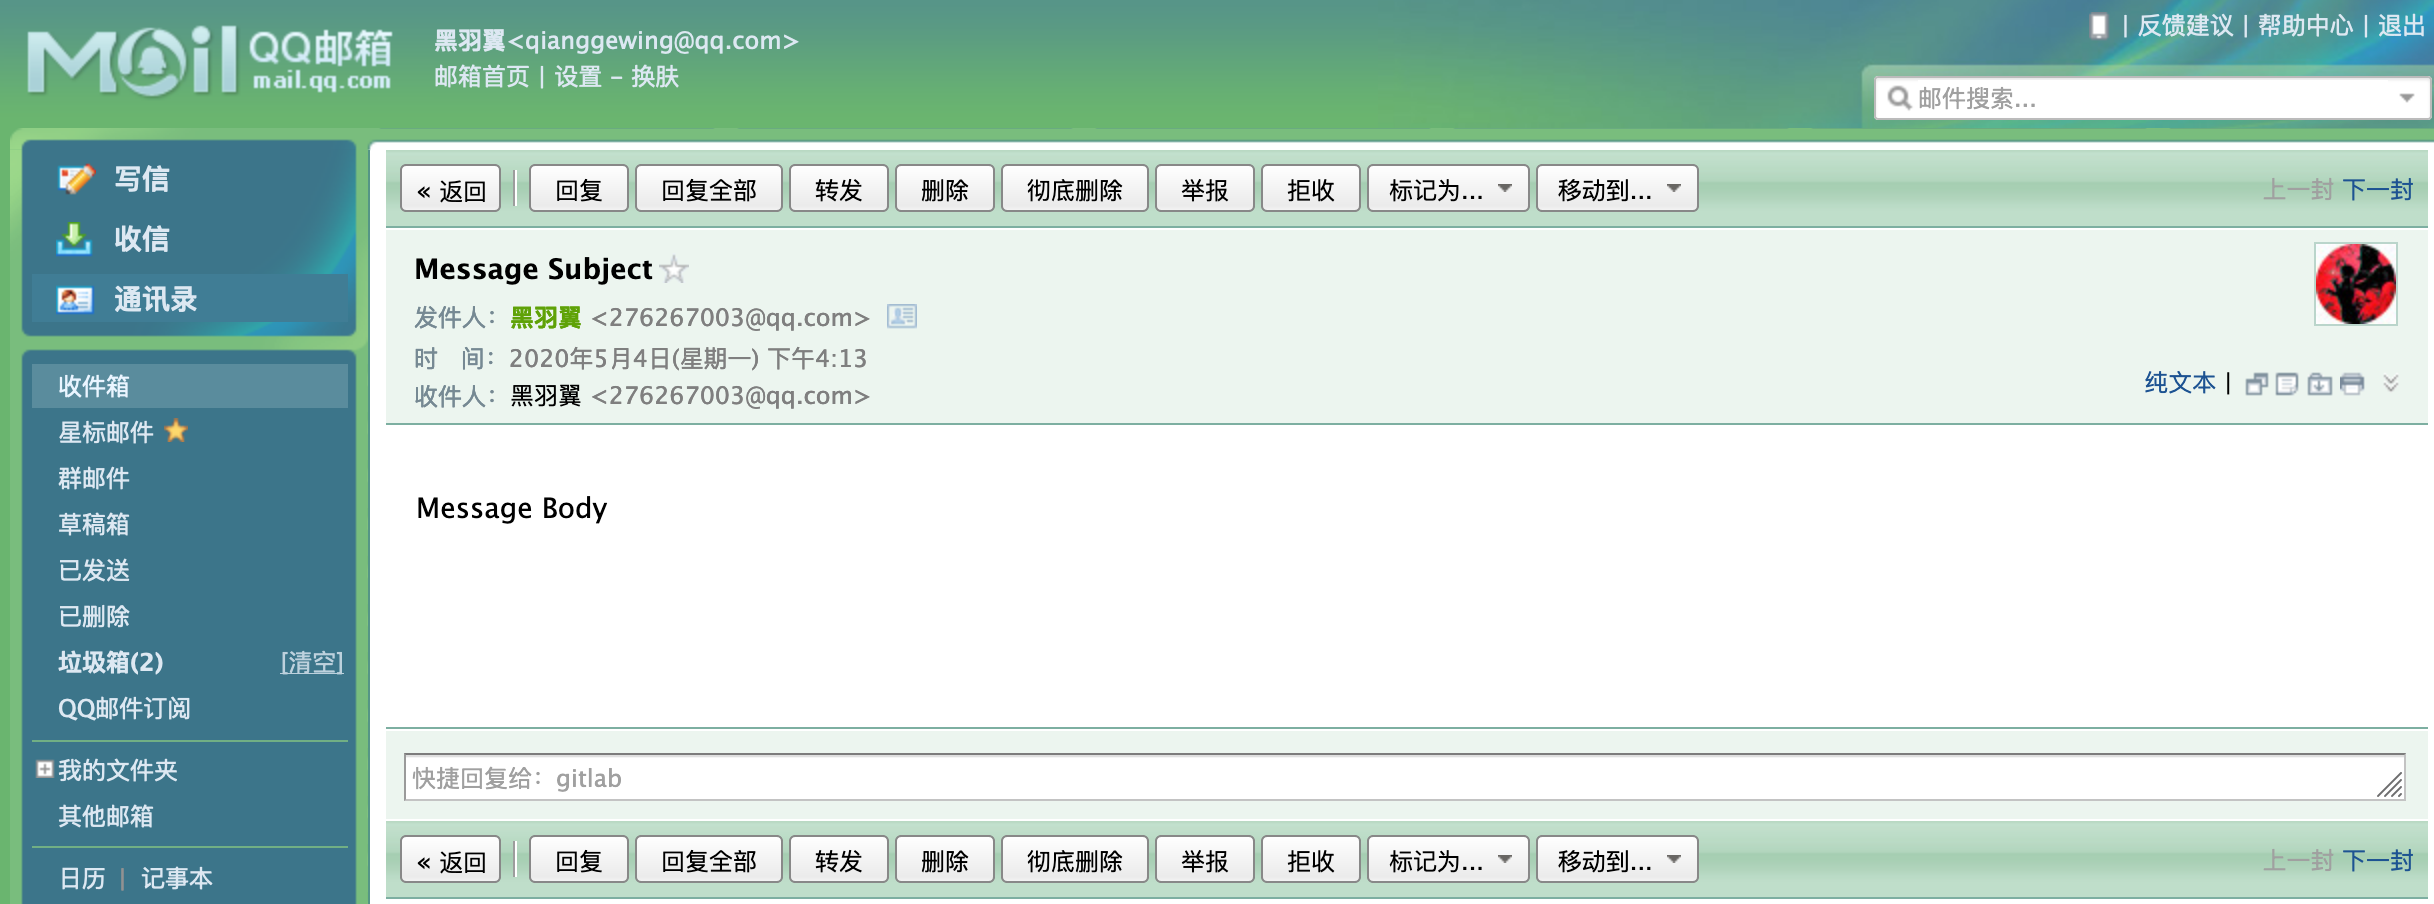
去qq邮箱web界面查看是否收到邮件
三、实践
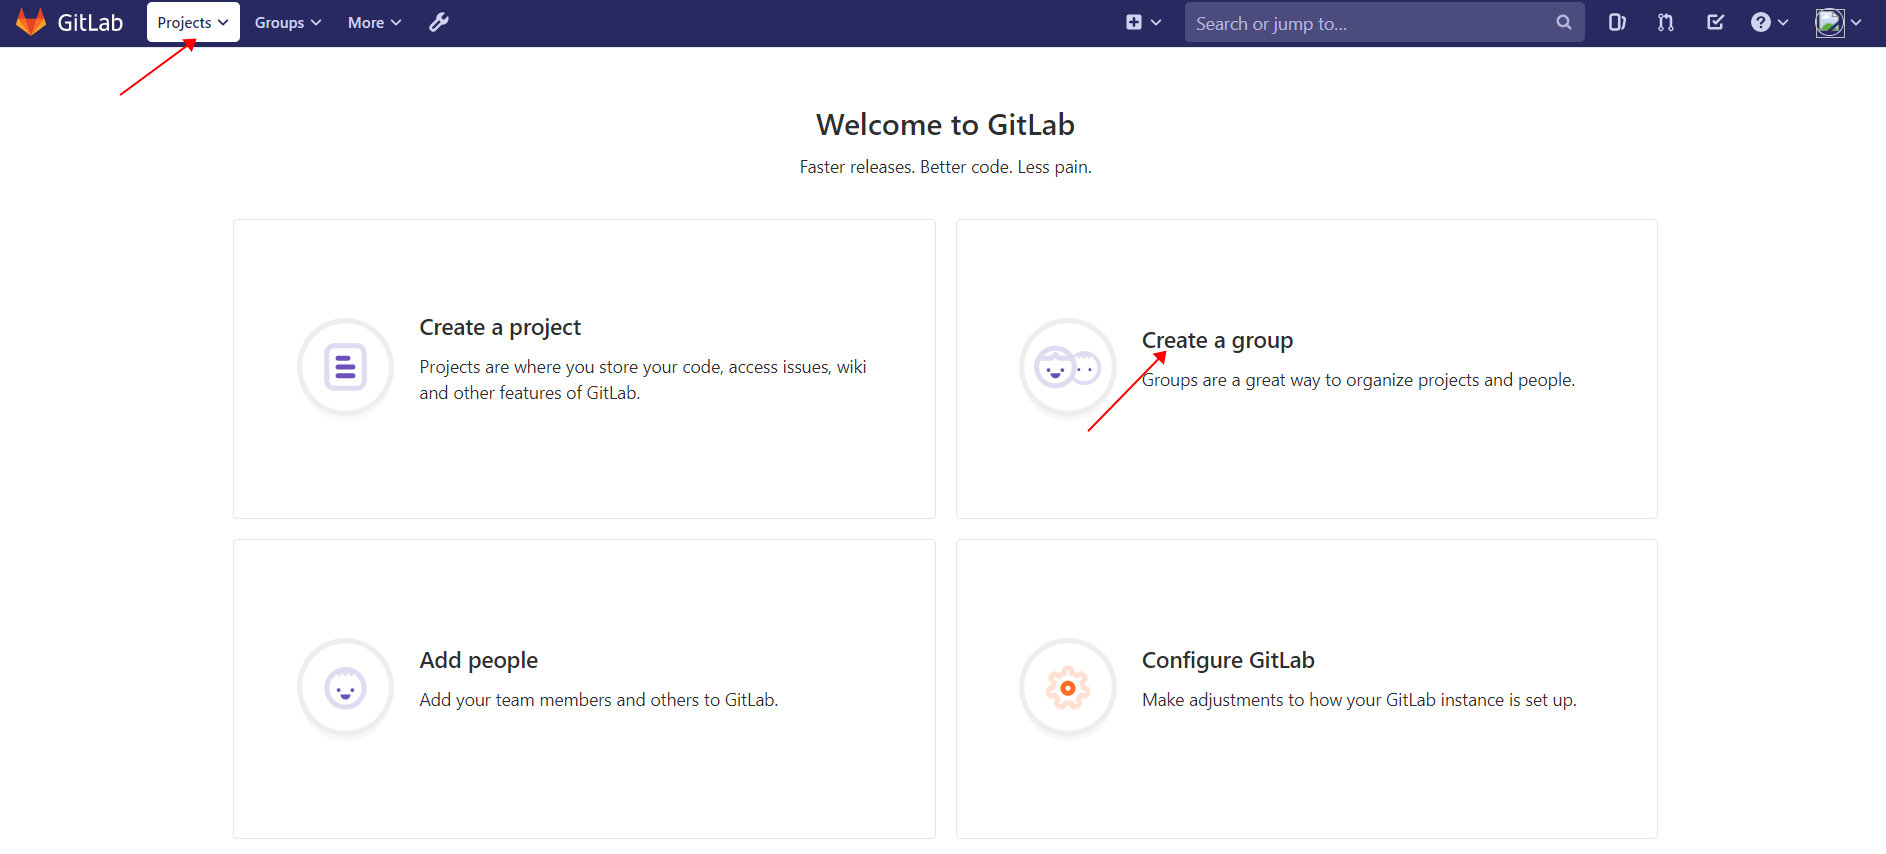
1.创建组
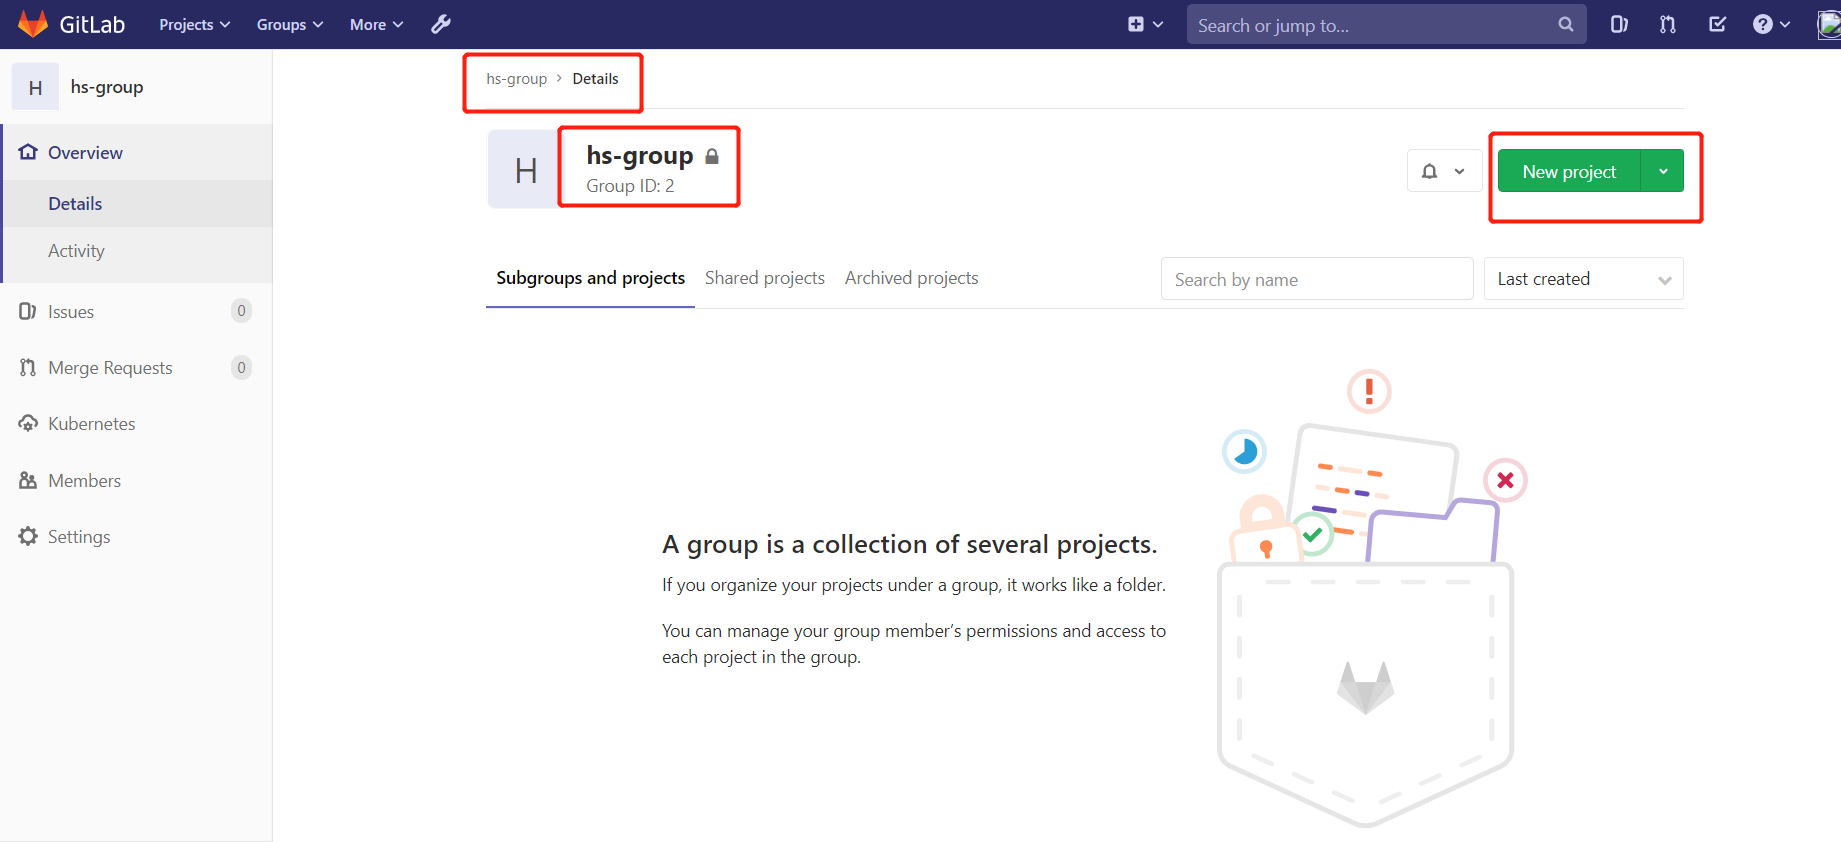
使用管理员 root 创建组,一个组里面可以有多个项目分支,可以将开发添加到组里面进行设置权限, 不同的组就是公司不同的开发项目或者服务模块,不同的组添加不同的开发即可实现对开发设置权限的管理
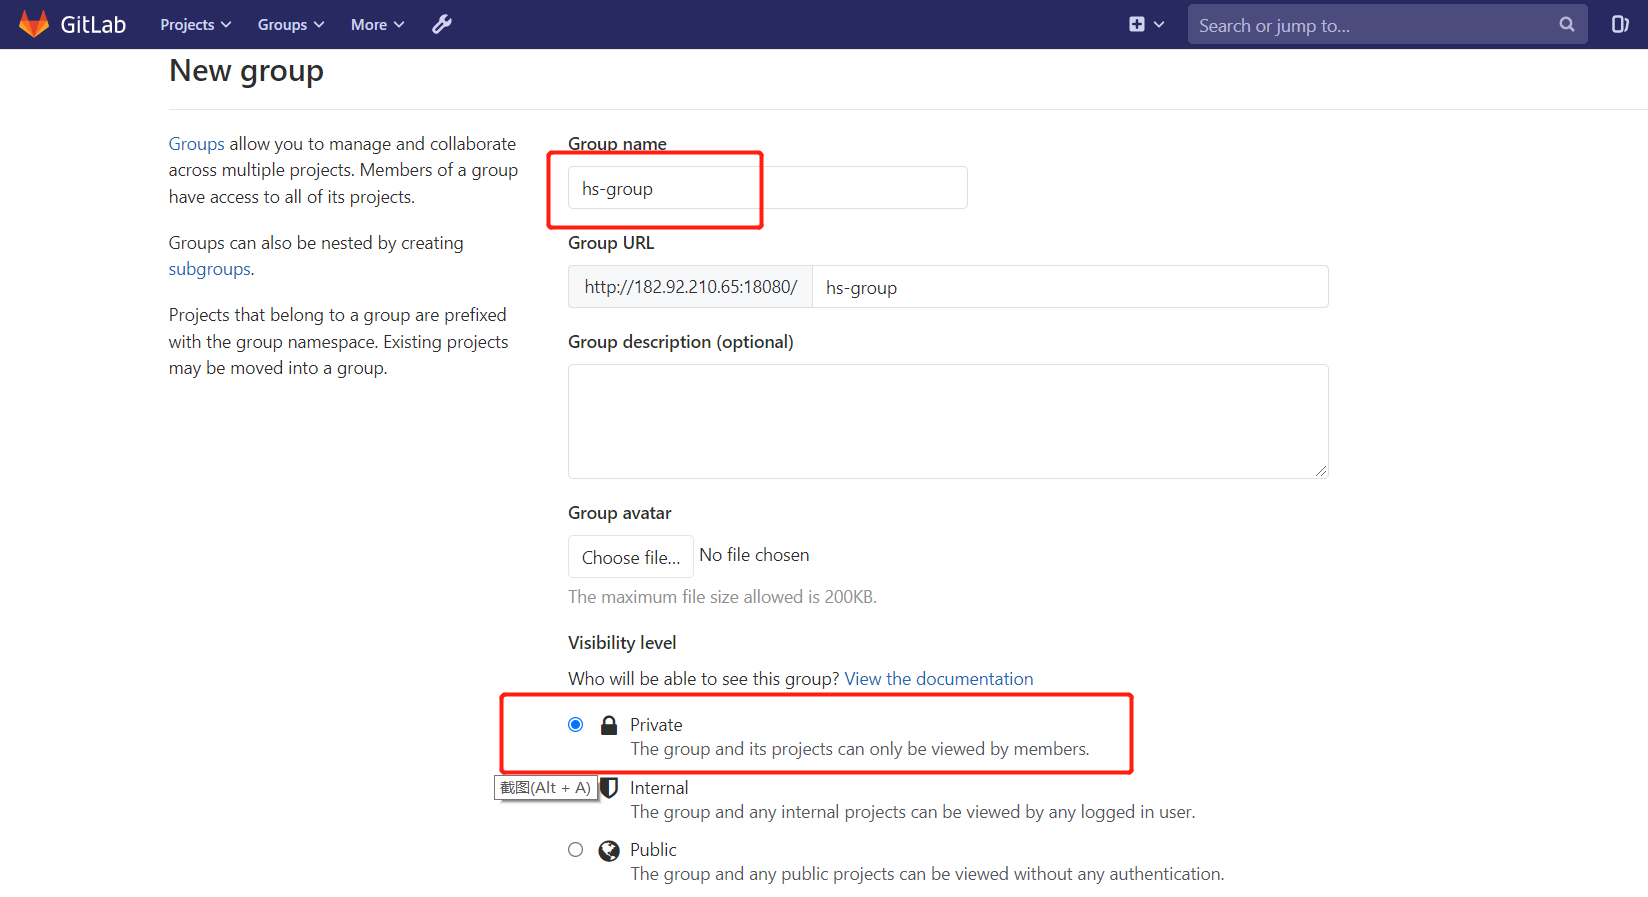
创建组 hs-group
-
a. 项目名称,项目名称可以为字母、数字、空格、下划线、中划线和英文点号组成,且必须以字母或数字开头,不能使用中文
-
b. 项目描述
-
c.可见性(库类别)
-
私有库:只有被赋予权限的用户可见
-
内部库:登录用户可以下载
-
公开库:所有人可以下载
-
2.创建用户
创建用户的时候,可以选择Regular或Admin类型。
- 普通用户:只能访问属于他的组和项目
- 管理员:可以访问所有组和项目
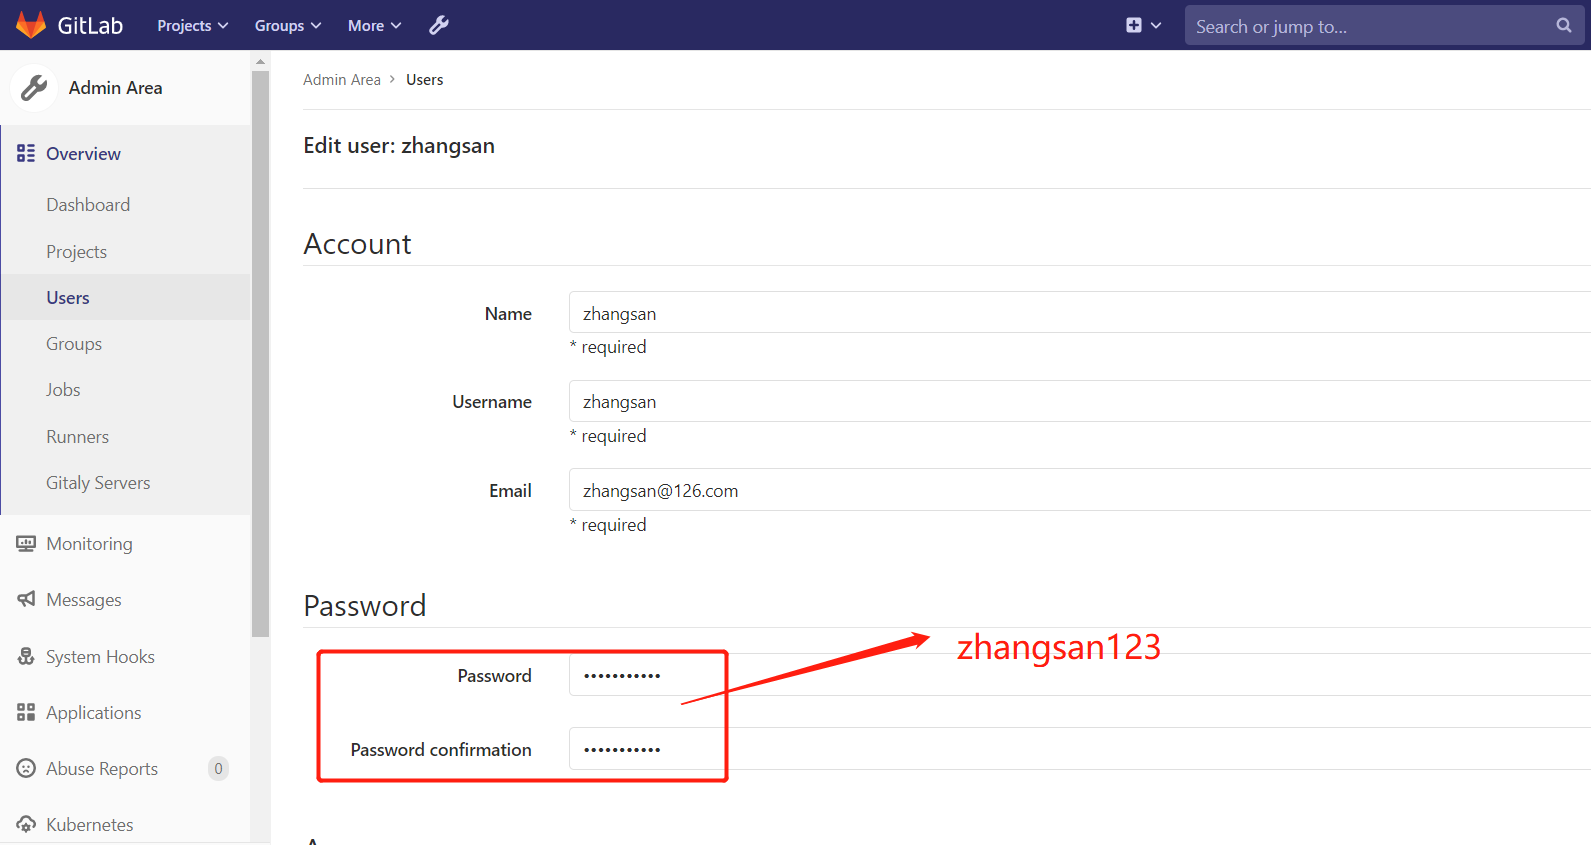
创建用户张三
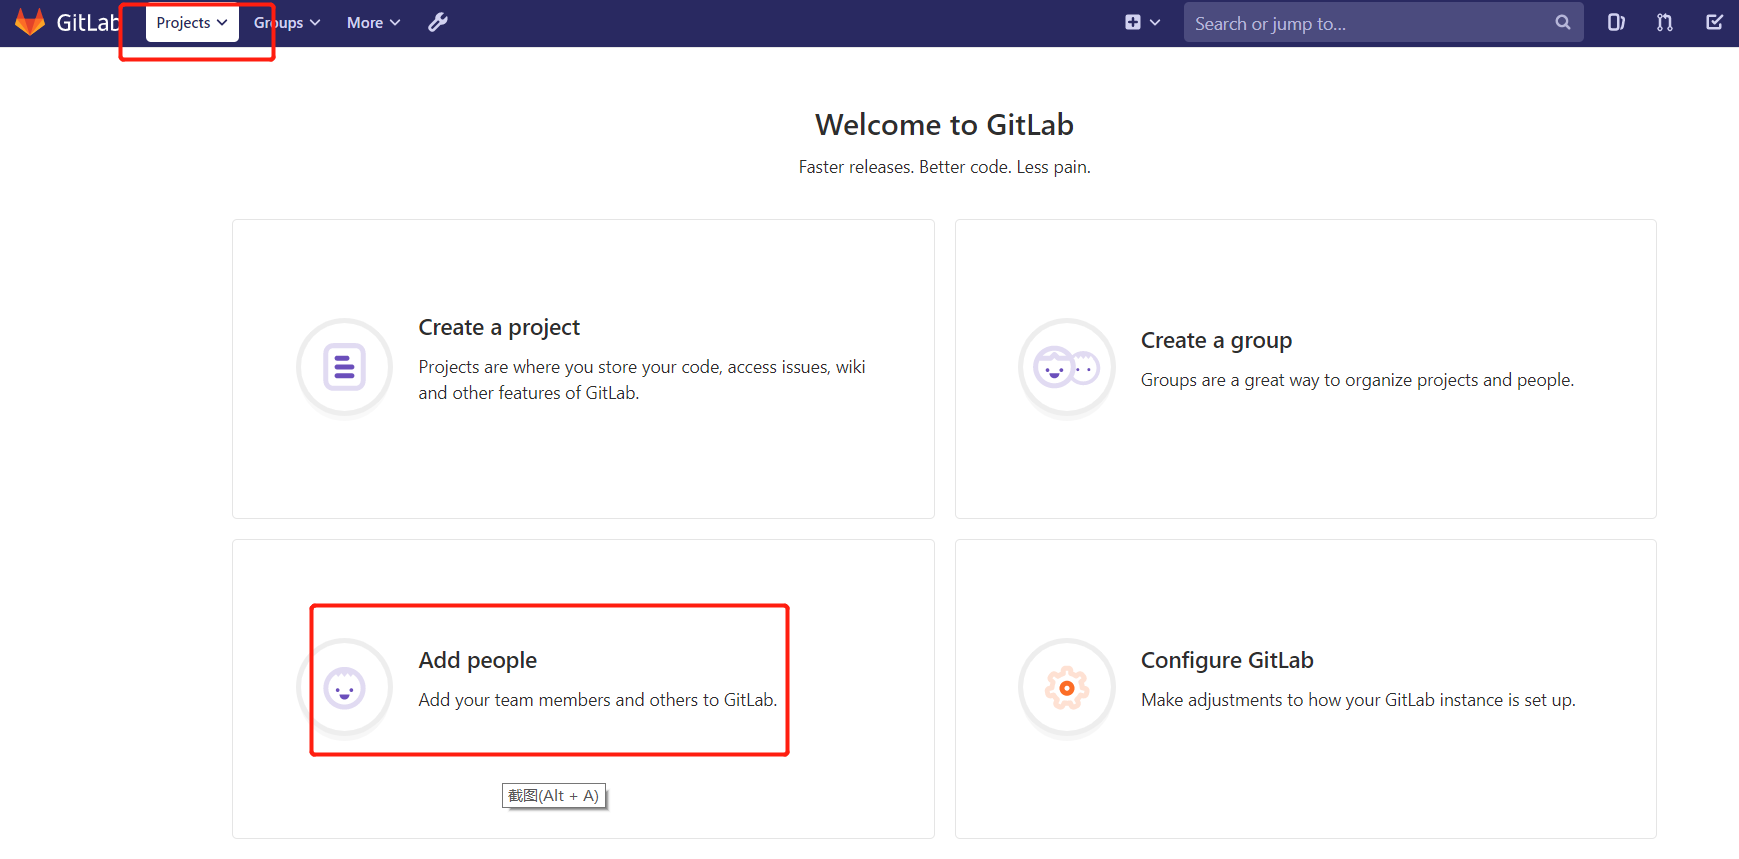
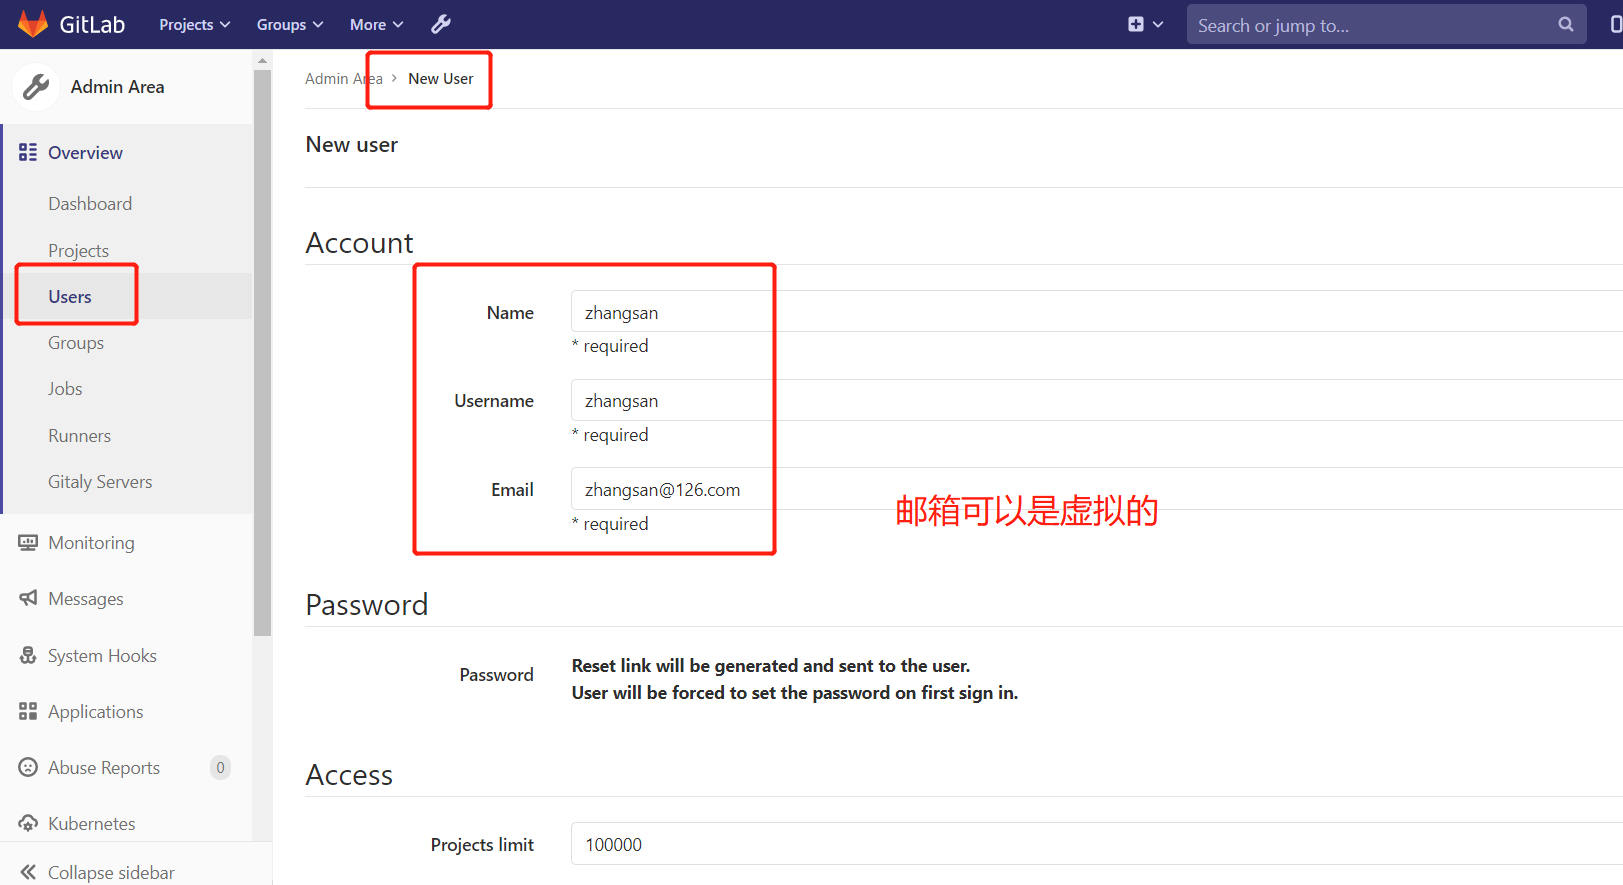
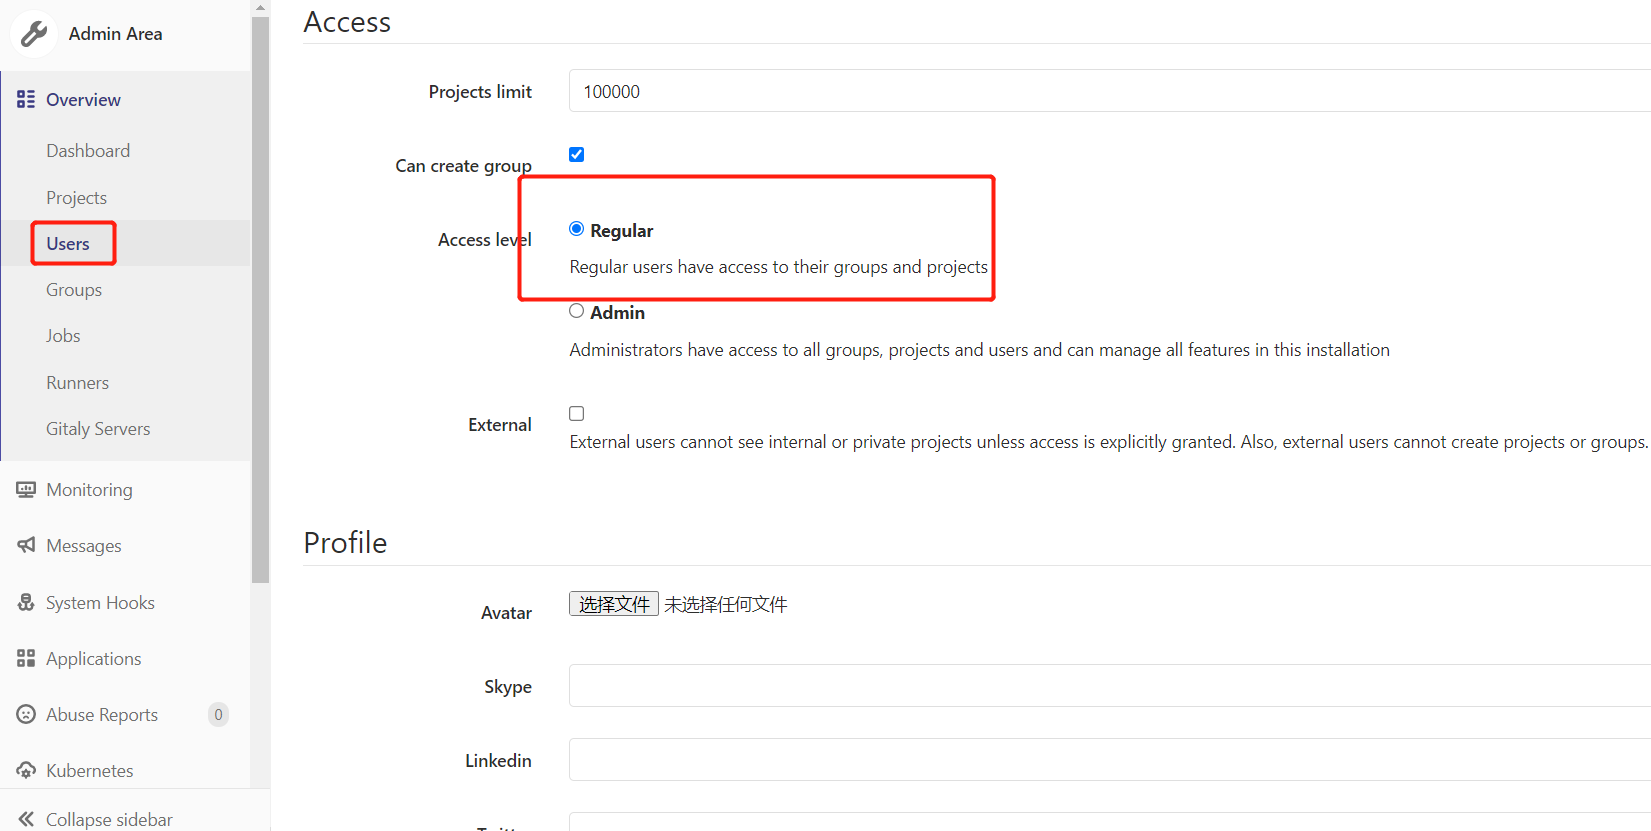
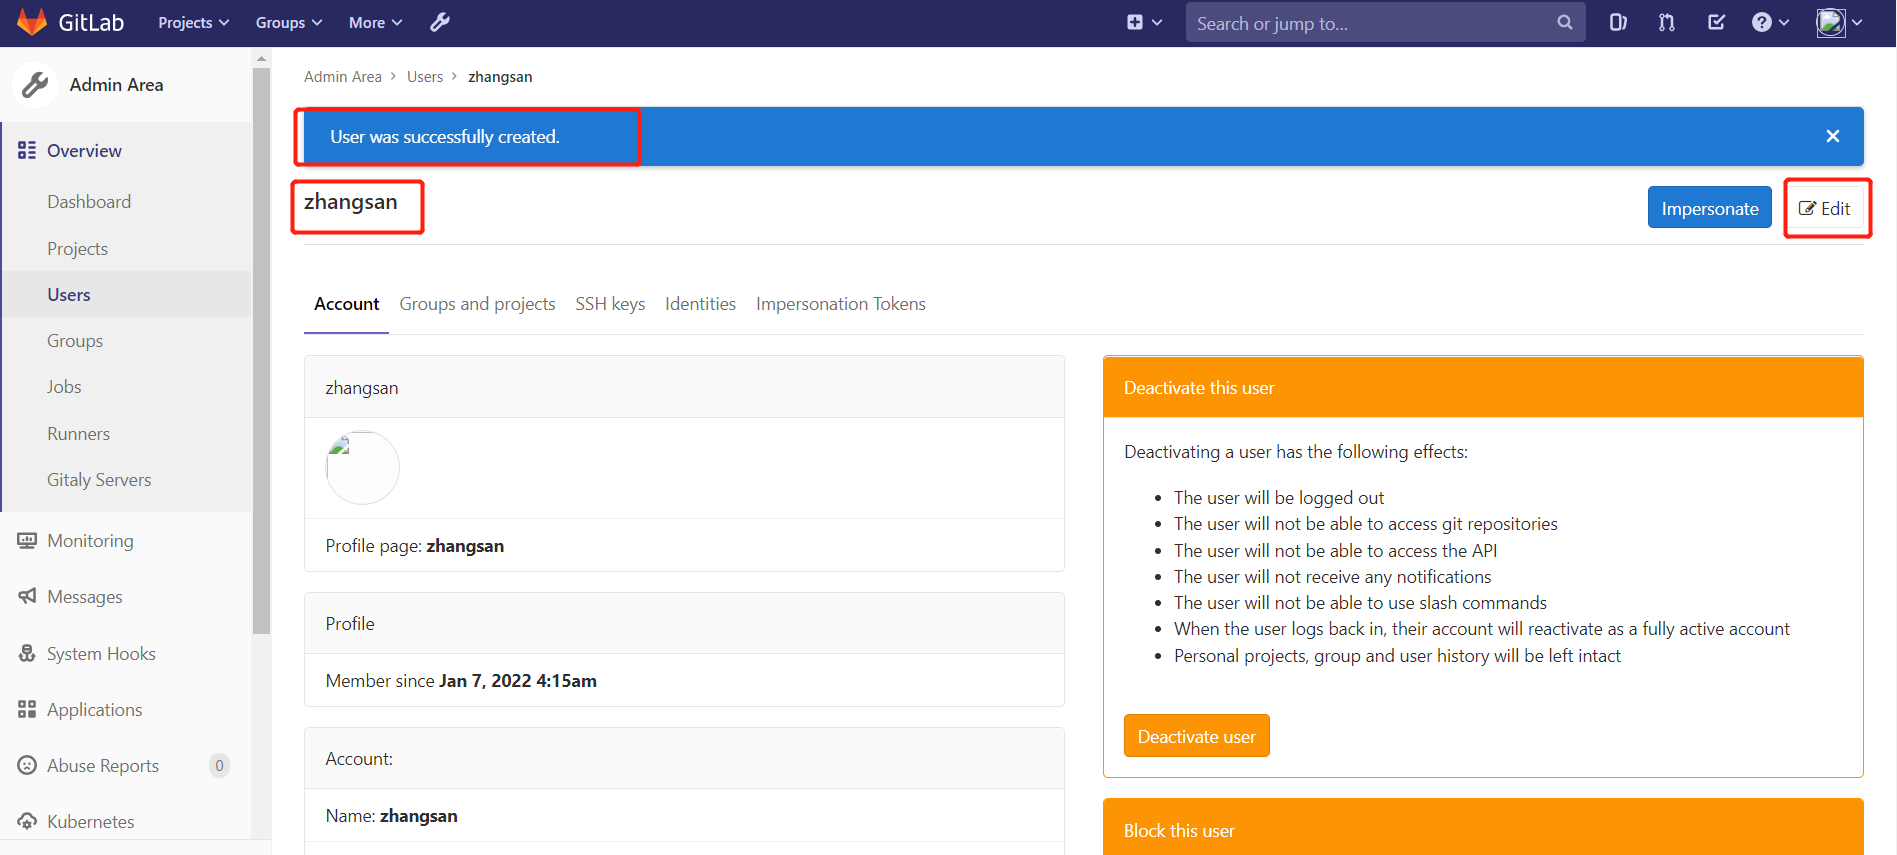
创建完用户后,立即修改密码 zhangshan123
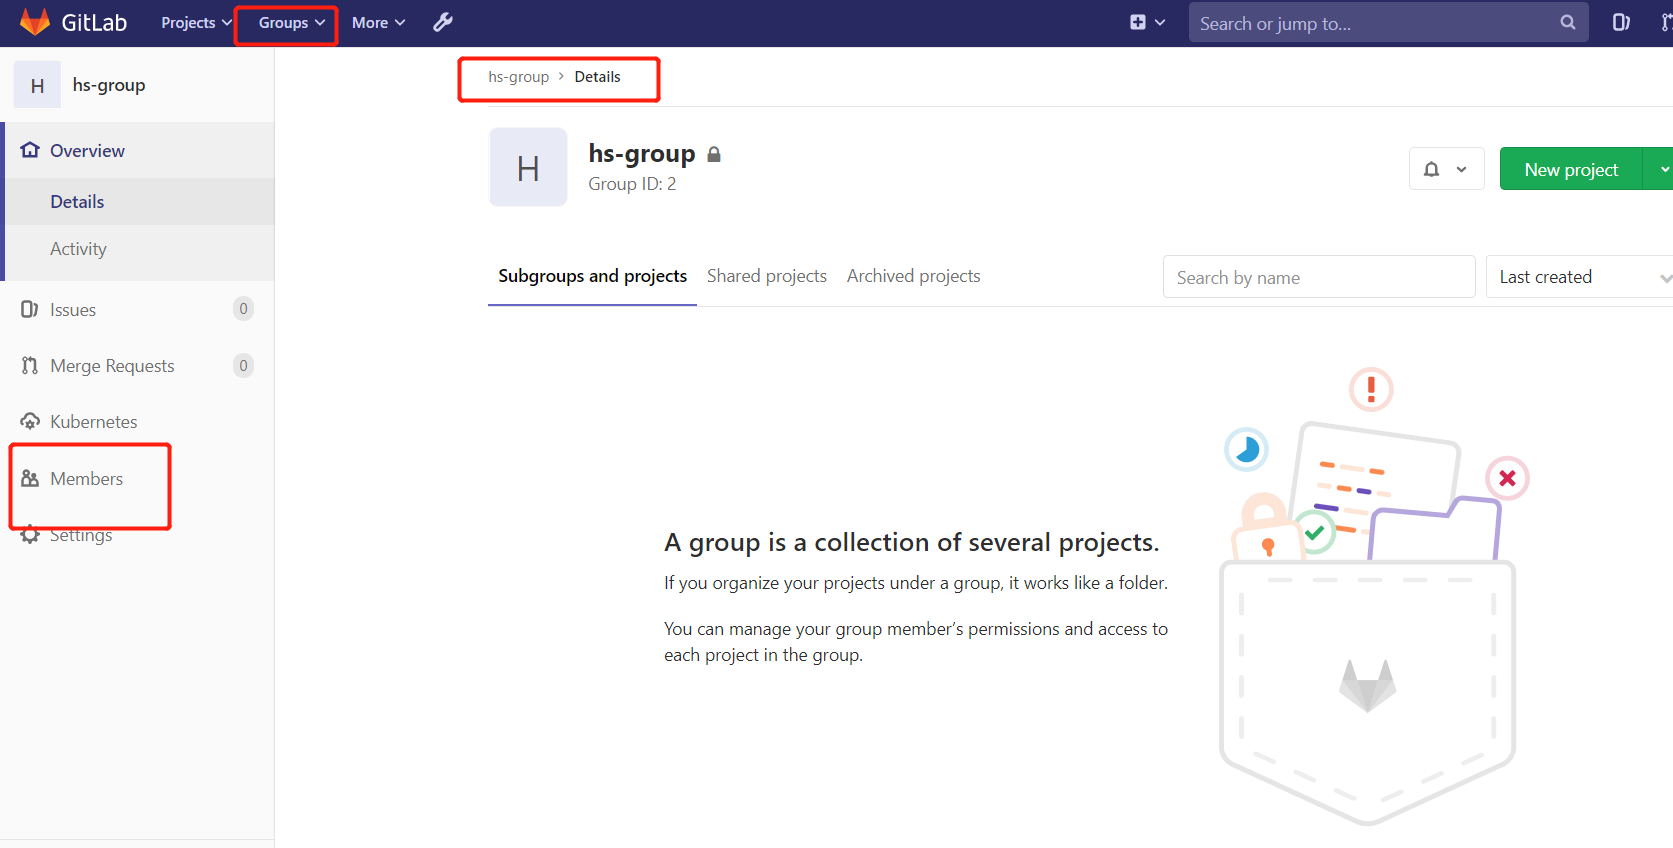
3.用户添加到组
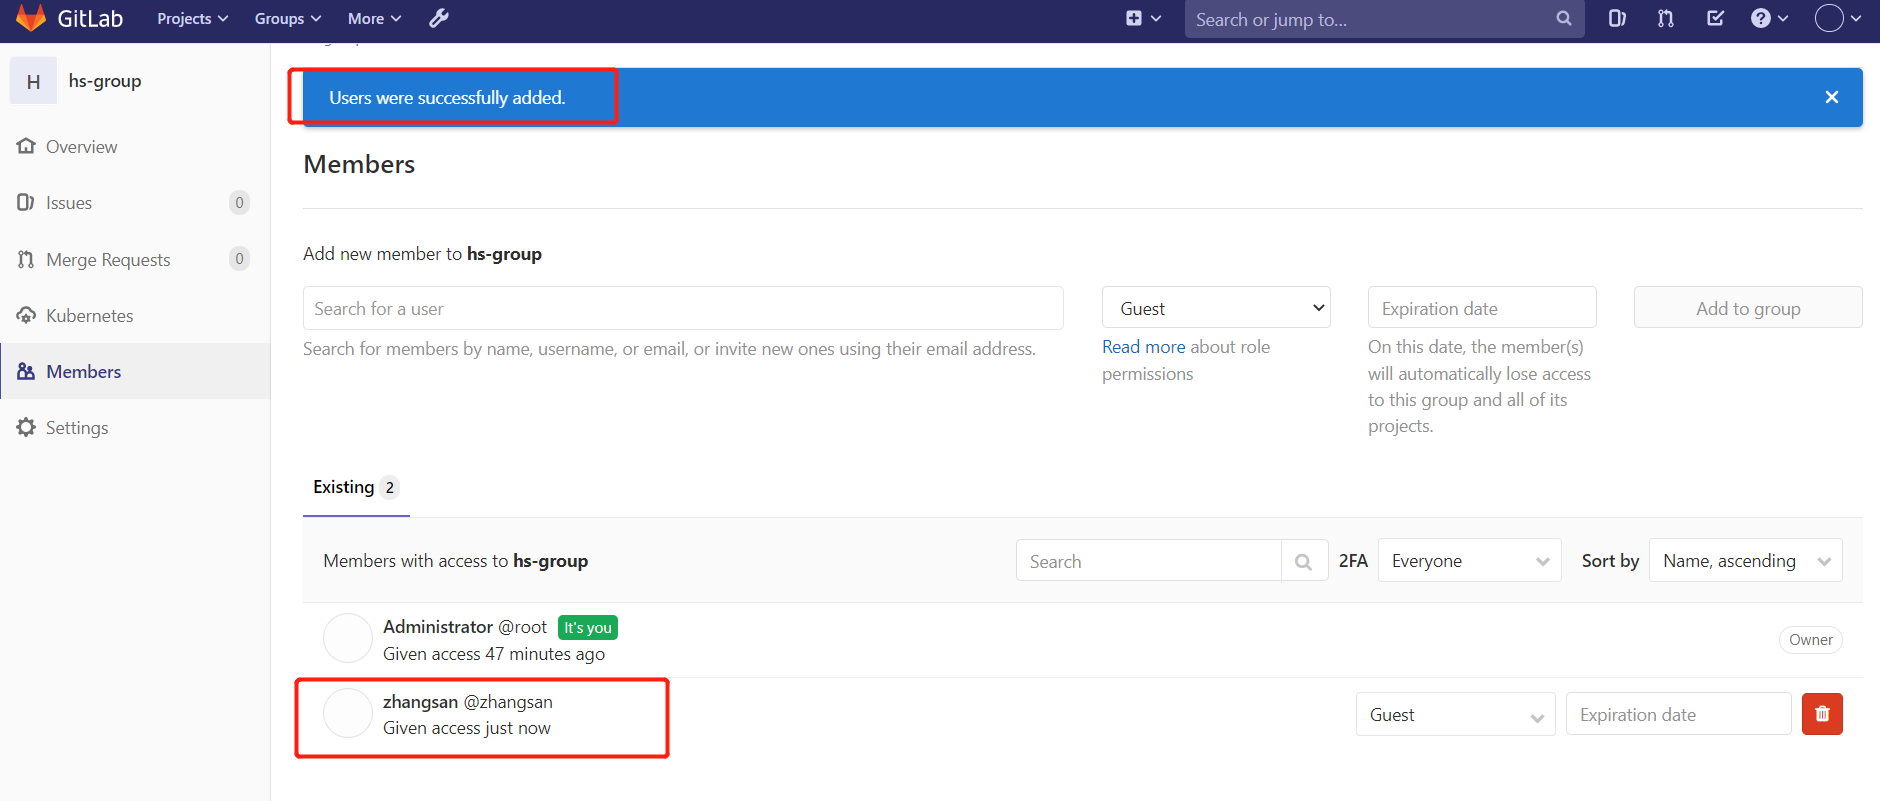
选择某个用户组,进行Members管理组的成员
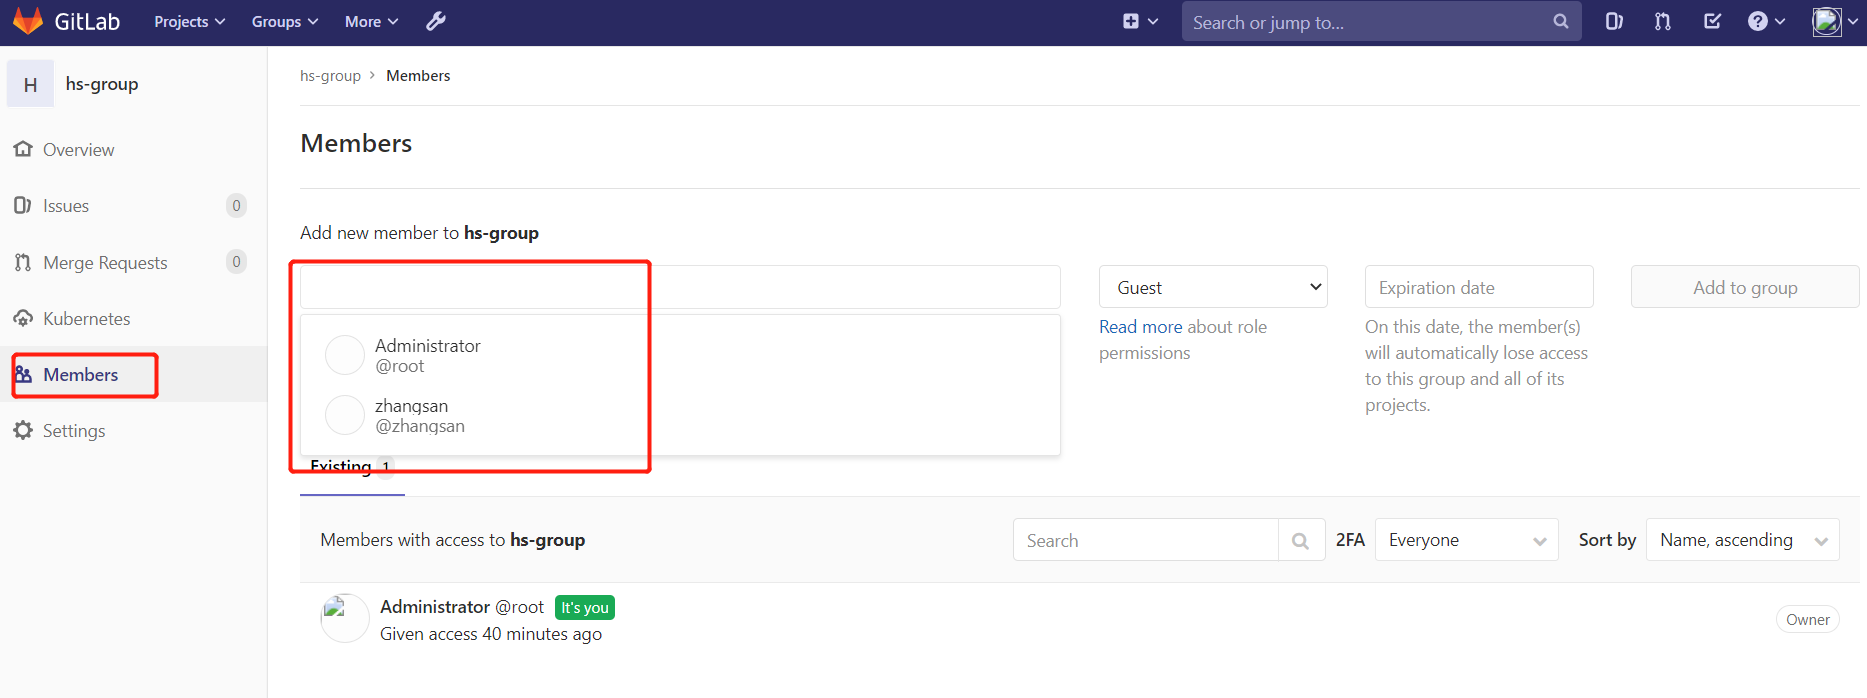
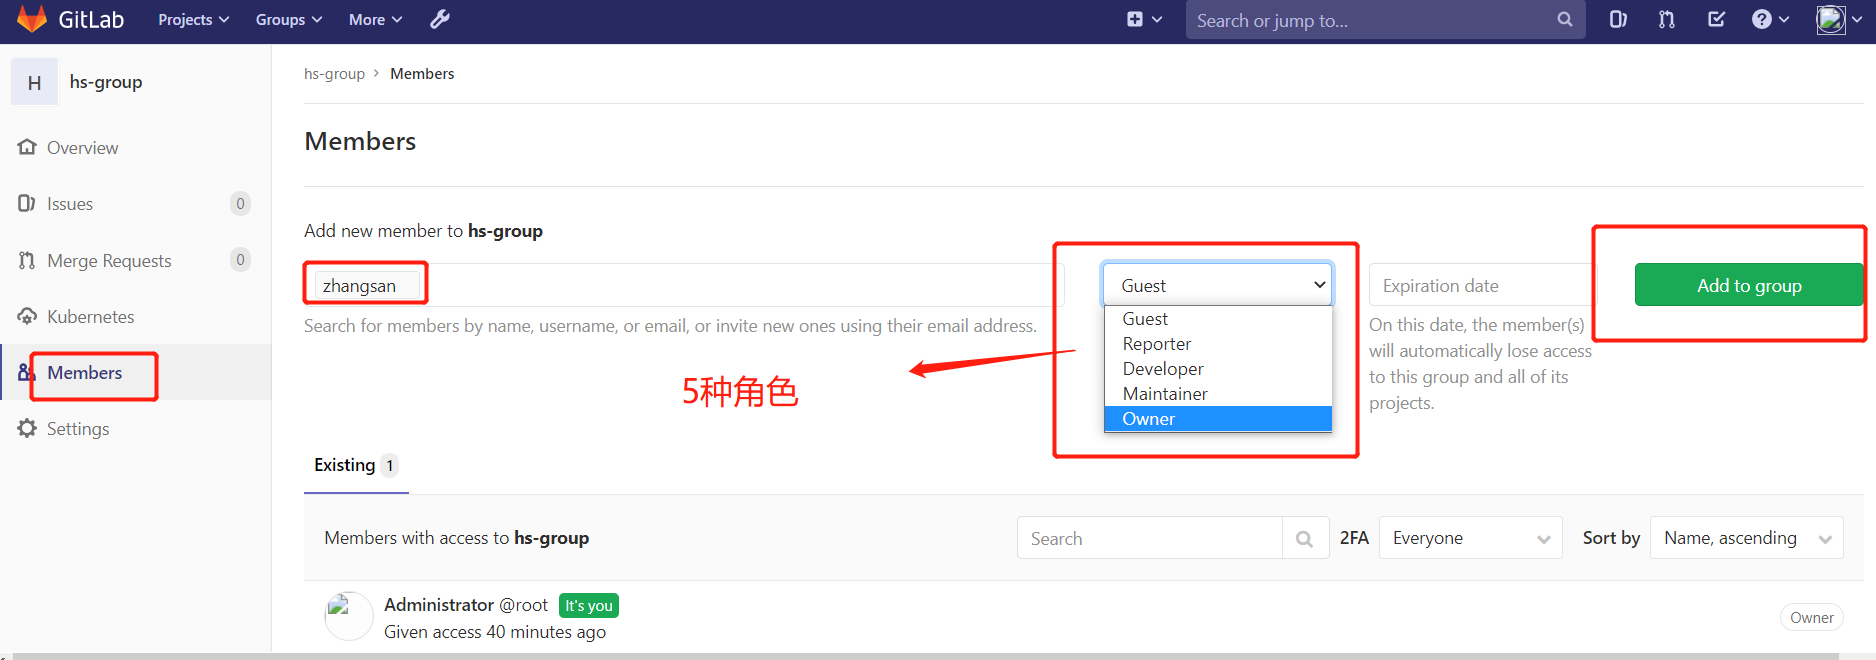
Gitlab用户在组里面有5种不同权限:
- Guest:可以创建issue、发表评论,不能读写版本库
- Reporter:可以克隆代码,不能提交,QA、PM可以赋予这个权限
- Developer:可以克隆代码、开发、提交、push,普通开发可以赋予这个权限
- Maintainer:可以创建项目、添加tag、保护分支、添加项目成员、编辑项目,核心开发可以赋予这个
- 权限 Owner:可以设置项目访问权限 - Visibility Level、删除项目、迁移项目、管理组成员,开发组组长可以赋予这个权限
4.创建项目
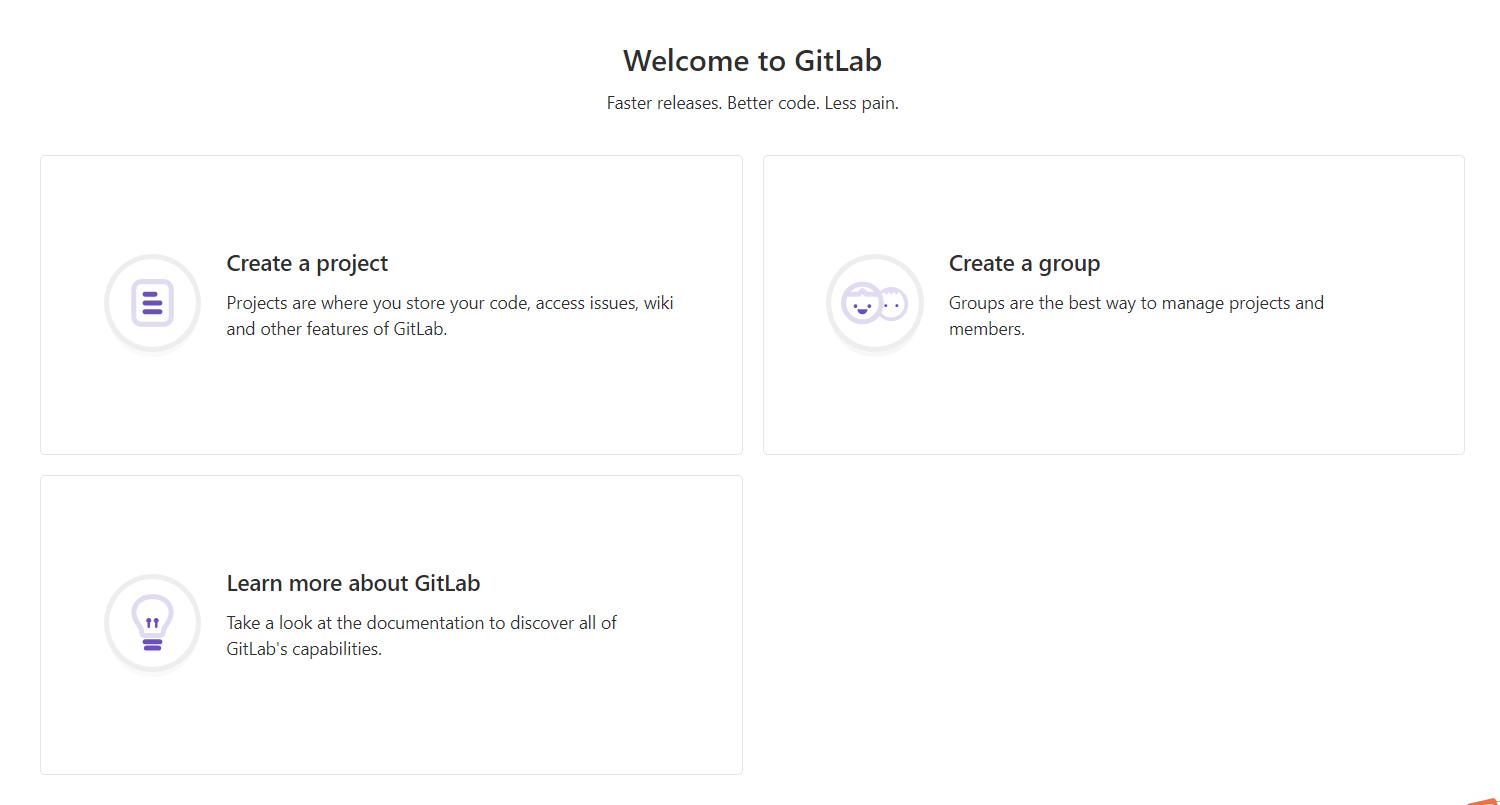
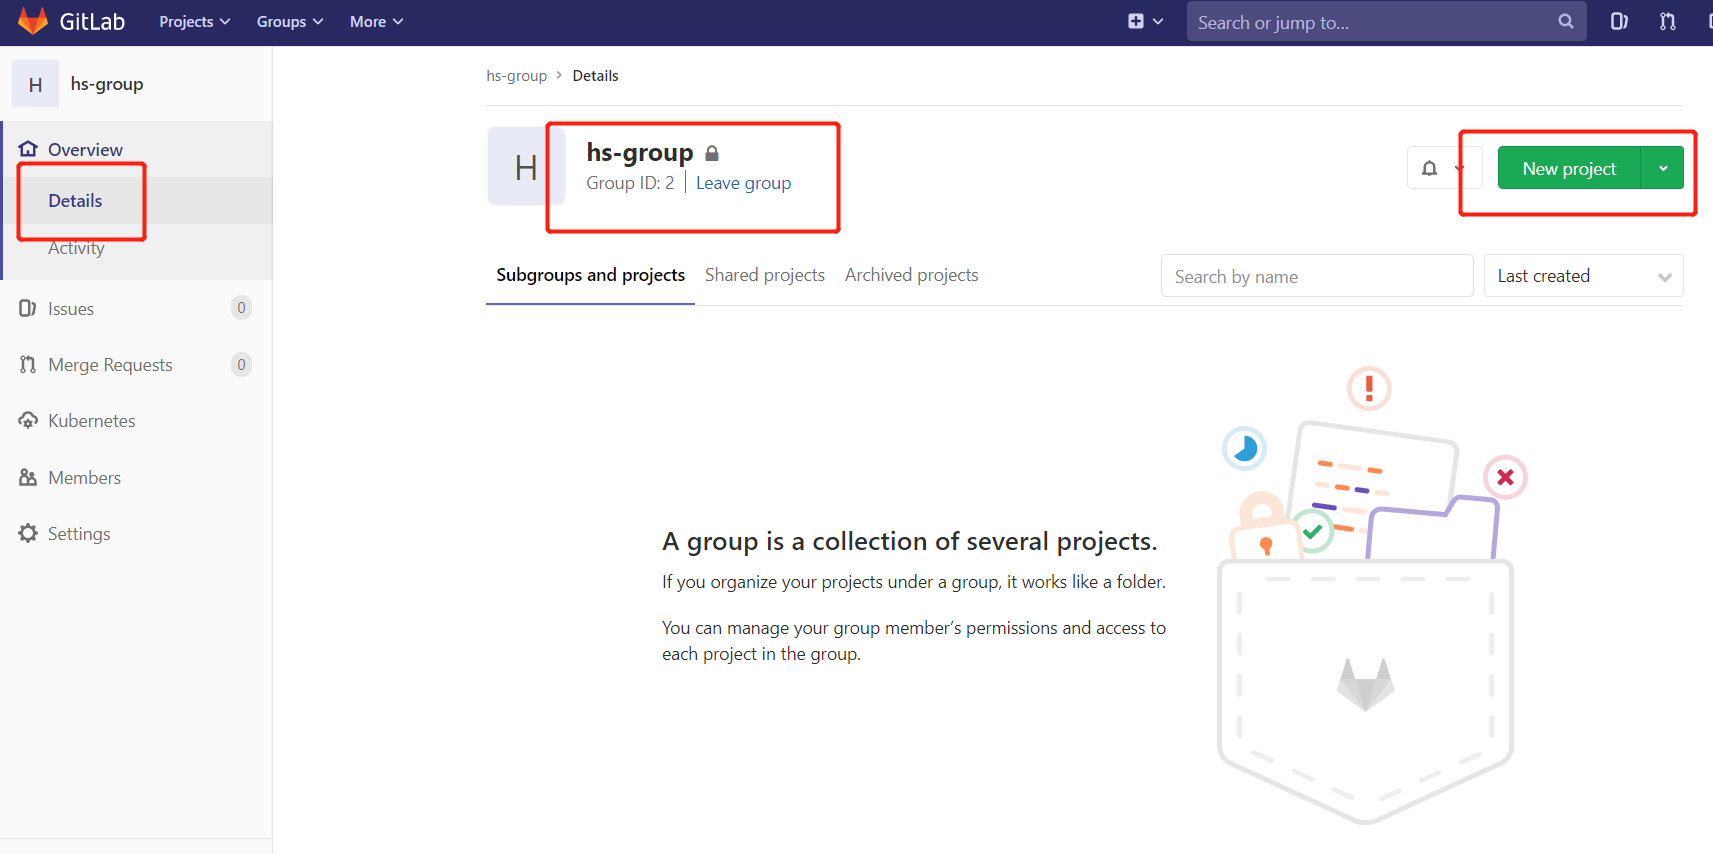
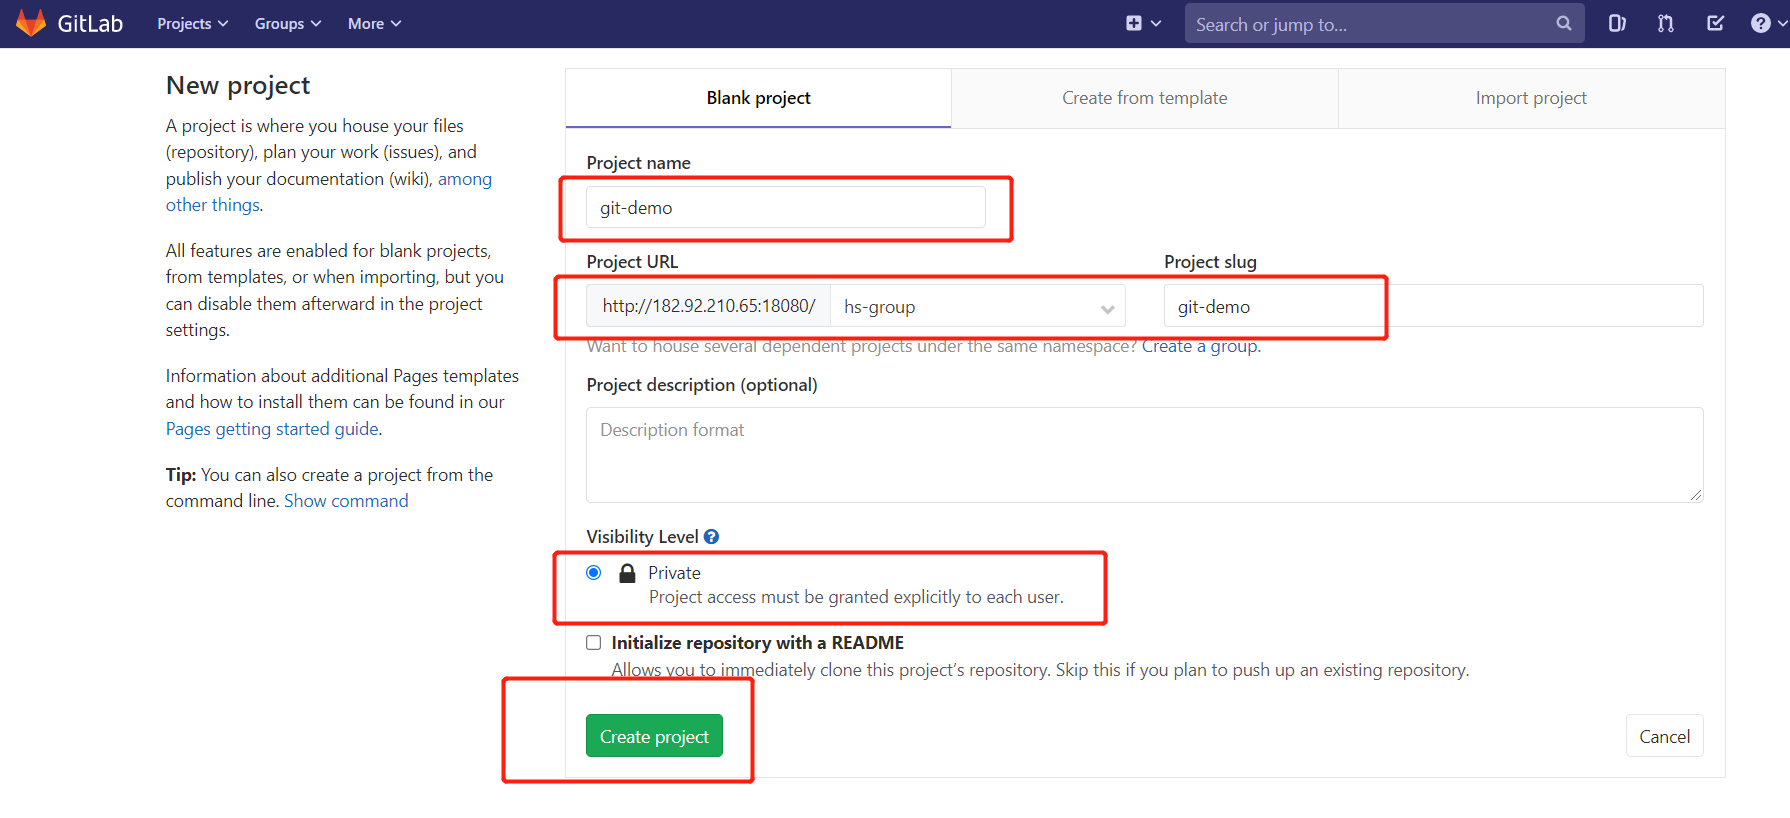
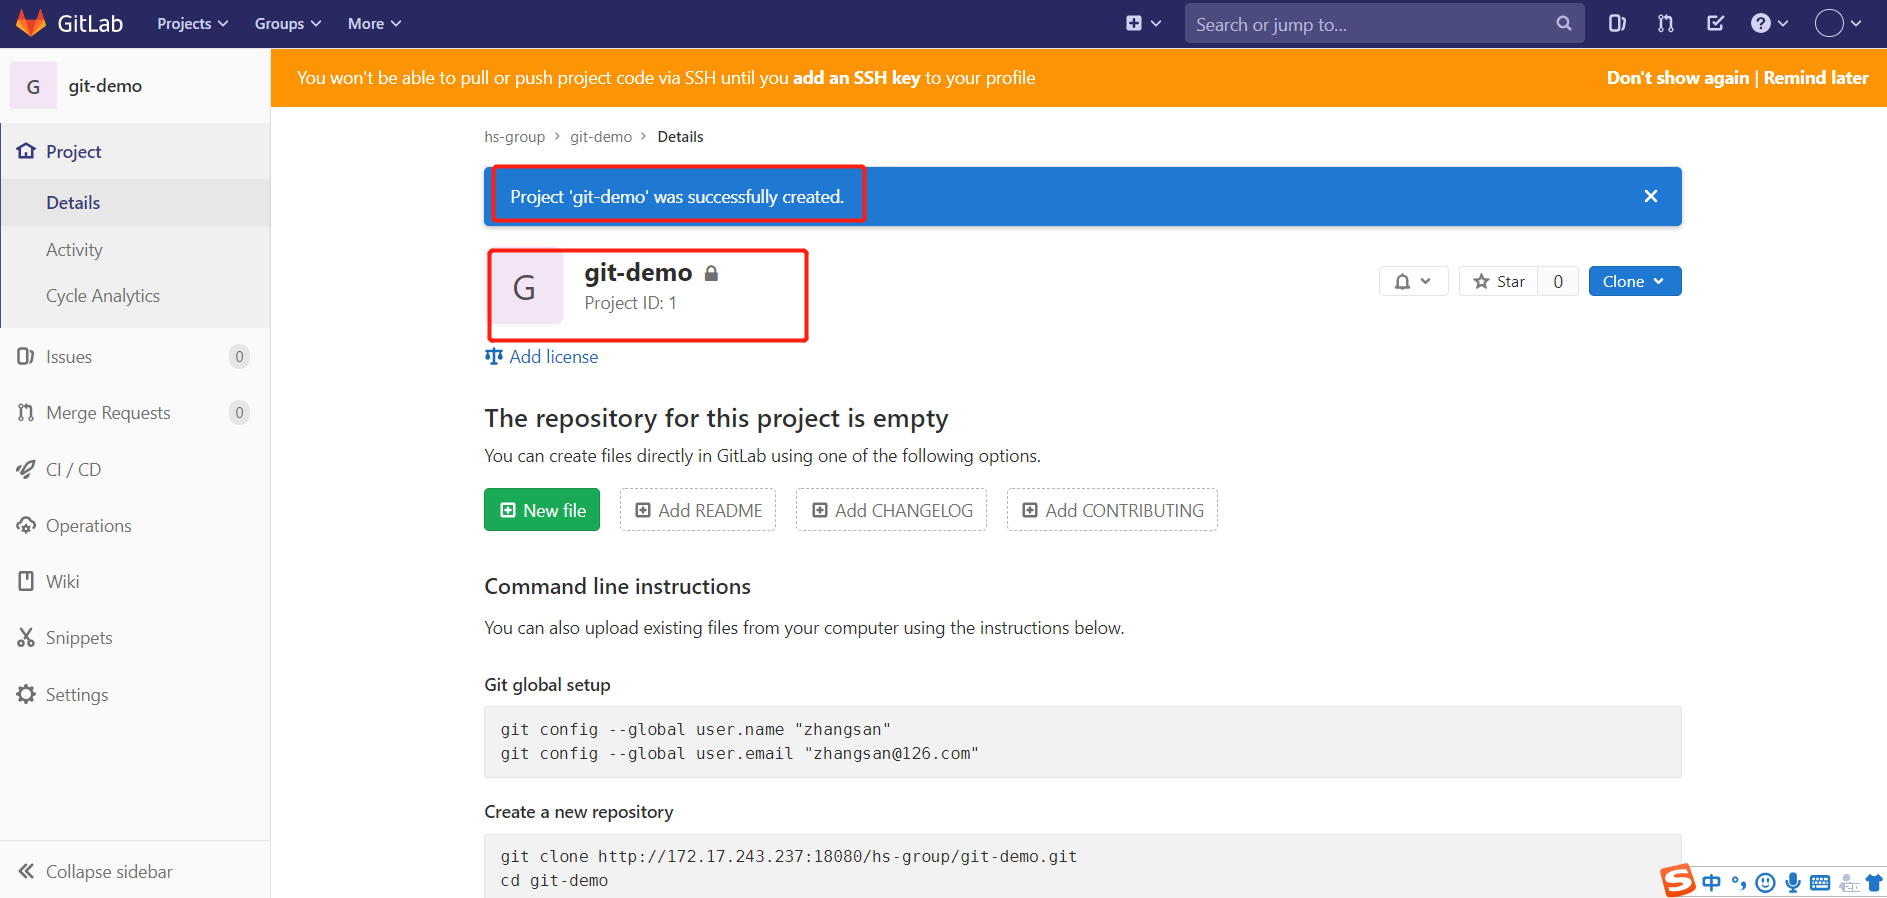
在用户组中创建项目
以刚才创建的新用户身份登录到Gitlab,然后在用户组中创建新的项目
新用户第一次登陆要重置密码。
1
2
3
4
5
6
7
8
9
10
11
12
13
14
15
16
17
18
19
20
21
22
23
24
25
26
27
28
29
Git global setup
git config --global user.name "zhangsan"
git config --global user.email "zhangsan@126.com"


Create a new repository
git clone http://172.17.243.237:18080/hs-group/git-demo.git
cd git-demo
touch README.md
git add README.md
git commit -m "add README"
git push -u origin master


Push an existing folder
cd existing_folder
git init
git remote add origin http://172.17.243.237:18080/hs-group/git-demo.git
git add .
git commit -m "Initial commit"
git push -u origin master


Push an existing Git repository
cd existing_repo
git remote rename origin old-origin
git remote add origin http://172.17.243.237:18080/hs-group/git-demo.git
git push -u origin --all
git push -u origin --tags
5.SSH免密登录
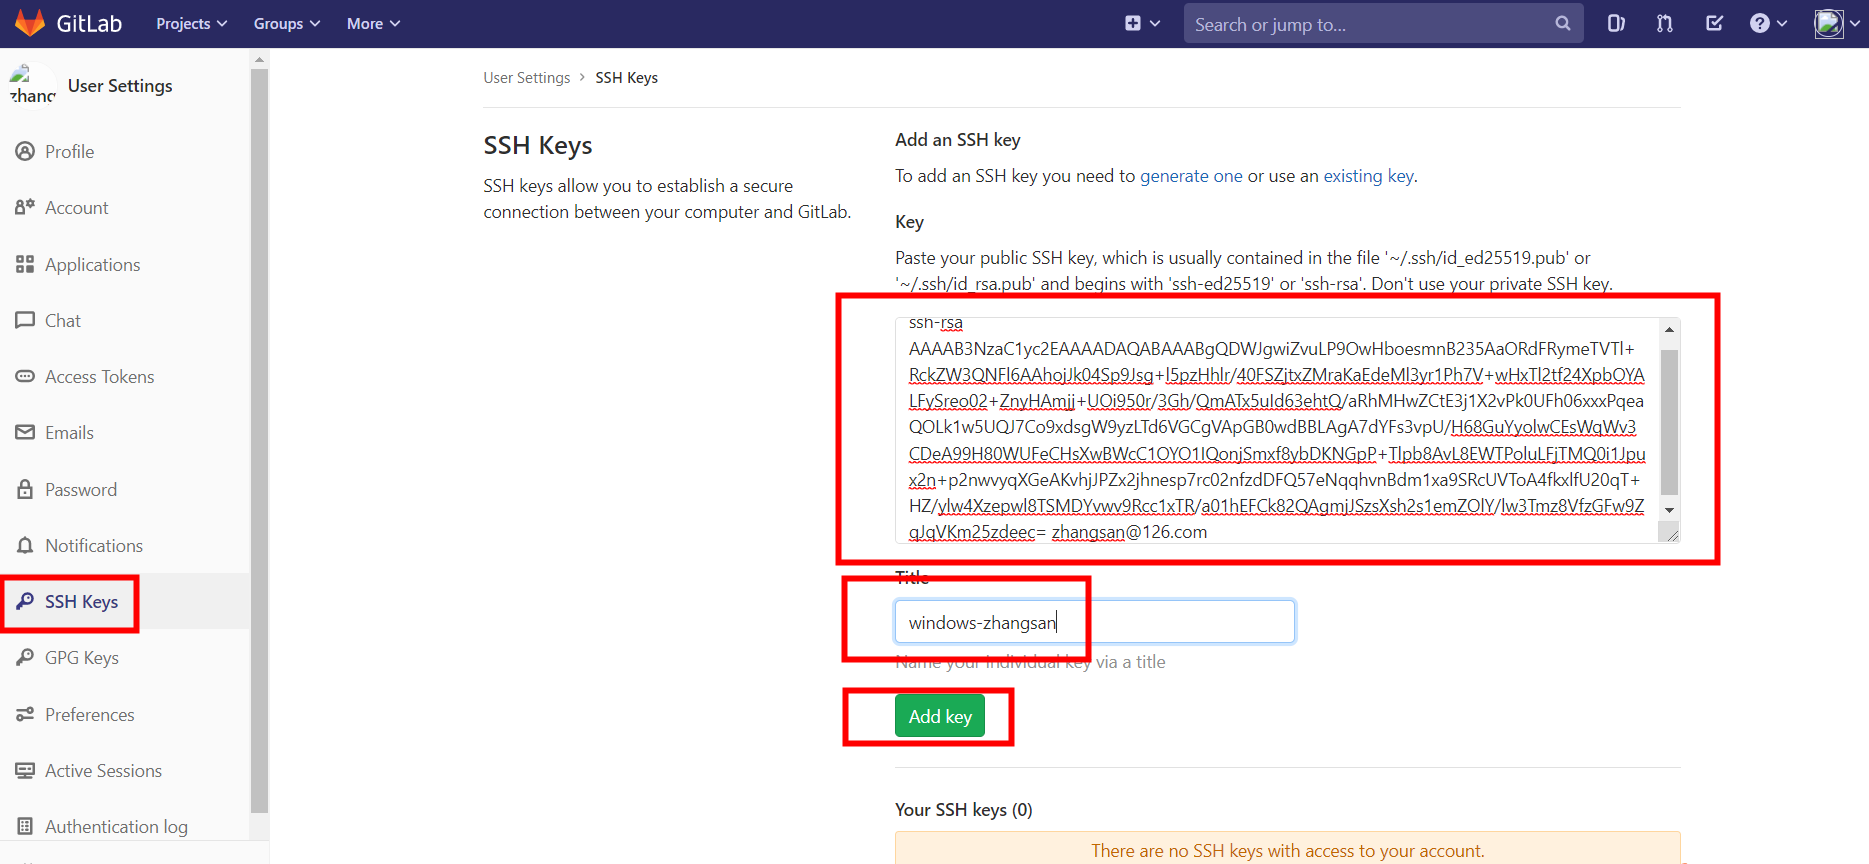
1.查看你生成的公钥:
vim id_rsa.pub
就可以查看到你的公钥
2.登陆GitLab账号,点击用户图像,然后 Settings -> 左栏点击 SSH keys

3.复制公钥内容,粘贴进“Key”文本区域内,取名字
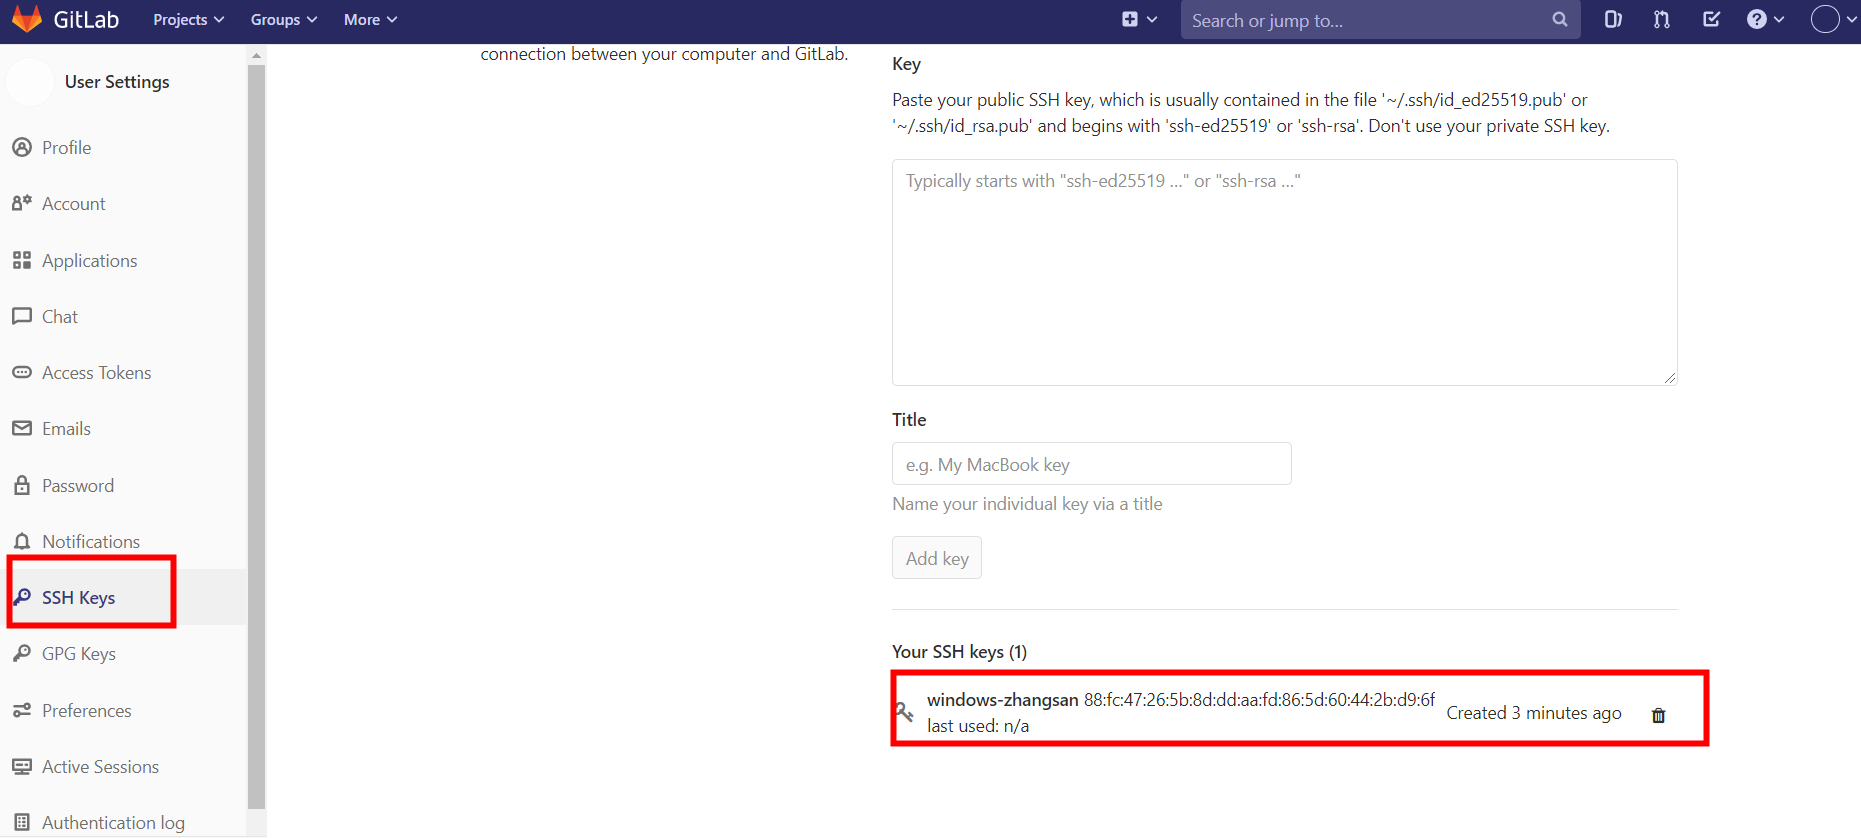
4.点击Add Key
6.分支管理
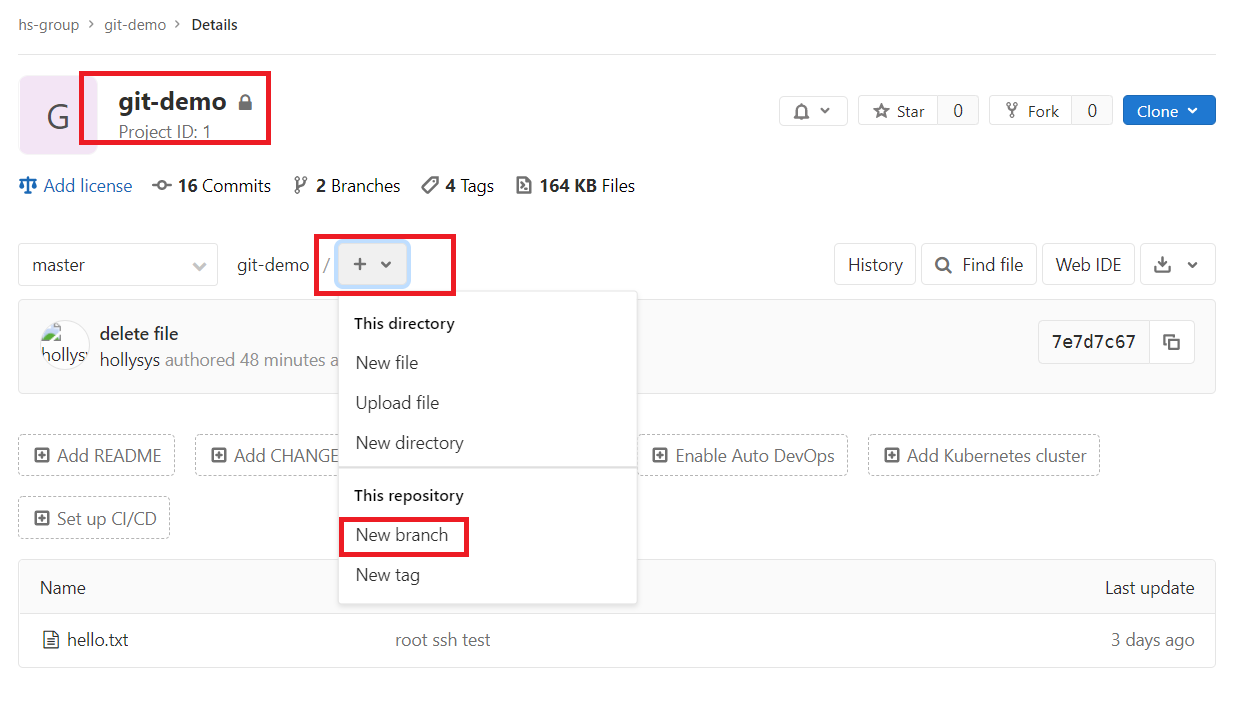
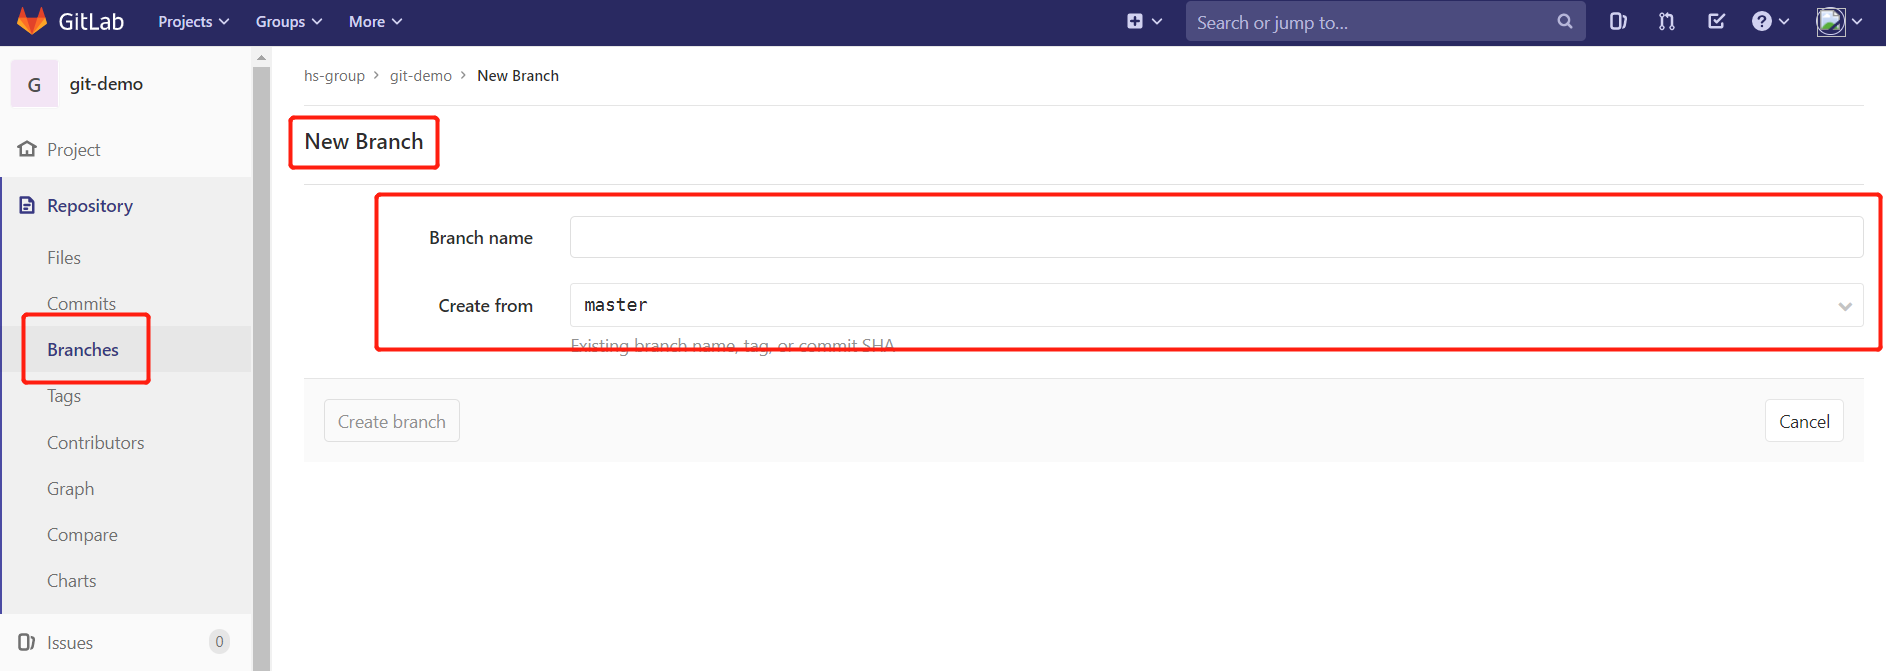
1.创建分支
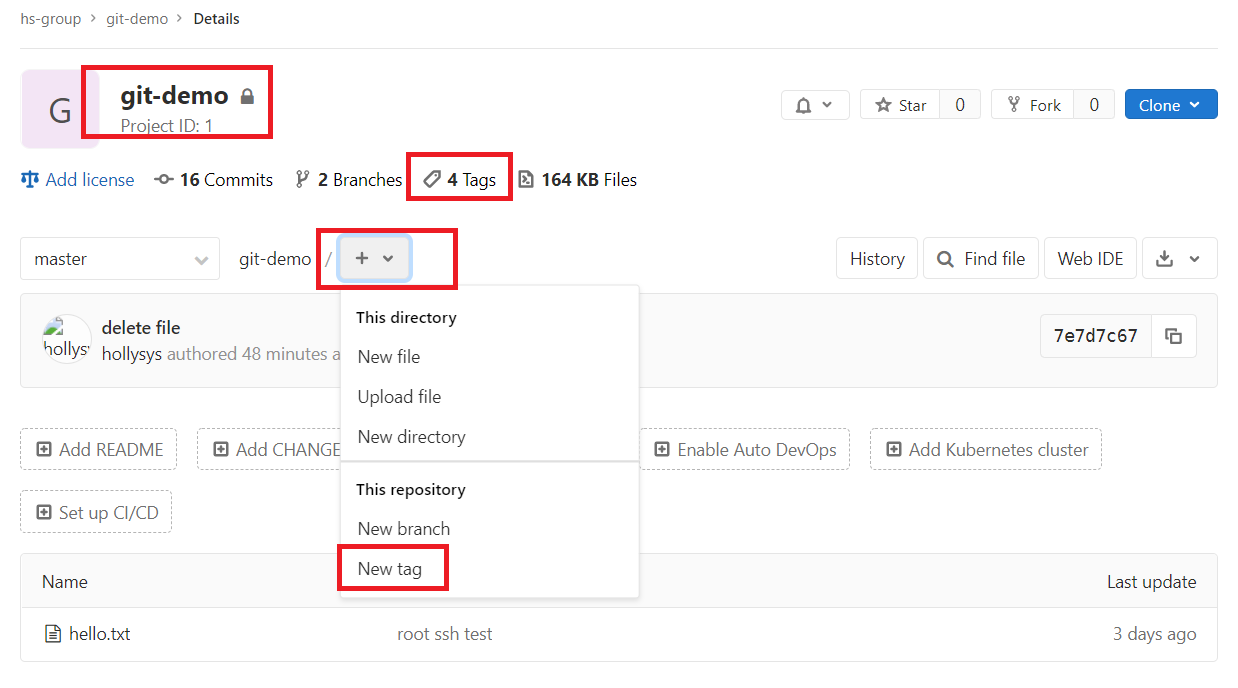
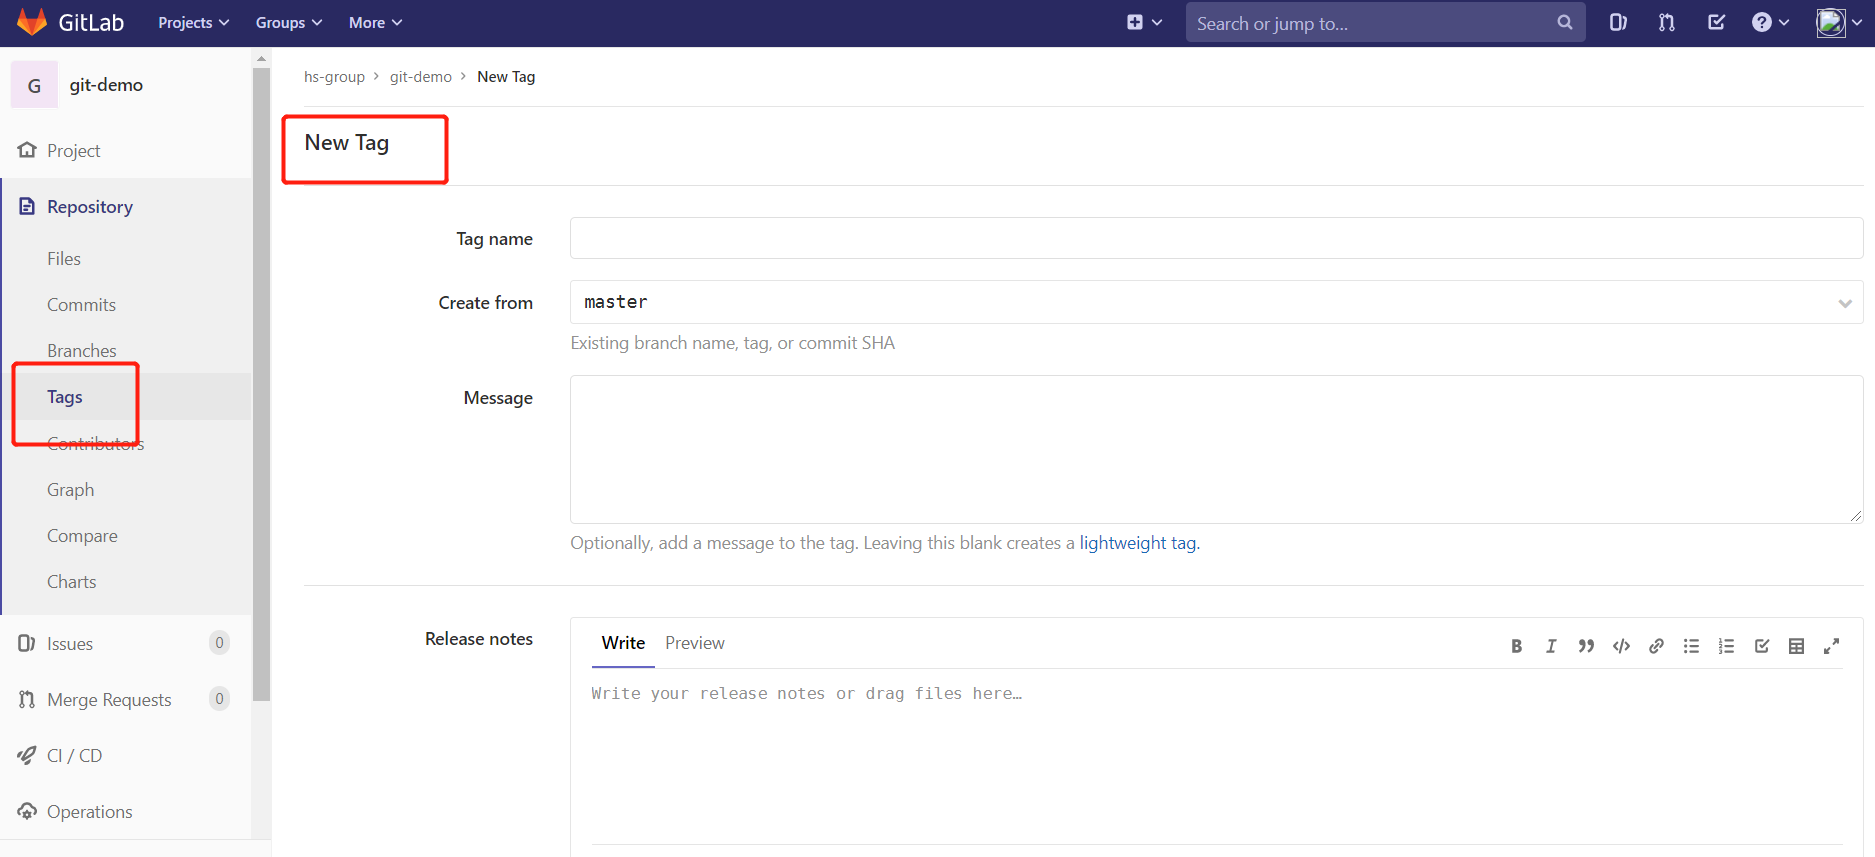
2.标签管理
