- 一、概述
- 二、环境部署
一、概述
分布式系统CI/CD流水线主要实现微服务的持续集成(CI)、持续交付(CD)、持续部署(CD)。
需要安装的中间件包括:
- Jenkins
- GitLab
- Docker
- Harbor
- SonarQube
- Kubernetes
部署环境
| 服务器 | IP | 用途 | 备注 |
|---|---|---|---|
| k8s-master | 172.51.216.81 | k8s、Helm | |
| devops-1 | 172.51.216.88 | Jenkins、Maven、docker | |
| devops-2 | 172.51.216.89 | GitLab、Harbor、SonarQube、docker |
二、环境部署
1.Jenkins
1.1.安装环境
1
2
3
4
5
# 操作系统:CentOS 7.6
# Jenkins版本:安装jenkins(安装的是最新的LTS版本)

# IP:172.51.216.88
# 端口:18888
1.2.环境准备
1
2
3
4
5
6
7
8
9
10
11
12
13
14
15
16
17
18
19
20
21
22
# 安装JDK
[root@aliyun-19 ~]# yum install java-1.8.0-openjdk* -y


[root@aliyun-19 ~]# cd /usr/lib/jvm
[root@aliyun-19 jvm]# ll
total 4
lrwxrwxrwx 1 root root   26 Jan 12 16:35 java -> /etc/alternatives/java_sdk
lrwxrwxrwx 1 root root   32 Jan 12 16:35 java-1.8.0 -> /etc/alternatives/java_sdk_1.8.0
lrwxrwxrwx 1 root root   40 Jan 12 16:35 java-1.8.0-openjdk -> /etc/alternatives/java_sdk_1.8.0_openjdk
drwxr-xr-x 9 root root 4096 Jan 12 16:35 java-1.8.0-openjdk-1.8.0.312.b07-1.el7_9.x86_64
lrwxrwxrwx 1 root root   34 Jan 12 16:35 java-openjdk -> /etc/alternatives/java_sdk_openjdk
lrwxrwxrwx 1 root root   21 Jan 12 16:35 jre -> /etc/alternatives/jre
lrwxrwxrwx 1 root root   27 Jan 12 16:35 jre-1.8.0 -> /etc/alternatives/jre_1.8.0
lrwxrwxrwx 1 root root   35 Jan 12 16:35 jre-1.8.0-openjdk -> /etc/alternatives/jre_1.8.0_openjdk
lrwxrwxrwx 1 root root   51 Jan 12 16:35 jre-1.8.0-openjdk-1.8.0.312.b07-1.el7_9.x86_64 -> java-1.8.0-openjdk-1.8.0.312.b07-1.el7_9.x86_64/jre
lrwxrwxrwx 1 root root   29 Jan 12 16:35 jre-openjdk -> /etc/alternatives/jre_openjdk

[root@aliyun-19 jvm]# java -version
openjdk version "1.8.0_312"
OpenJDK Runtime Environment (build 1.8.0_312-b07)
OpenJDK 64-Bit Server VM (build 25.312-b07, mixed mode)
1.3.安装Jenkins
1
2
3
4
5
6
7
8
9
10
11
12
13
14
15
16
17
18
19
20
21
22
23
[root@aliyun-8g ~]# yum install -y ca-certificates

# 导入jenkins源
[root@aliyun-8g ~]# wget -O /etc/yum.repos.d/jenkins.repo https://pkg.jenkins.io/redhat-stable/jenkins.repo

# 导入jenkins官方证书
[root@aliyun-8g ~]# rpm --import https://pkg.jenkins.io/redhat-stable/jenkins.io.key

# 安装jenkins(安装的是最新的LTS版本)
[root@aliyun-8g ~]# yum install -y jenkins


 # 查看yum安装文件
[root@aliyun-8g ~]# rpm -ql jenkins
/etc/init.d/jenkins
/etc/logrotate.d/jenkins
/etc/sysconfig/jenkins
/usr/lib/jenkins
/usr/lib/jenkins/jenkins.war
/usr/sbin/rcjenkins
/var/cache/jenkins
/var/lib/jenkins
/var/log/jenkins
1.4.配置Jenkins
1
2
3
4
5
6
# 修改Jenkins配置
vim /etc/sysconfig/jenkins

# 修改内容如下:
JENKINS_USER="root"
JENKINS_PORT="18888"
1
2
3
4
5
6
7
8
9
10
11
12
# 查询 yum 下载 Jenkins 安装的文件

[root@qfedu.com ~]# rpm -ql jenkins
/etc/init.d/jenkins         # 启动文件
/etc/logrotate.d/jenkins    # 日志分割配置文件
/etc/sysconfig/jenkins      # jenkins主配置文件
/usr/lib/jenkins            # 存放war包目录
/usr/lib/jenkins/jenkins.war   # war 包
/usr/sbin/rcjenkins         # 命令
/var/cache/jenkins          # war包解压目录 jenkins网页代码目录
/var/lib/jenkins            # jenkins 工作目录
/var/log/jenkins            # 日志
1.5.启动Jenkins服务
1
2
# 启动Jenkins
systemctl start jenkins
1.6.访问 Jenkins
1.打开浏览器访问
1
2
3
# 注意:本服务器把防火墙关闭了,如果开启防火墙,需要在防火墙添加端口

http://172.51.216.88:18888
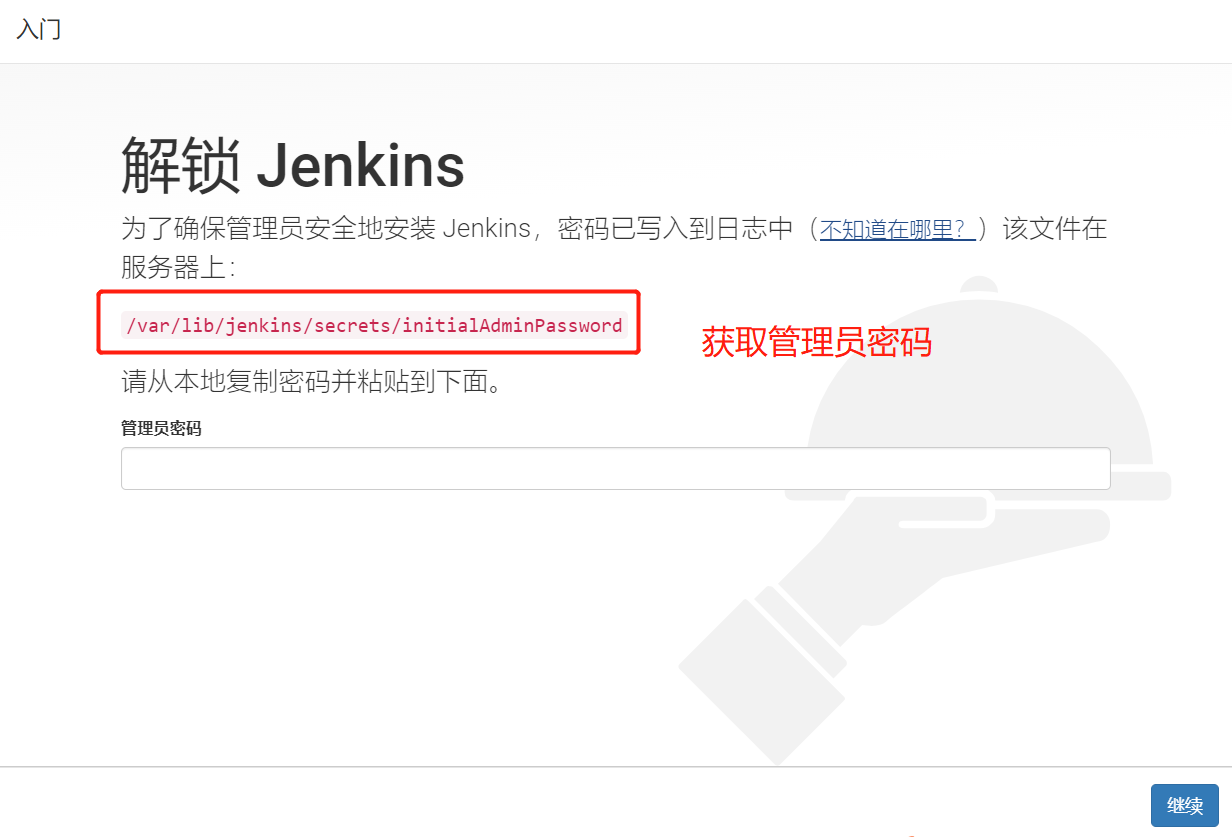
2.获取并输入admin账户密码
1
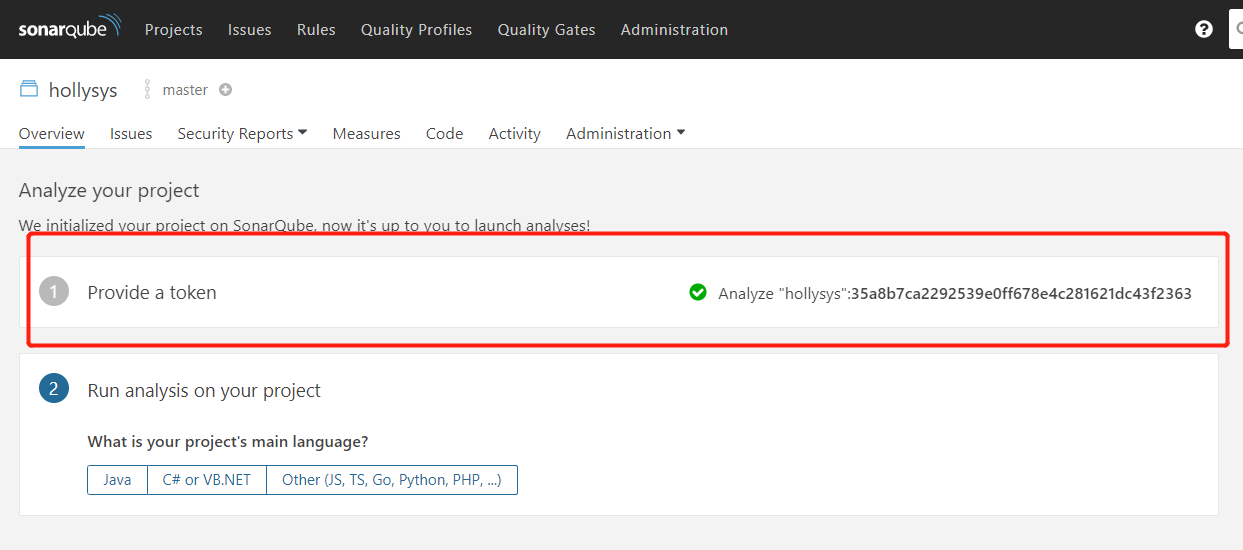
2
3
4
5
6
7
# 获取并输入admin账户密码
cat /var/lib/jenkins/secrets/initialAdminPassword


# admin密码
[root@aliyun-8g ~]# cat /var/lib/jenkins/secrets/initialAdminPassword
170a6aba47974e1bbb4d3337102ea3a7
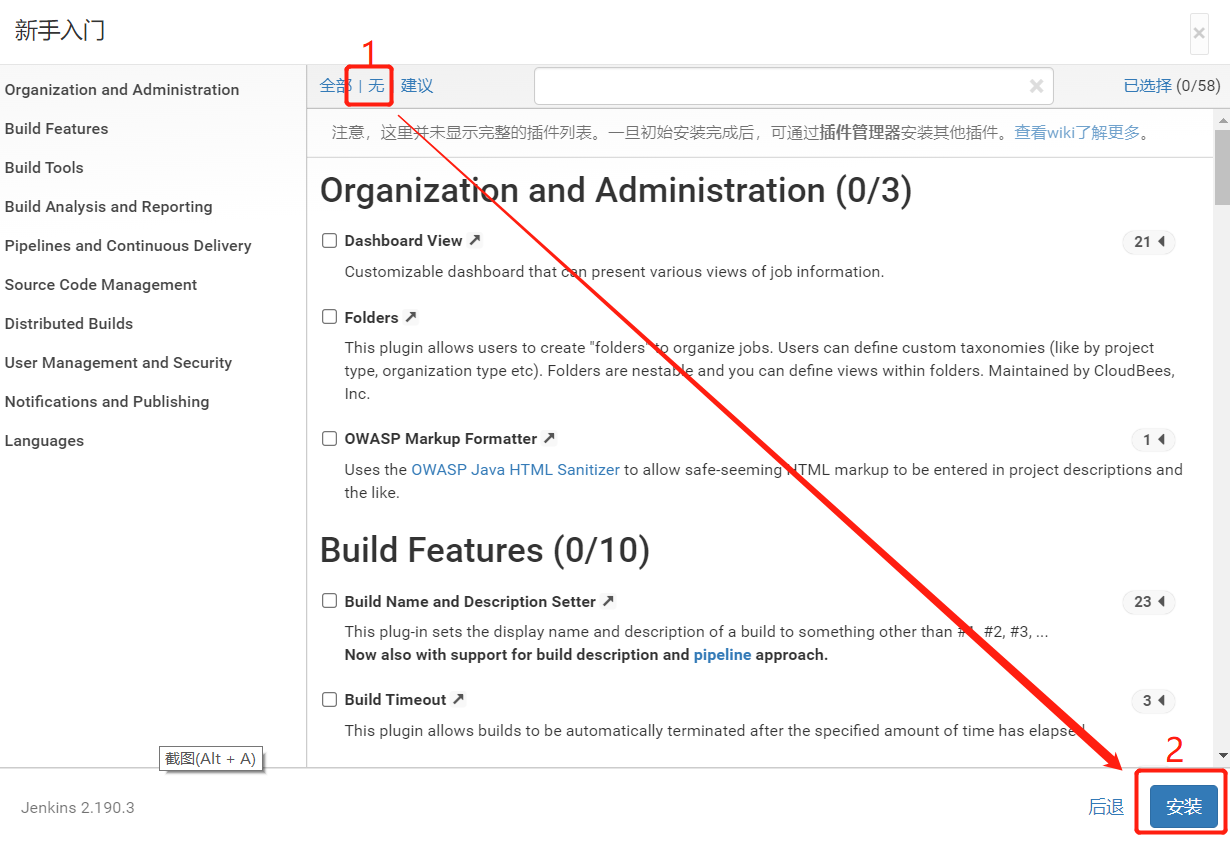
3.跳过插件安装
因为Jenkins插件需要连接默认官网下载,速度非常慢,而且经过会失败,所以我们暂时先跳过插件安装

4.创建新管理员
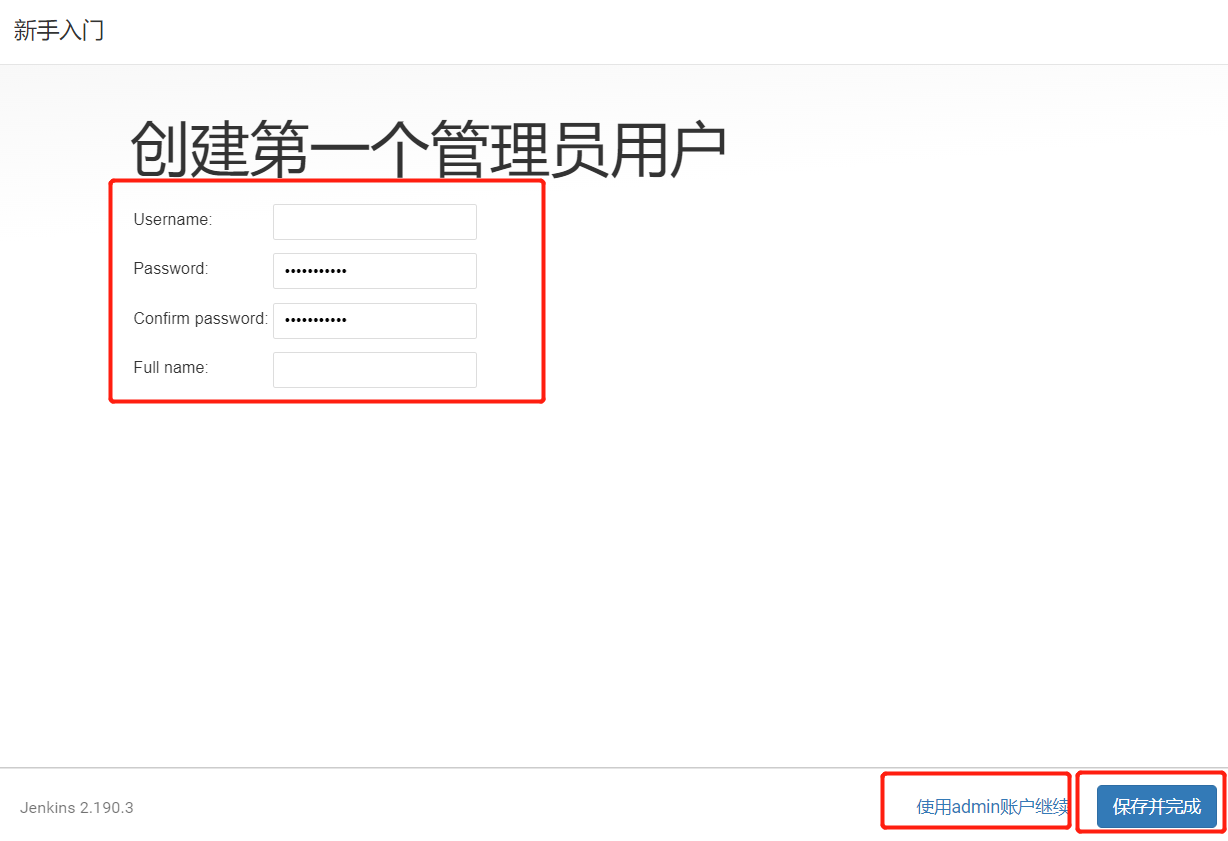
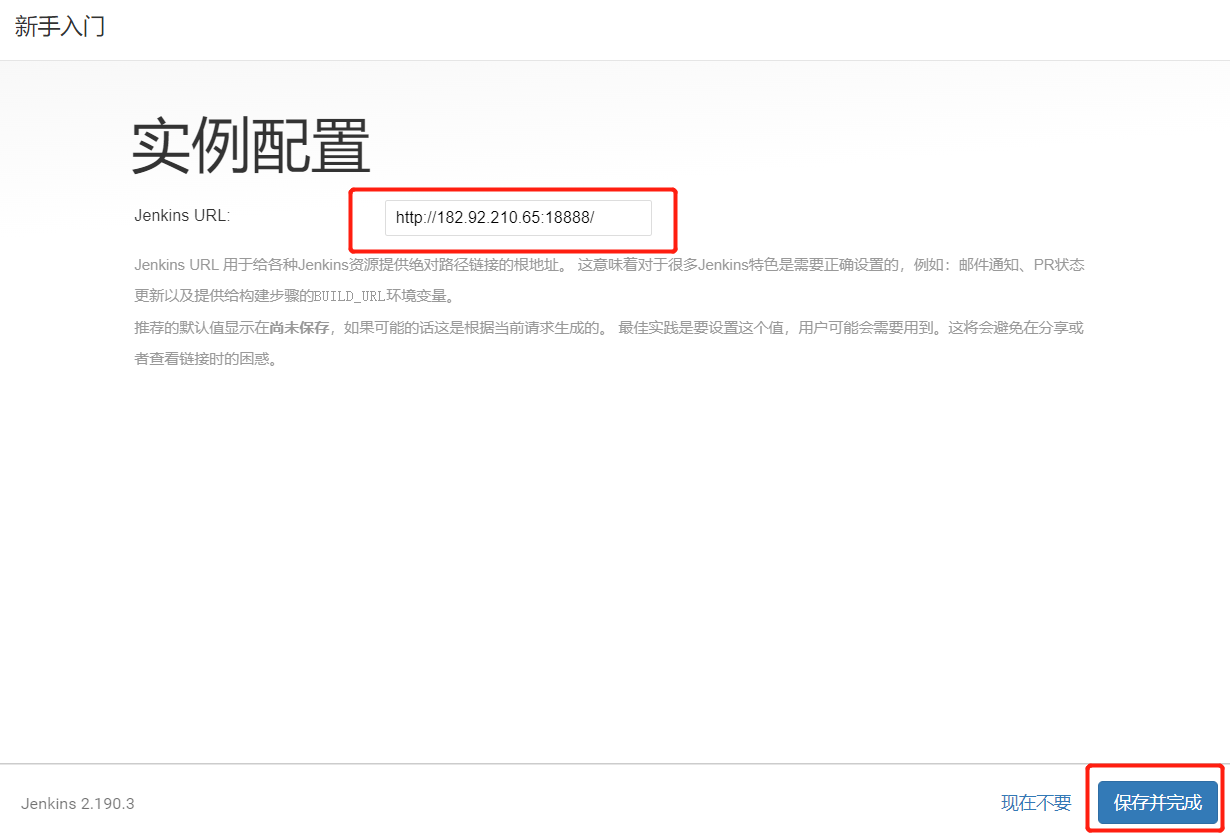

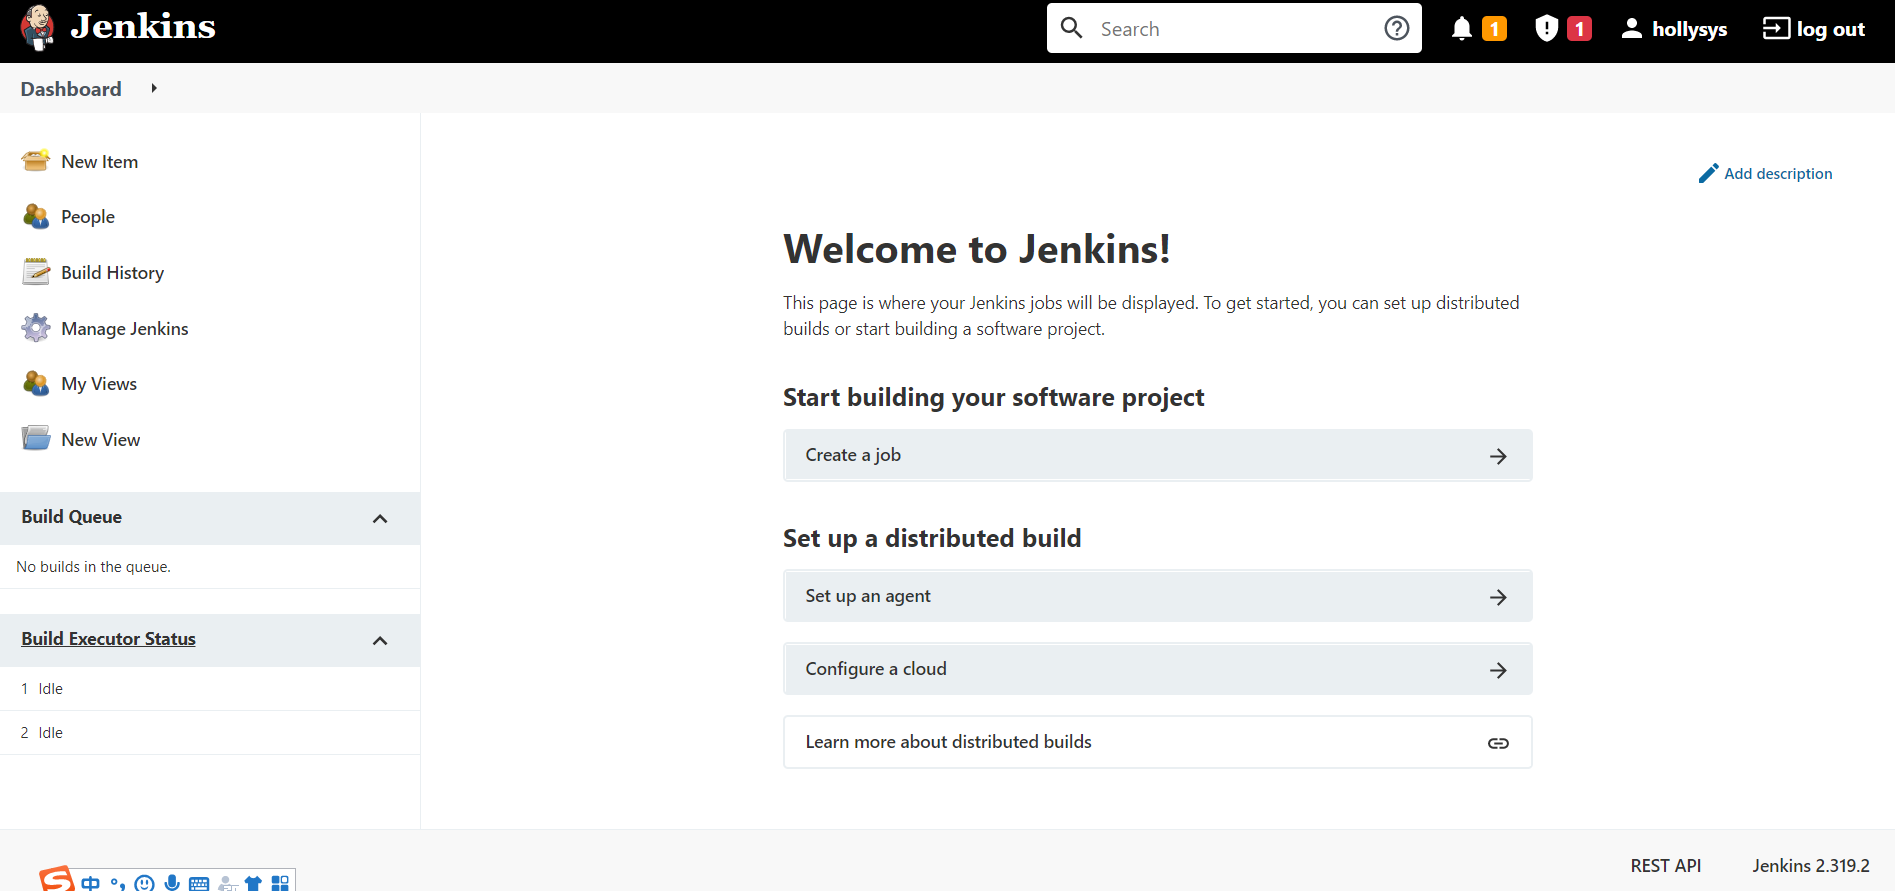
1
2
3
4
5
# 登录信息

http://172.51.216.88:18888/
iothub
******
1.7.修改Jenkins插件下载地址
Jenkins本身不提供很多功能,我们可以通过使用插件来满足我们的使用。例如从Gitlab拉取代码,使用Maven构建项目等功能需要依靠插件完成。接下来演示如何下载插件。
修改Jenkins插件下载地址 Jenkins国外官方插件地址下载速度非常慢,所以可以修改为国内插件地址:
1.下载插件地址
Jenkins->Manage Jenkins->Manage Plugins,点击Available
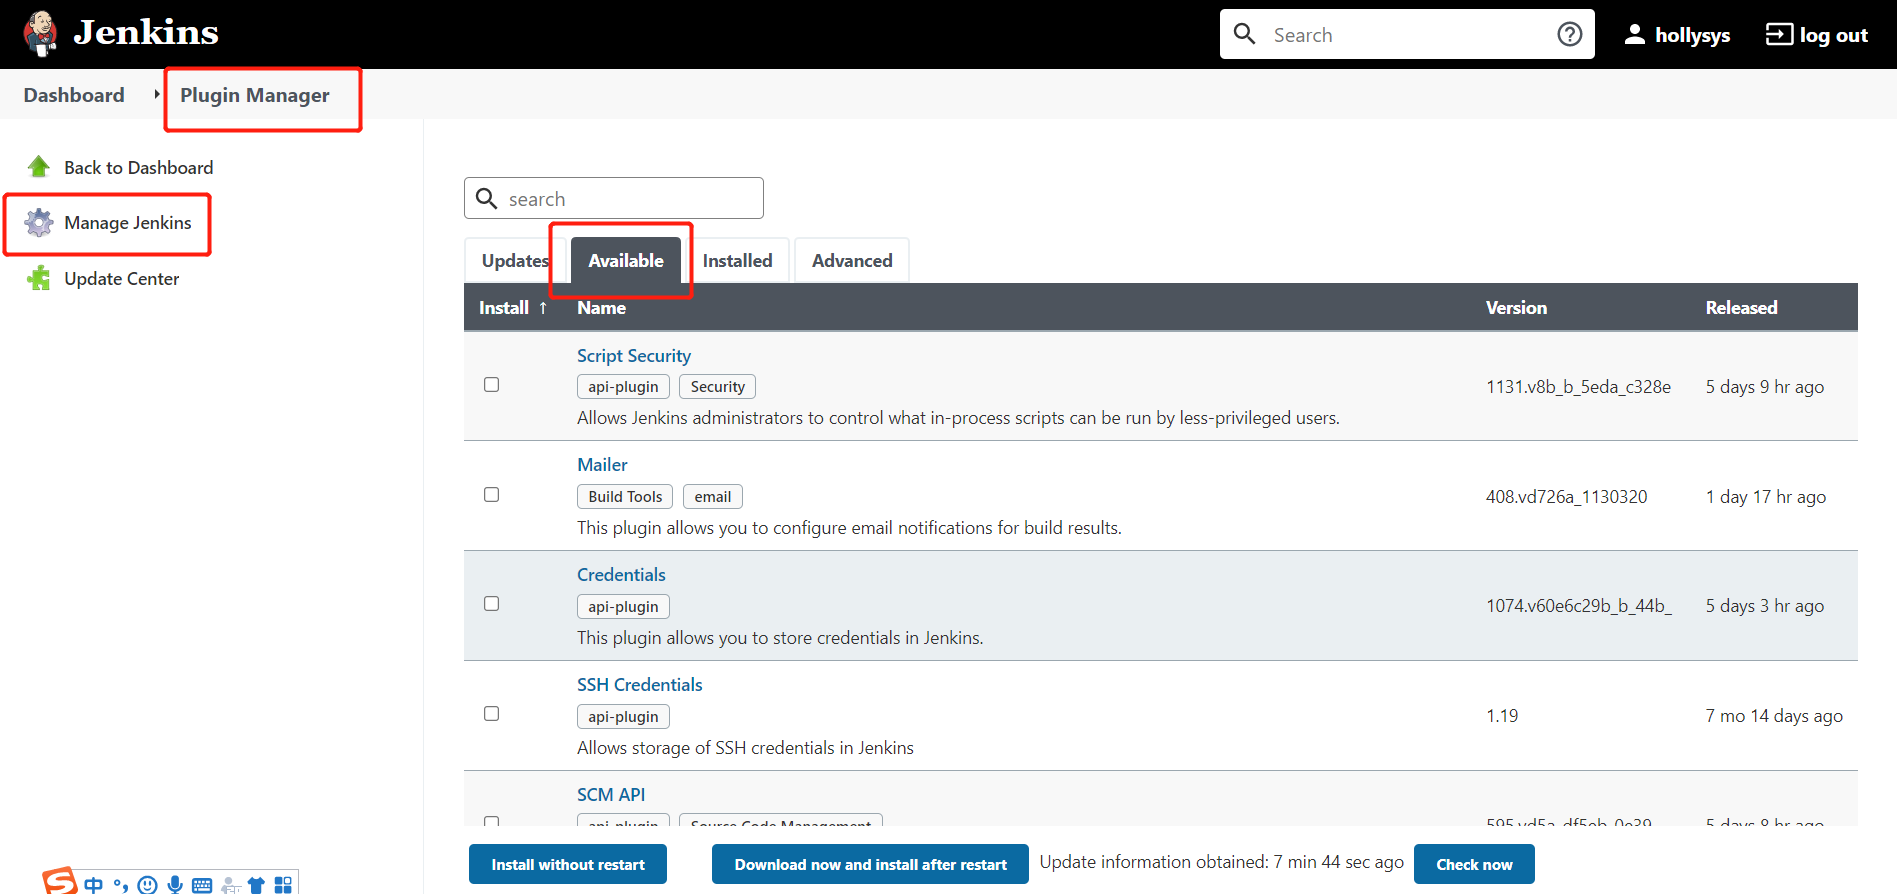
这样做是为了把Jenkins官方的插件列表下载到本地,接着修改地址文件,替换为国内插件地址
1
2
3
4
5
6
7
8
9
10
11
12
13
14
15
16
17
18
19
20
21
22
23
24
25
26
27
28
29
30
31
32
33
# Jenkins安装地址
[root@aliyun-19 jenkins]# pwd
/var/lib/jenkins
[root@aliyun-19 jenkins]# ll
total 68
-rw-r--r-- 1 root root 1644 Jan 12 17:17 config.xml
-rw-r--r-- 1 root root  156 Jan 12 16:54 hudson.model.UpdateCenter.xml
-rw------- 1 root root 1712 Jan 12 16:54 identity.key.enc
-rw-r--r-- 1 root root    7 Jan 12 17:17 jenkins.install.InstallUtil.lastExecVersion
-rw-r--r-- 1 root root    7 Jan 12 17:17 jenkins.install.UpgradeWizard.state
-rw-r--r-- 1 root root  184 Jan 12 17:16 jenkins.model.JenkinsLocationConfiguration.xml
-rw-r--r-- 1 root root  171 Jan 12 16:54 jenkins.telemetry.Correlator.xml
drwxr-xr-x 2 root root 4096 Jan 12 16:54 jobs
drwxr-xr-x 3 root root 4096 Jan 12 16:54 logs
-rw-r--r-- 1 root root  907 Jan 12 16:54 nodeMonitors.xml
drwxr-xr-x 2 root root 4096 Jan 12 16:54 nodes
drwxr-xr-x 2 root root 4096 Jan 12 16:54 plugins
-rw-r--r-- 1 root root   64 Jan 12 16:54 secret.key
-rw-r--r-- 1 root root    0 Jan 12 16:54 secret.key.not-so-secret
drwx------ 4 root root 4096 Jan 12 17:20 secrets
drwxr-xr-x 2 root root 4096 Jan 12 16:54 updates
drwxr-xr-x 2 root root 4096 Jan 12 16:54 userContent
drwxr-xr-x 3 root root 4096 Jan 12 17:14 users


# 插件下载地址 default.json
[root@aliyun-19 jenkins]# cd updates/
[root@aliyun-19 updates]# pwd
/var/lib/jenkins/updates
[root@aliyun-19 updates]# ll
total 2484
-rw-r--r-- 1 root root 2533571 Jan 12 16:54 default.json
-rw-r--r-- 1 root root    5902 Jan 12 16:54 hudson.tasks.Maven.MavenInstaller
2.替换为国内插件地址
1
2
3
4
5
6
7
8
9
# 替换位置 /var/lib/jenkins/updates

[root@aliyun-19 updates]# cd /var/lib/jenkins/updates
[root@aliyun-19 updates]# ll
total 2484
-rw-r--r-- 1 root root 2533571 Jan 12 16:54 default.json
-rw-r--r-- 1 root root    5902 Jan 12 16:54 hudson.tasks.Maven.MavenInstaller
[root@aliyun-19 updates]# pwd
/var/lib/jenkins/updates
1
2
3
4
5
# 替换代码
sed -i 's/http:\/\/updates.jenkinsci.org\/download/https:\/\/mirrors.tuna.tsinghua.edu.cn\/jenkins/g' default.json && sed -i 's/http:\/\/www.google.com/https:\/\/www.baidu.com/g' default.json


[root@aliyun-19 updates]# sed -i 's/http:\/\/updates.jenkinsci.org\/download/https:\/\/mirrors.tuna.tsinghua.edu.cn\/jenkins/g' default.json && sed -i 's/http:\/\/www.google.com/https:\/\/www.baidu.com/g' default.json
3.更新站点地址
最后,Manage Plugins点击Advanced,把Update Site改为国内插件下载地址
1
https://mirrors.tuna.tsinghua.edu.cn/jenkins/updates/update-center.json
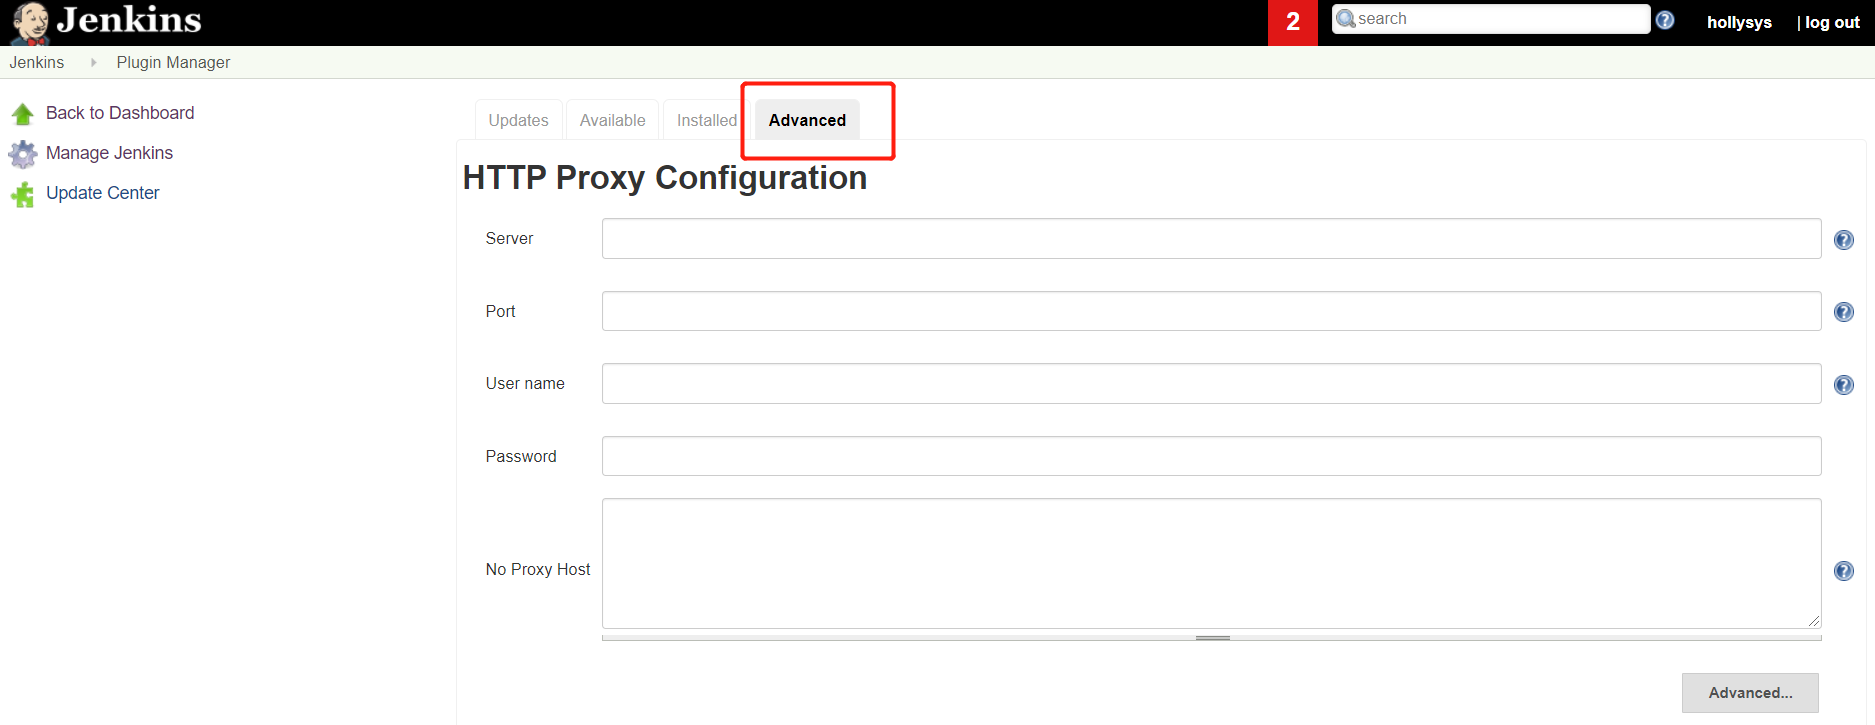
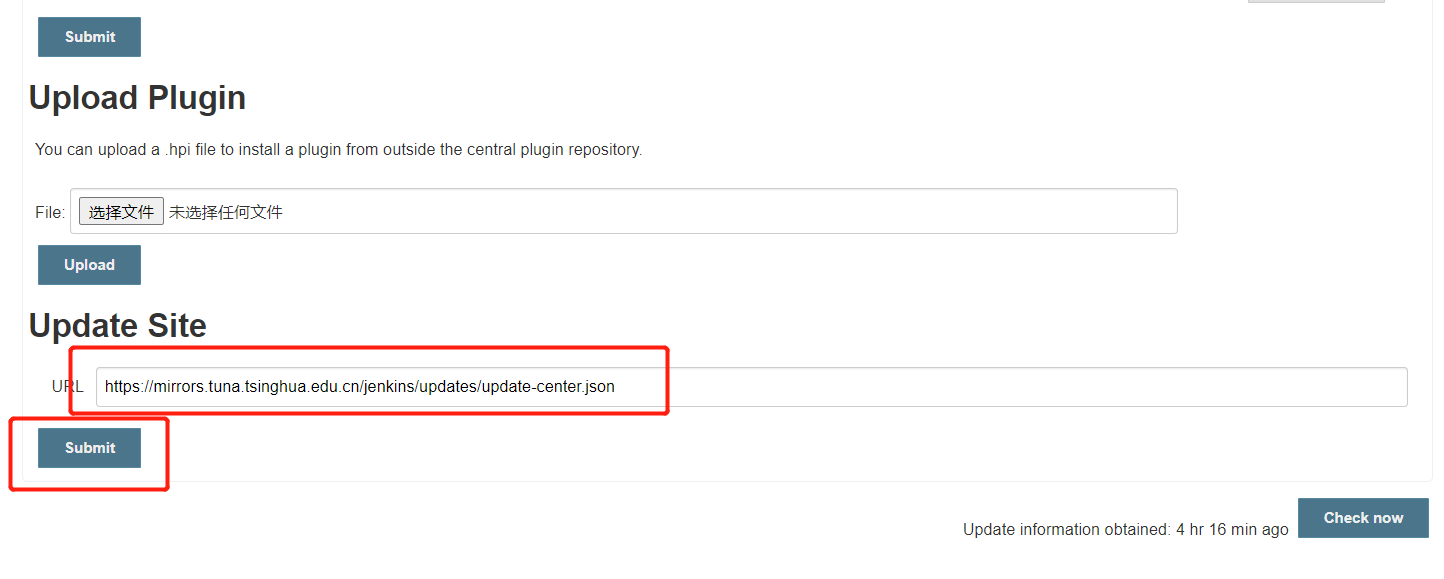
4.重启Jenkins
Sumbit后,在浏览器输入: http://172.51.216.88:18888/restart ,重启Jenkins。
1.8.系统中文汉化
下载中文汉化插件
Jenkins->Manage Jenkins->Manage Plugins,点击Available,搜索”Chinese”

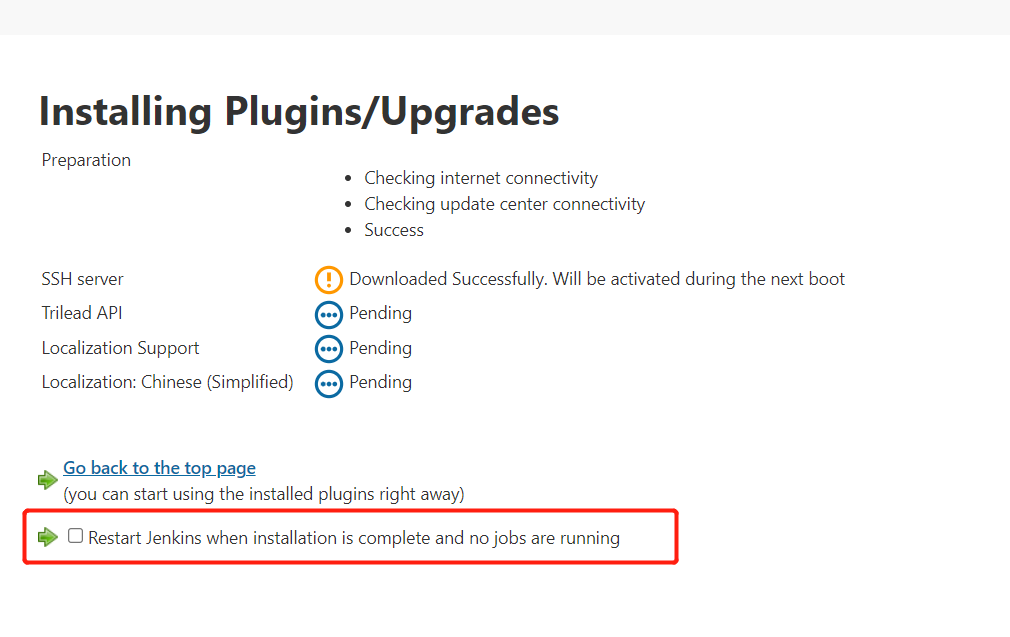
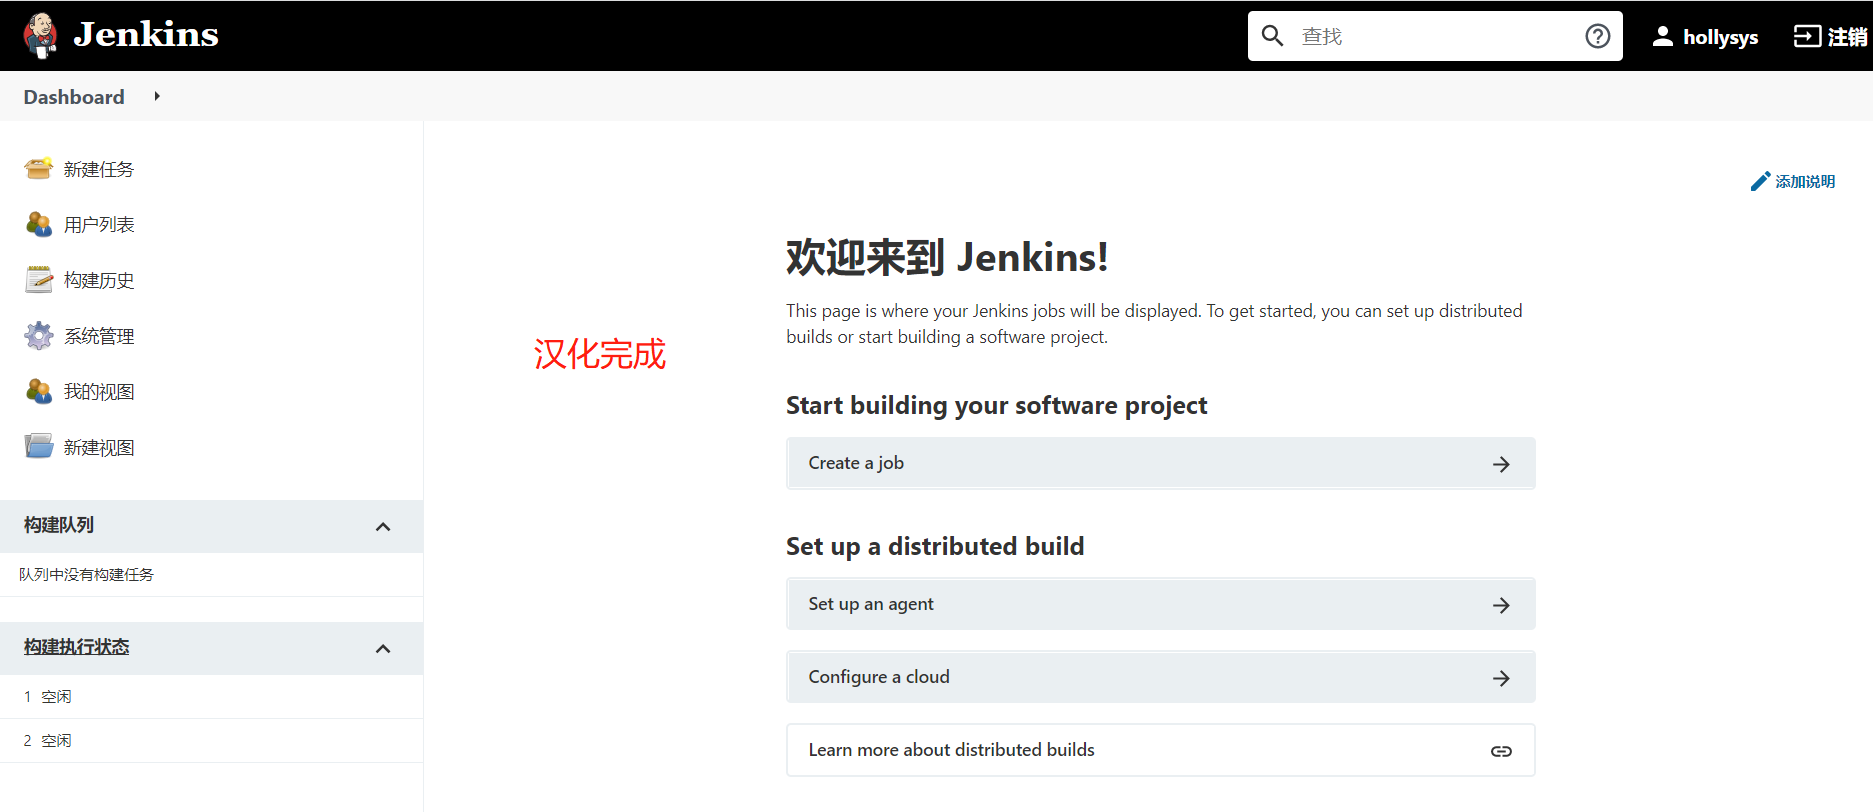
1.9.安装Git插件和Git工具
1.安装Git
CentOS7上安装Git工具:
1
2
# yum install git -y
# git --version
2.安装Git插件

1.10.Maven安装和配置
在Jenkins集成服务器上,我们需要安装Maven来编译和打包项目。
1.10.1.安装Maven
- 先上传Maven软件到Jenkins服务器
- tar -xzf apache-maven-3.6.2-bin.tar.gz 解压
- mkdir -p /opt/maven 创建目录
- mv apache-maven-3.6.2/* /opt/maven 移动文件
1
2
3
4
5
6
7
8
9
10
11
12
13
[root@aliyun-8g ~]# ll
total 8932
-rw-r--r-- 1 root root 9142315 Jan 13 17:24 apache-maven-3.6.2-bin.tar.gz

[root@aliyun-8g ~]# tar -zxf apache-maven-3.6.2-bin.tar.gz
[root@aliyun-8g ~]# ll
total 8936
drwxr-xr-x 6 root root    4096 Jan 13 17:25 apache-maven-3.6.2
-rw-r--r-- 1 root root 9142315 Jan 13 17:24 apache-maven-3.6.2-bin.tar.gz


[root@aliyun-8g ~]# mkdir -p /opt/maven
[root@aliyun-8g ~]# mv apache-maven-3.6.2/* /opt/maven
1.10.2.配置环境变量
1
2
3
4
5
6
7
8
9
10
11
12
13
14
15
16
17
18
[root@aliyun-8g maven]# vi /etc/profile

export JAVA_HOME=/usr/lib/jvm/java-1.8.0-openjdk
export MAVEN_HOME=/opt/maven
export PATH=$PATH:$JAVA_HOME/bin:$MAVEN_HOME/bin


# 配置生效
[root@aliyun-8g ~]# source /etc/profile


# 查找Maven版本
[root@aliyun-8g ~]# mvn -v
Apache Maven 3.6.2 (40f52333136460af0dc0d7232c0dc0bcf0d9e117; 2019-08-27T23:06:16+08:00)
Maven home: /opt/maven
Java version: 1.8.0_312, vendor: Red Hat, Inc., runtime: /usr/lib/jvm/java-1.8.0-openjdk-1.8.0.312.b07-1.el7_9.x86_64/jre
Default locale: en_US, platform encoding: UTF-8
OS name: "linux", version: "3.10.0-957.21.3.el7.x86_64", arch: "amd64", family: "unix"
1.10.3.全局配置JDK和Maven
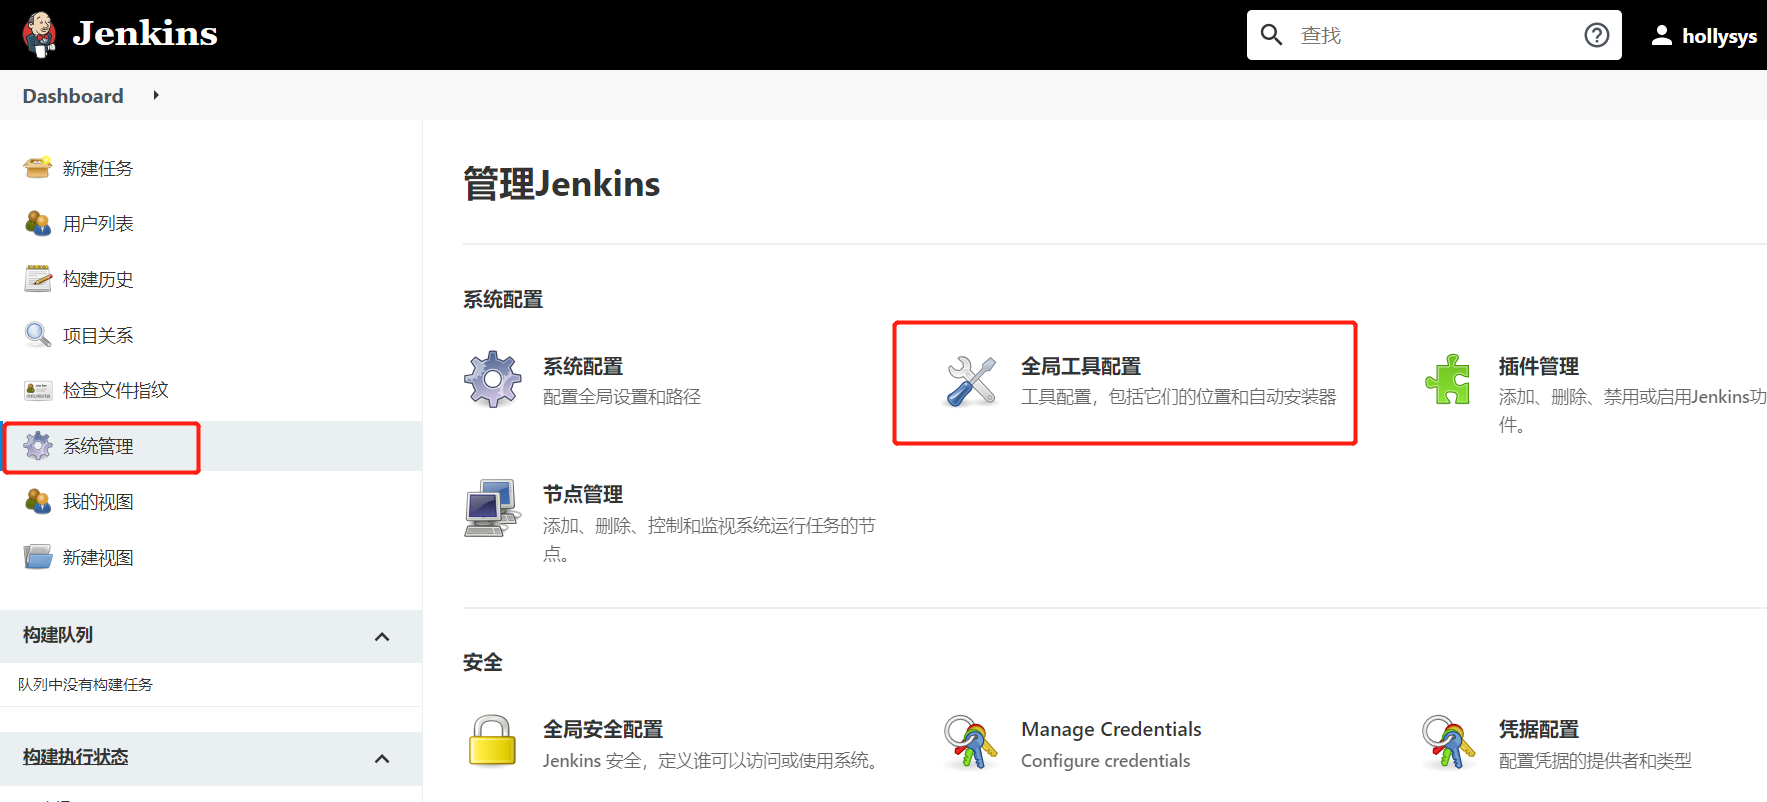
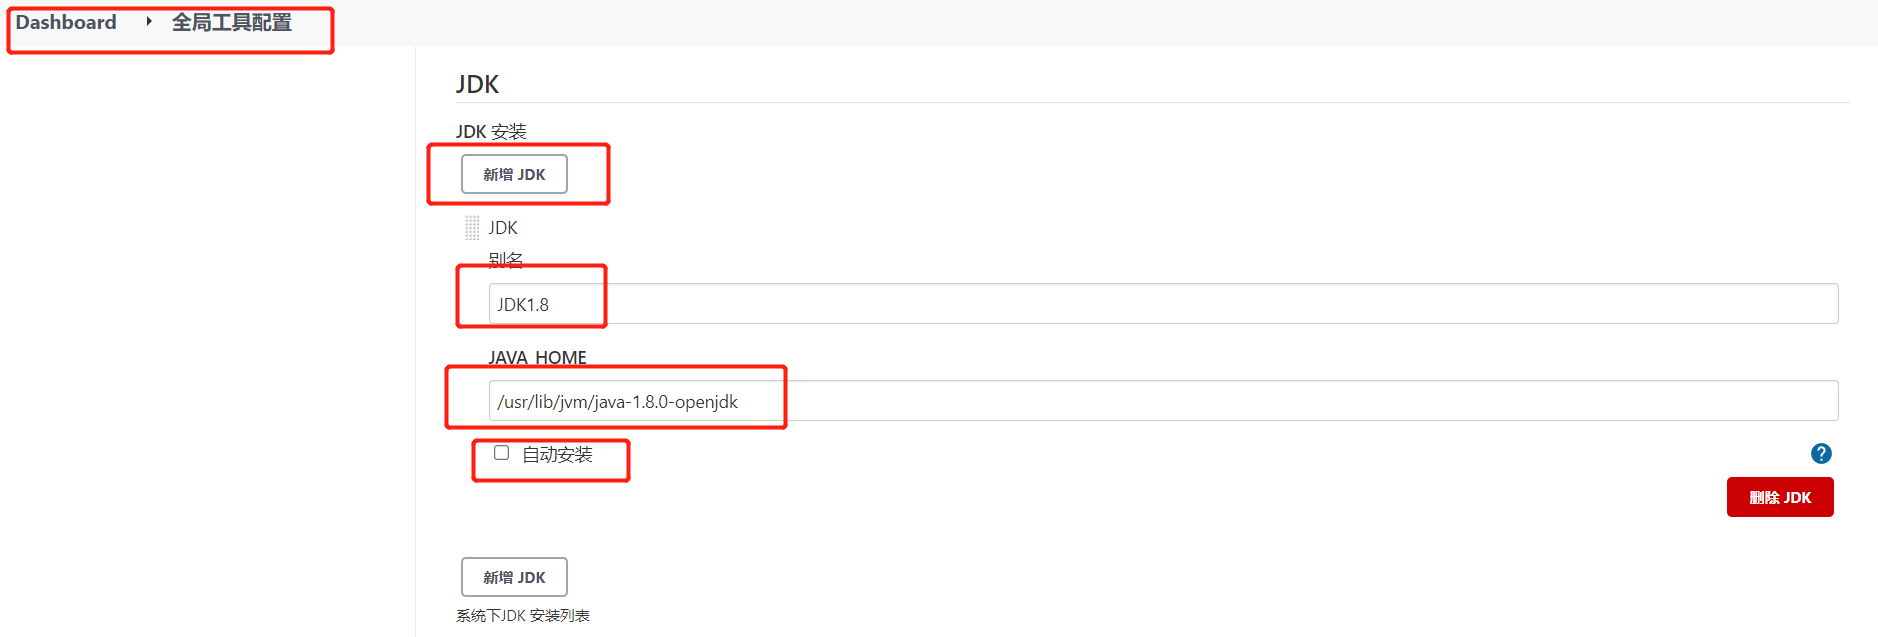
Jenkins->Global Tool Configuration->JDK->新增JDK,配置如下:
/usr/lib/jvm/java-1.8.0-openjdk
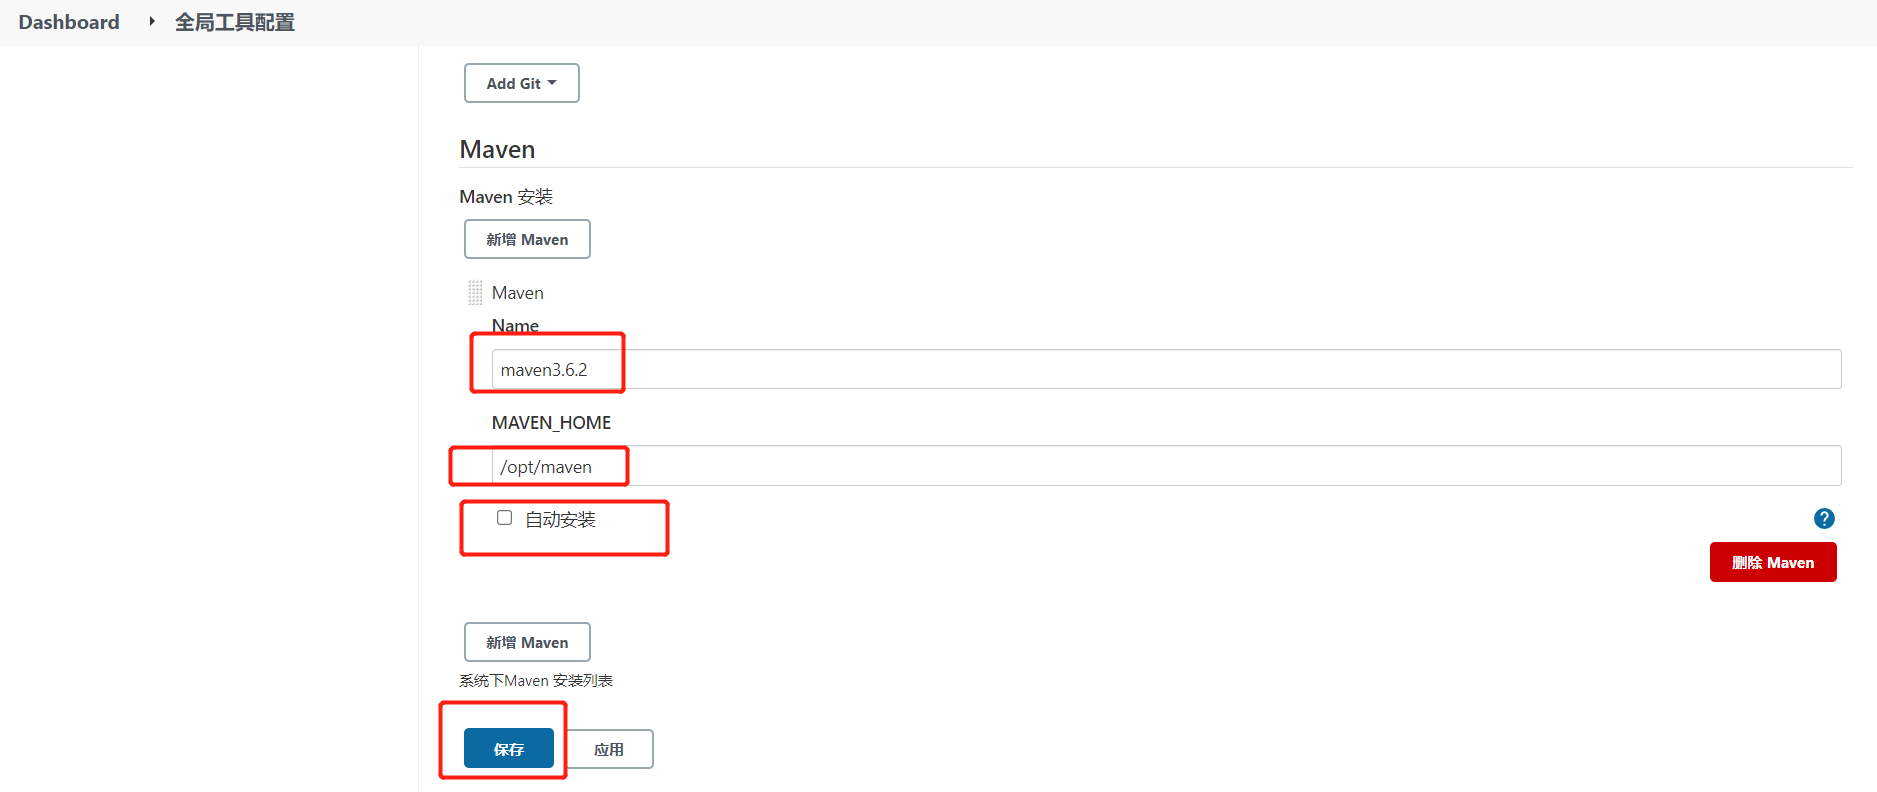
Jenkins->Global Tool Configuration->Maven->新增Maven,配置如下:
/opt/maven
1.10.4.添加Jenkins全局变量
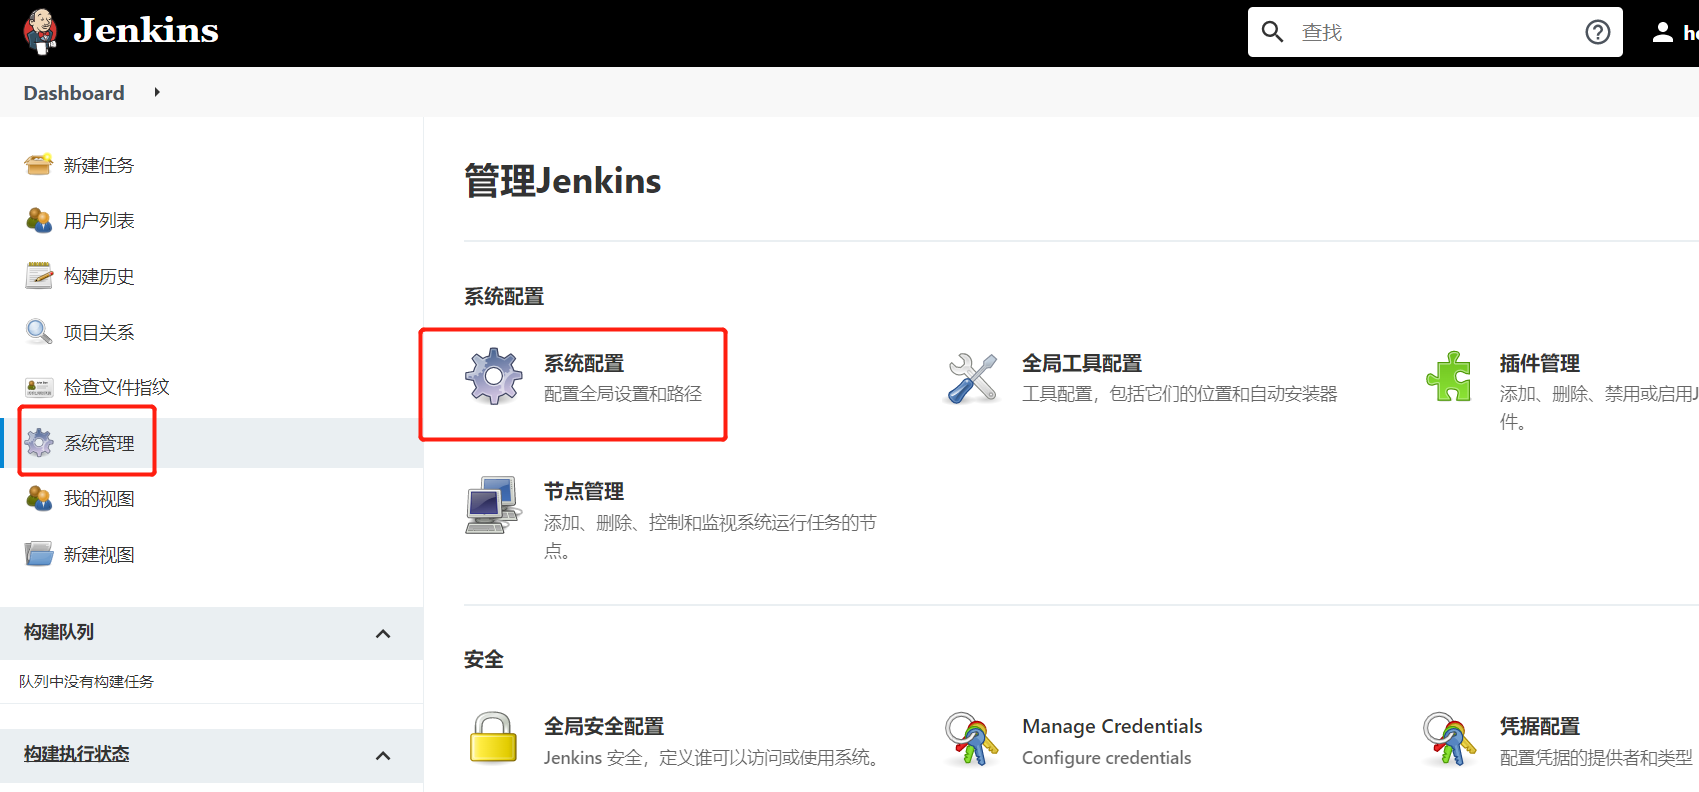
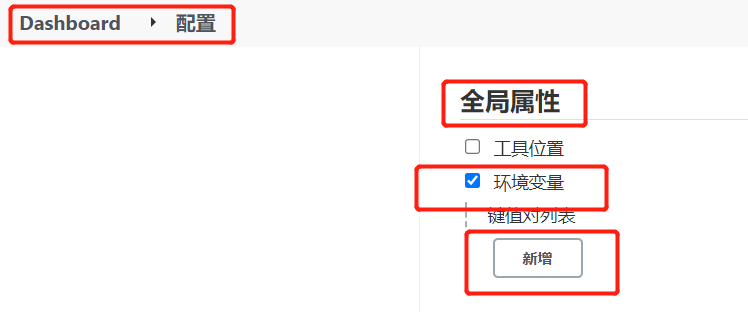
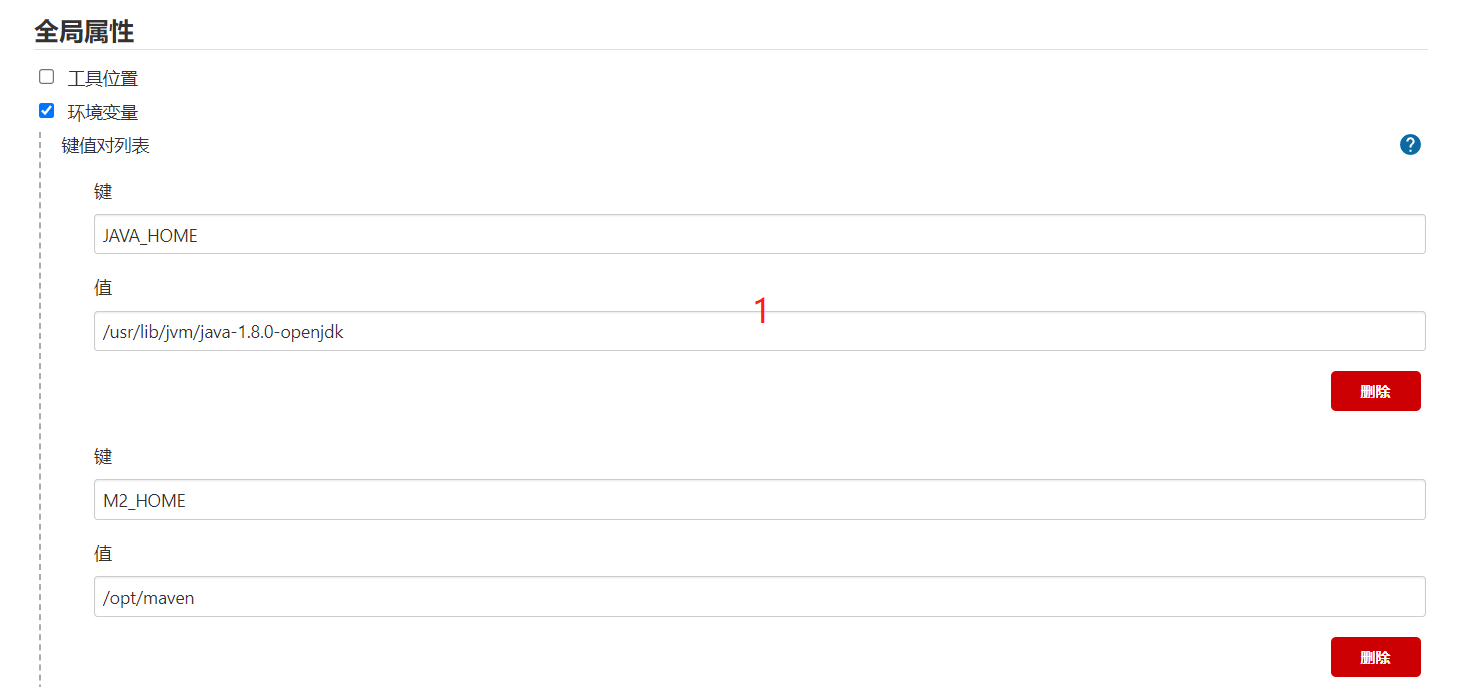
Manage Jenkins->Configure System->Global Properties ,添加三个全局变量 JAVA_HOME、M2_HOME、PATH+EXTRA
1
2
3
JAVA_HOME=/usr/lib/jvm/java-1.8.0-openjdk
M2_HOME=/opt/maven
PATH+EXTRA=$M2_HOME/bin

1.10.5.修改Maven的settings.xml
1
2
3
4
5
6
7
8
9
10
11
12
13
mkdir /root/repo 创建本地仓库目录
vim /opt/maven/conf/settings.xml

本地仓库改为:/root/repo/
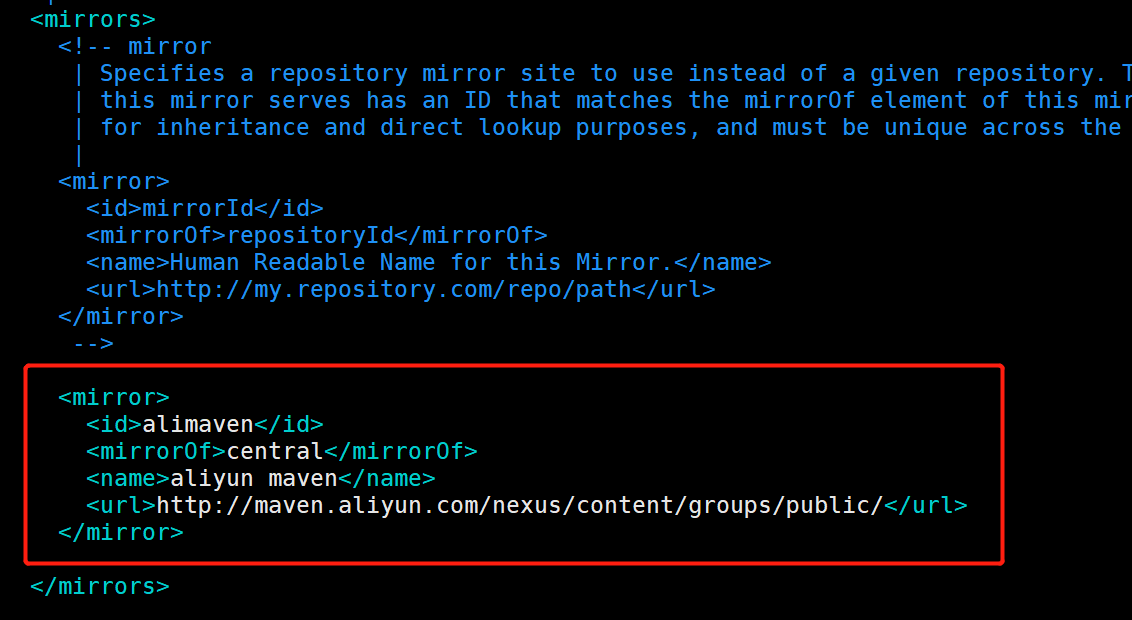
添加阿里云私服地址:


	 <mirror>
      <id>alimaven</id>
      <mirrorOf>central</mirrorOf>
      <name>aliyun maven</name>
      <url>http://maven.aliyun.com/nexus/content/groups/public/</url>
     </mirror>

1.11.常用插件安装
1.11.1.系统中文汉化插件
下载中文汉化插件
Jenkins->Manage Jenkins->Manage Plugins,点击Available,搜索”Chinese”

1.11.2.用户权限管理插件
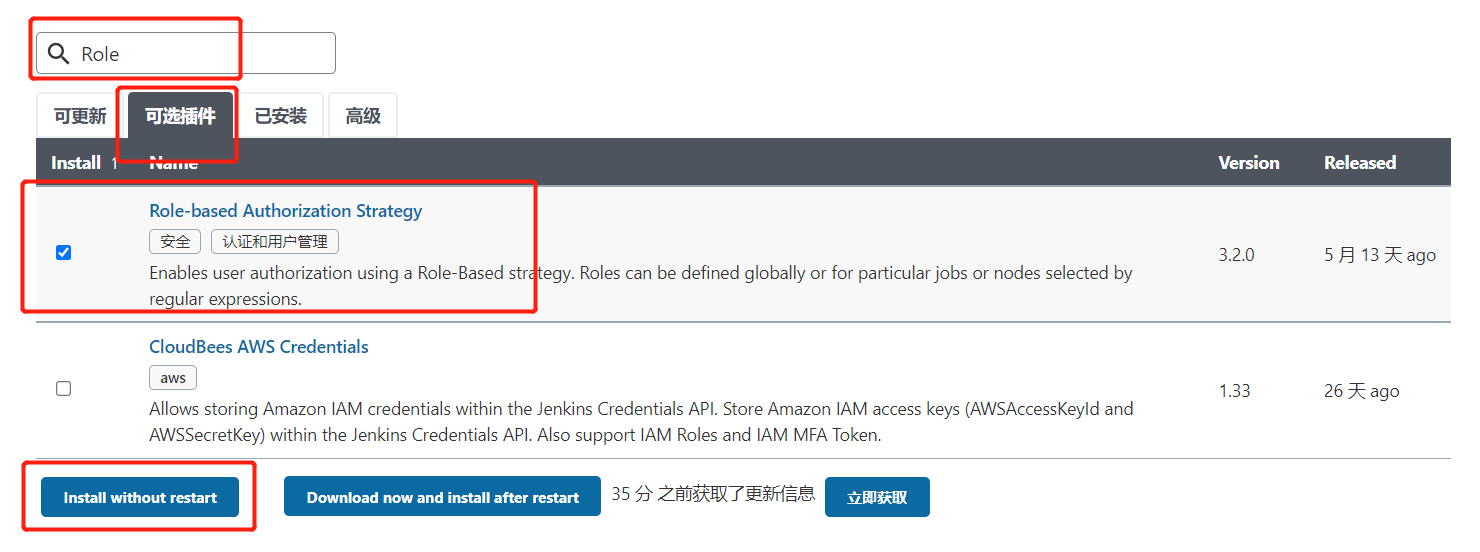
利用Role-based Authorization Strategy 插件来管理Jenkins用户权限
安装Role-based Authorization Strategy插件
1.11.3.Git插件

1.11.4.Jenkins凭证管理插件
凭据可以用来存储需要密文保护的数据库密码、Gitlab密码信息、Docker私有仓库密码等,以便Jenkins可以和这些第三方的应用进行交互。
安装Credentials Binding插件 要在Jenkins使用凭证管理功能,需要安装Credentials Binding插件

注意:新版本好像自动安装了
1.11.5.安装Gitlab Hook插件
需要安装两个插件:Gitlab Hook和GitLab


1.11.6.Email Extension插件
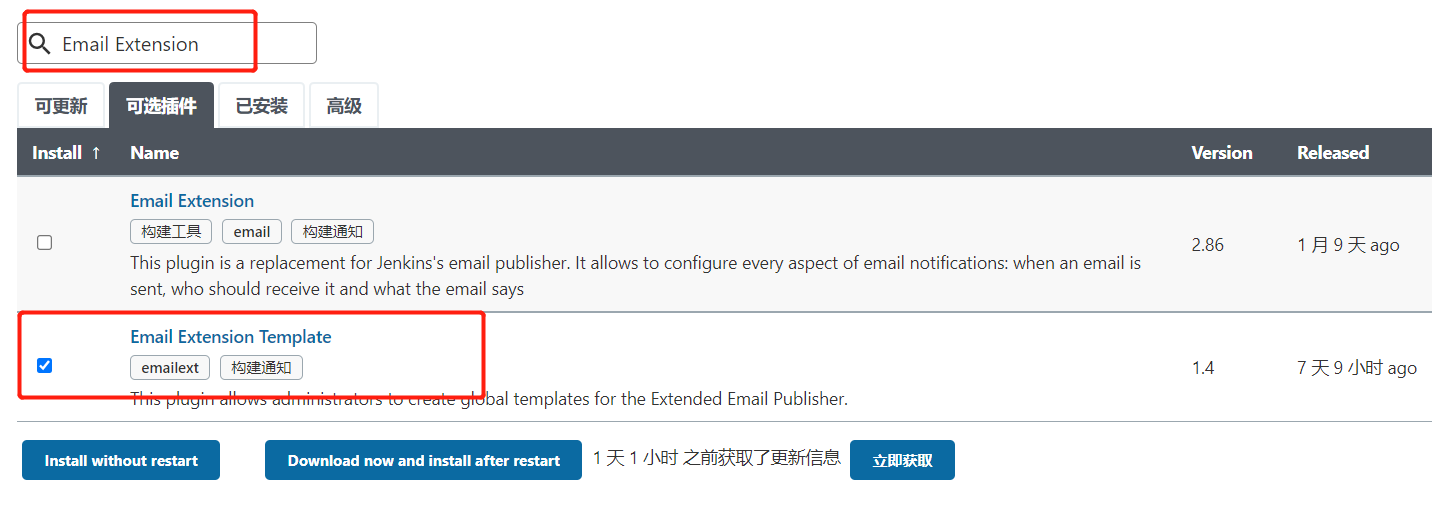
1.11.7.Git分支标签选择参数插件

1.11.8.多选参数插件
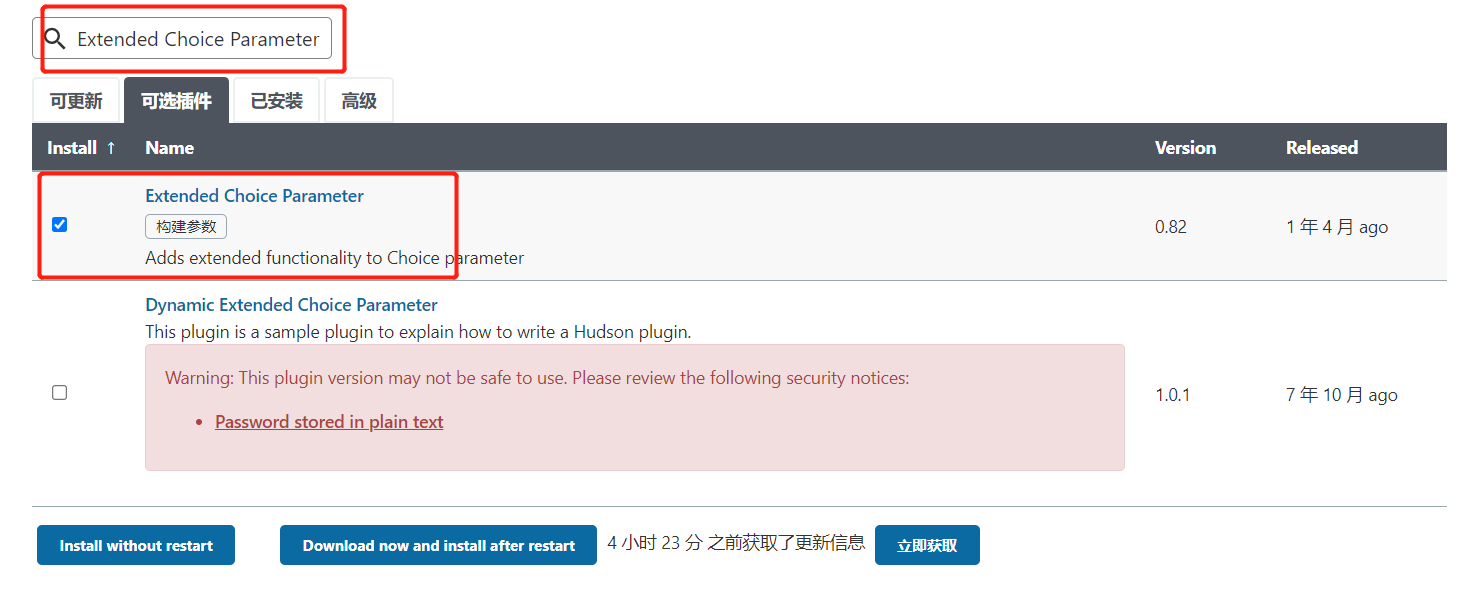
1.11.9.SSH 插件
1.Publish Over SSH 插件
Publish Over SSH有安全漏洞,暂时无法安装
https://updates.jenkins-ci.org/download/plugins/
2.安装SSH插件

1.11.10.SonarQube Scanner插件

1.11.11.Pipeline插件

2.GitLab
2.1.安装环境
1
2
3
4
5
# 操作系统:CentOS 7.6
# GitLab版本:gitlab-ce-12.4.2-ce.0.el6.x86_64.rpm

# IP:172.51.216.89
# 端口:18080
2.2.环境准备
1
2
3
4
5
6
7
8
9
10
11
12
13
14
15
16
17
18
19
20
21
22
23
24
25
26
27
# 准备工作


# 1. 安装相关依赖
yum -y install policycoreutils openssh-server openssh-clients postfix


# 2. 启动ssh服务&设置为开机启动
systemctl enable sshd && sudo systemctl start sshd


# 3. 设置postfix开机自启,并启动,postfix支持gitlab发信功能
systemctl enable postfix && systemctl start postfix


# 4. 开放ssh以及http服务,然后重新加载防火墙列表
firewall-cmd --add-service=ssh --permanent
firewall-cmd --add-service=http --permanent
firewall-cmd --reload
# 如果关闭防火墙就不需要做以上配置

# 防火墙已关闭
[root@hollysys ~]# systemctl status firewalld
● firewalld.service - firewalld - dynamic firewall daemon
   Loaded: loaded (/usr/lib/systemd/system/firewalld.service; disabled; vendor preset: enabled)
   Active: inactive (dead)
     Docs: man:firewalld(1)
2.3.安装GitLab
1
2
3
4
5
6
7
8
9
10
11
12
13
14
15
16
17
18
19
20
21
22
23
24
25
26
27
28
29
30
31
32
33
34
35
36
37
38
39
40
41
42
43
# 5. 下载gitlab包,并且安装
# 在线下载安装包:
wget https://mirrors.tuna.tsinghua.edu.cn/gitlab-ce/yum/el6/gitlab-ce-12.4.2-ce.0.el6.x86_64.rpm

# 安装:
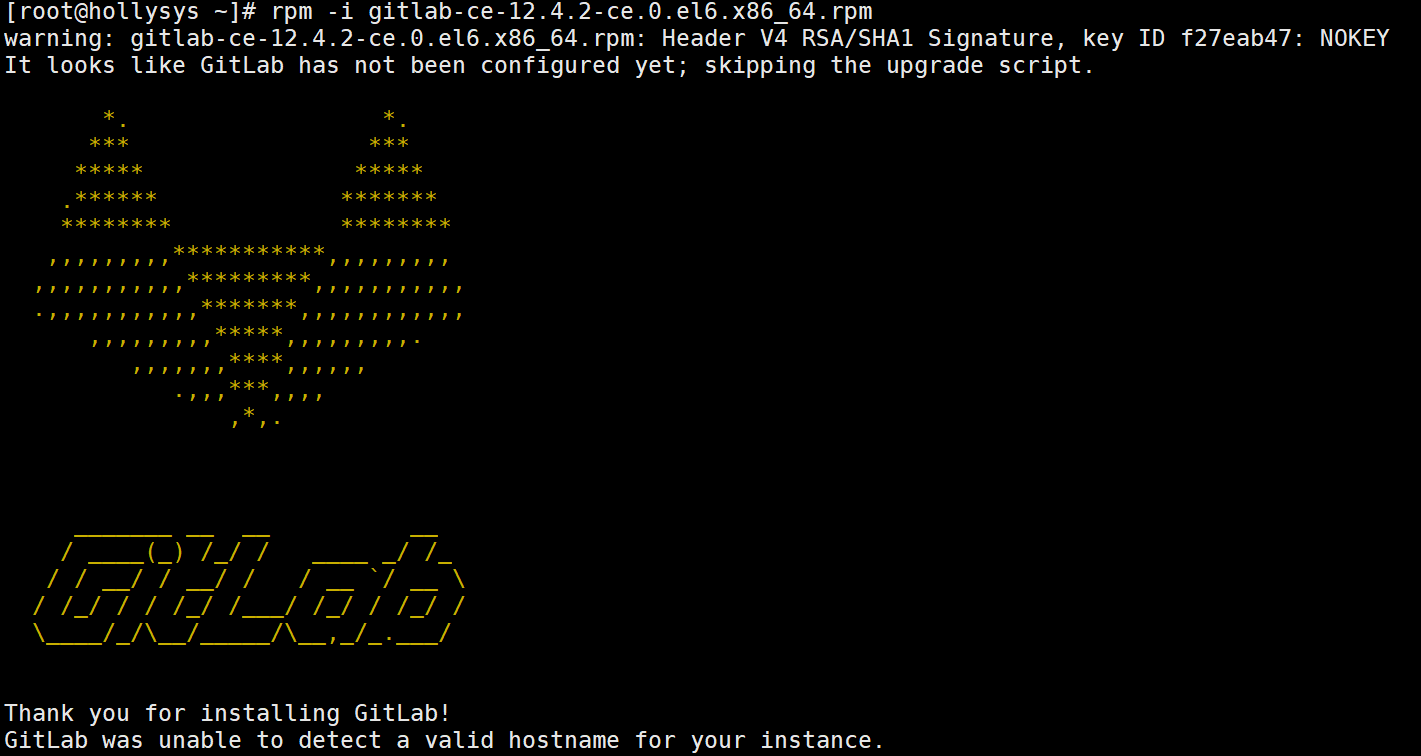
rpm -i gitlab-ce-12.4.2-ce.0.el6.x86_64.rpm


[root@hollysys ~]# rpm -i gitlab-ce-12.4.2-ce.0.el6.x86_64.rpm
warning: gitlab-ce-12.4.2-ce.0.el6.x86_64.rpm: Header V4 RSA/SHA1 Signature, key ID f27eab47: NOKEY
It looks like GitLab has not been configured yet; skipping the upgrade script.

       *.                  *.
      ***                 ***
     *****               *****
    .******             *******
    ********            ********
   ,,,,,,,,,***********,,,,,,,,,
  ,,,,,,,,,,,*********,,,,,,,,,,,
  .,,,,,,,,,,,*******,,,,,,,,,,,,
      ,,,,,,,,,*****,,,,,,,,,.
         ,,,,,,,****,,,,,,
            .,,,***,,,,
                ,*,.


     _______ __  __          __
    / ____(_) /_/ /   ____ _/ /_
   / / __/ / __/ /   / __ `/ __ \
  / /_/ / / /_/ /___/ /_/ / /_/ /
  \____/_/\__/_____/\__,_/_.___/


Thank you for installing GitLab!
GitLab was unable to detect a valid hostname for your instance.
Please configure a URL for your GitLab instance by setting `external_url`
configuration in /etc/gitlab/gitlab.rb file.
Then, you can start your GitLab instance by running the following command:
  sudo gitlab-ctl reconfigure

For a comprehensive list of configuration options please see the Omnibus GitLab readme
https://gitlab.com/gitlab-org/omnibus-gitlab/blob/master/README.md
2.4.配置GitLab
1
2
3
4
5
6
7
8
9
10
11
12
# 6. 修改gitlab配置
vi /etc/gitlab/gitlab.rb

#修改gitlab访问地址和端口,默认为80,我们改为82
external_url 'http://172.51.216.89:18080'
nginx['listen_port'] = 18080


# 8. 把端口添加到防火墙(此步改为开阿里云端口)
firewall-cmd --zone=public --add-port=82/tcp --permanent
firewall-cmd --reload
# 启动成功后,看到以下修改管理员root密码的页面,修改密码后,然后登录即可
2.5.启动 GitLab 服务
1
2
3
4
5
6
7
8
9
10
11
12
13
14
15
16
17
18
19
20
21
22
23
24
25
26
# 初始化服务
[root@hollysys ~]# gitlab-ctl reconfigure
......
Running handlers:
Running handlers complete
Chef Client finished, 526/1425 resources updated in 02 minutes 55 seconds
gitlab Reconfigured!


# 启动服务
[root@hollysys ~]# gitlab-ctl restart
ok: run: alertmanager: (pid 15092) 1s
ok: run: gitaly: (pid 15105) 0s
ok: run: gitlab-exporter: (pid 15124) 1s
ok: run: gitlab-workhorse: (pid 15132) 0s
ok: run: grafana: (pid 15144) 0s
ok: run: logrotate: (pid 15156) 1s
ok: run: nginx: (pid 15163) 0s
ok: run: node-exporter: (pid 15170) 1s
ok: run: postgres-exporter: (pid 15251) 0s
ok: run: postgresql: (pid 15262) 1s
ok: run: prometheus: (pid 15271) 0s
ok: run: redis: (pid 15282) 0s
ok: run: redis-exporter: (pid 15316) 1s
ok: run: sidekiq: (pid 15325) 0s
ok: run: unicorn: (pid 15336) 0s
2.6.使用浏览器访问 GitLab
1
2
3
4
5
6
地址:http://172.51.216.89:18080/
root
*******

# 首次登陆之前,需要修改下 GitLab 提供的 root 账户的密码,
# 密码要求 8 位以上,包含大小写子母和特殊符号。因此我们修改密码为 *******
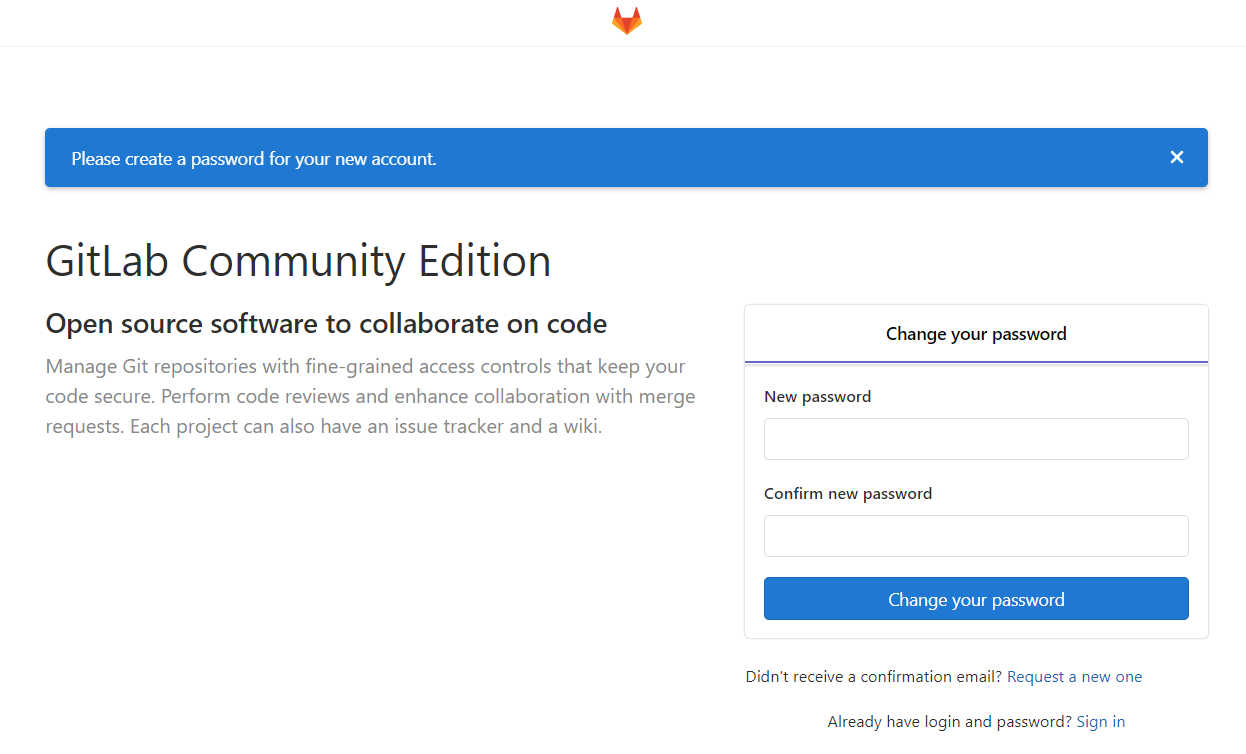
登录系统
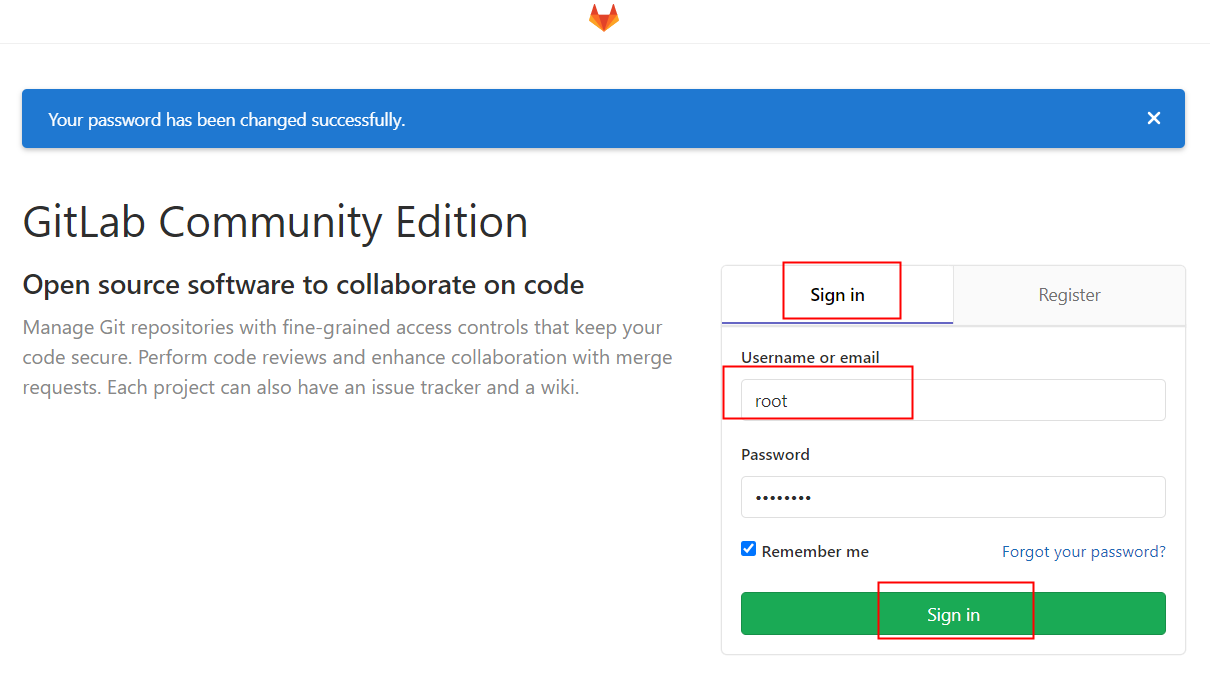
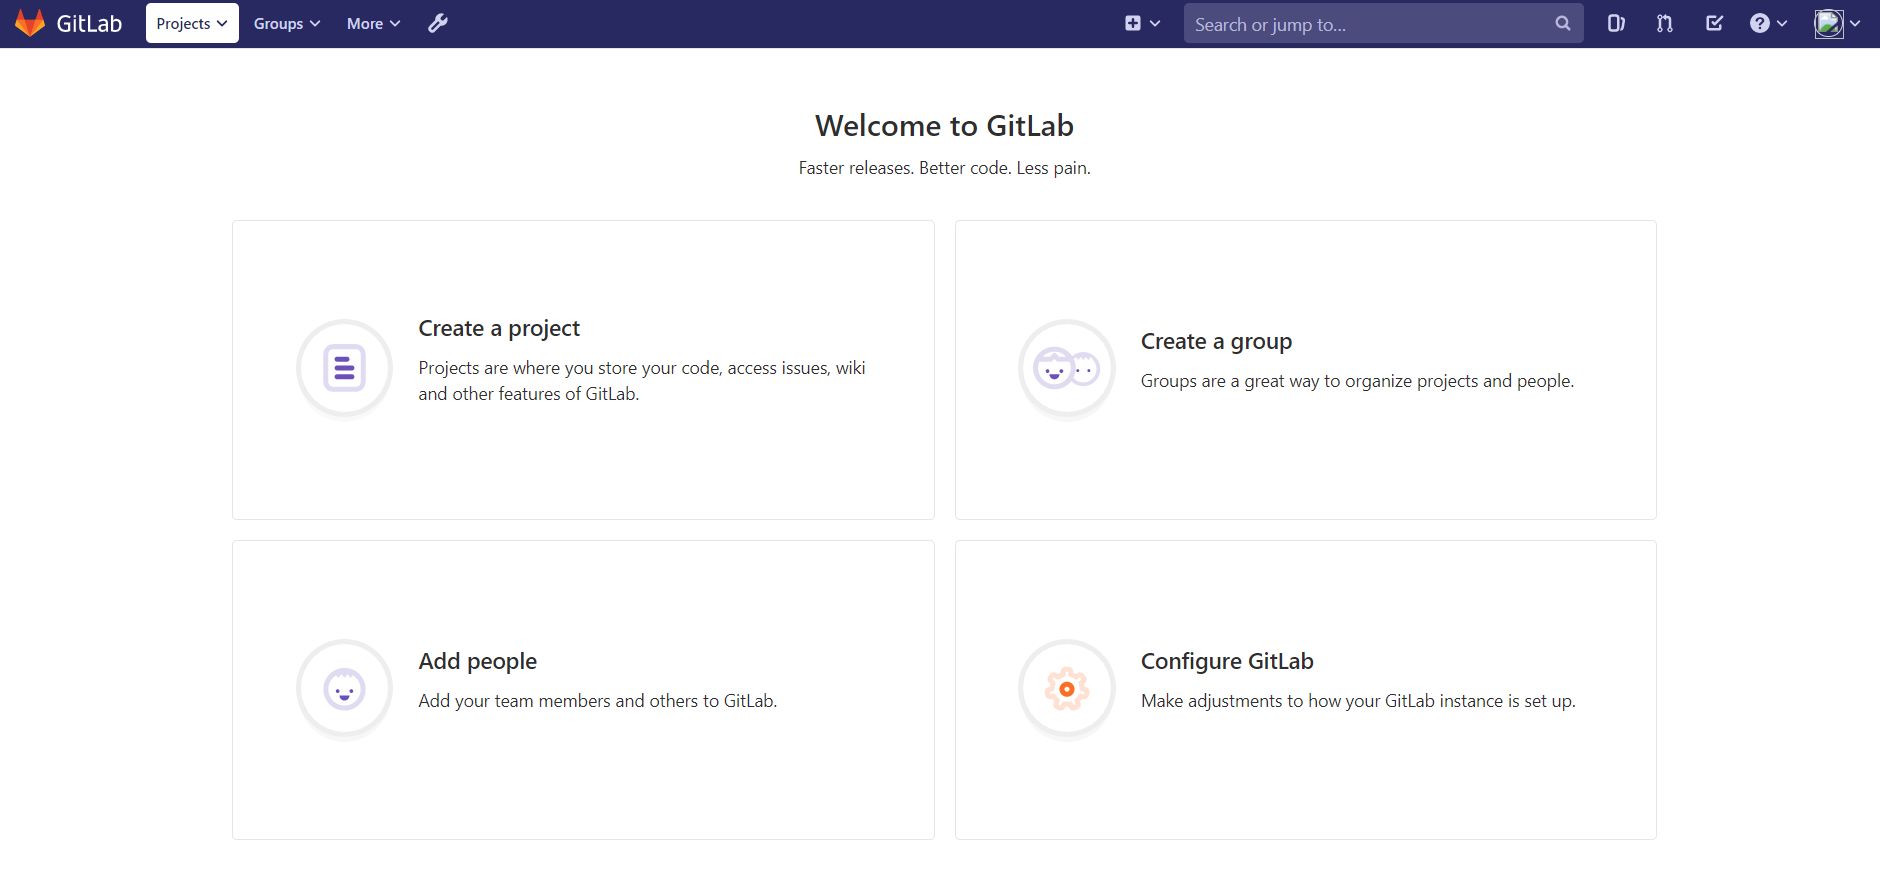
登录成功
2.7.去掉自动注册功能
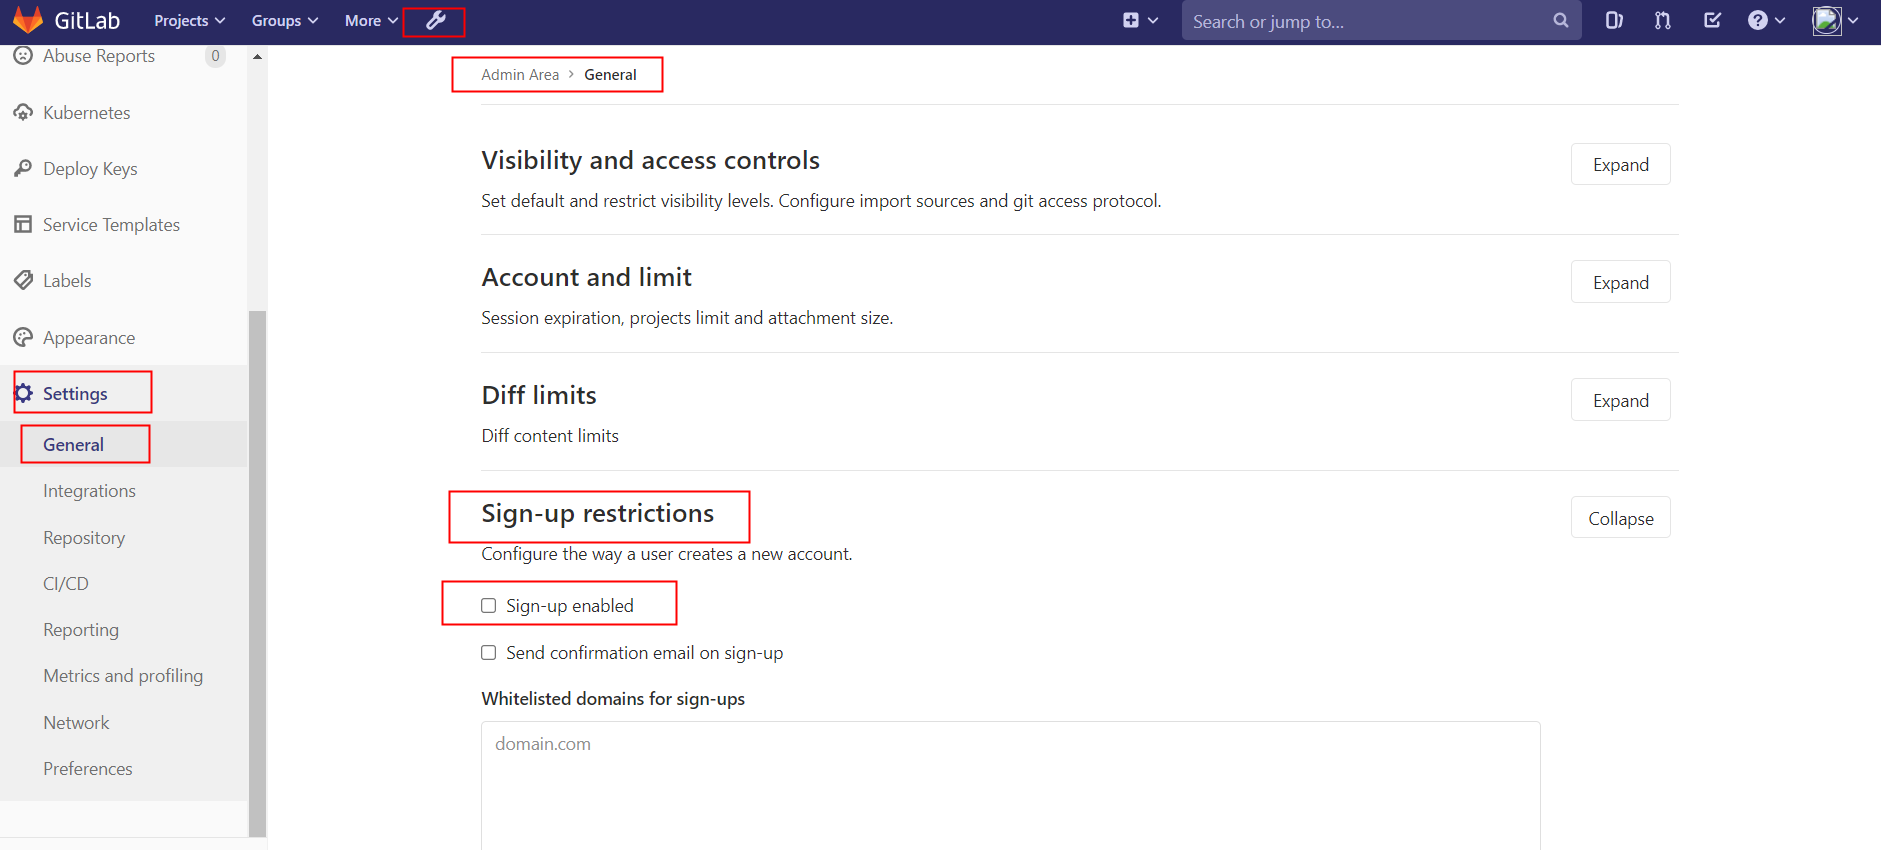
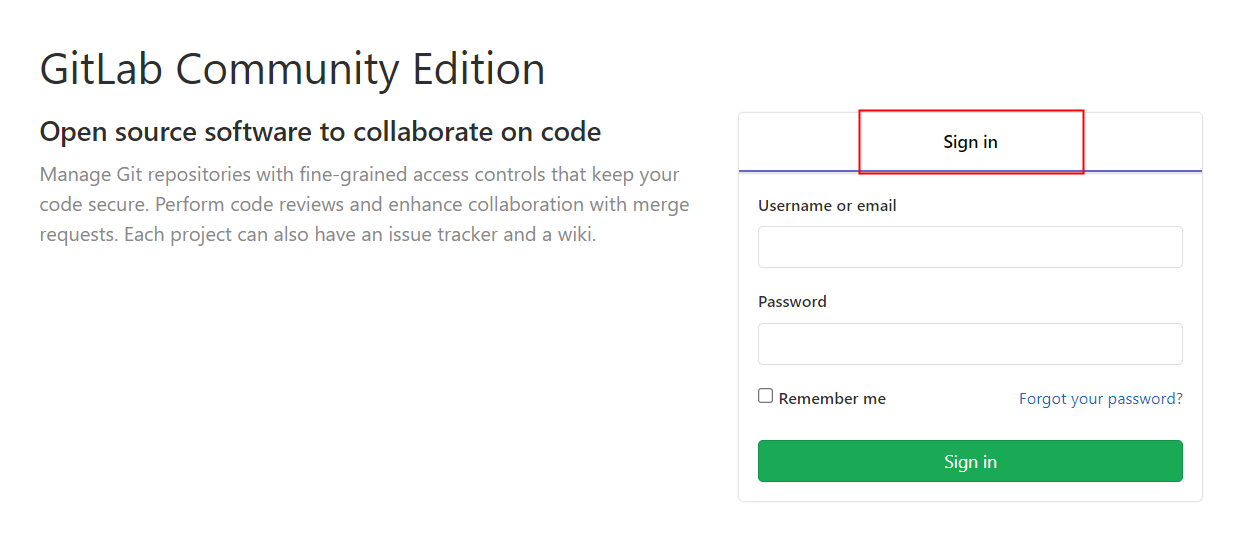
admin are -> settings -> Sign-up Restrictions 去掉钩钩,然后拉到最下面保存,重新登录
3.Docker
3.1.查看版本
1
2
3
4
5
6
7
8
9
10
11
12
13
14
15
16
17
18
19
20
21
22
23
24
25
26
27
28
29
30
31
32
33
34
35
36
37
38
39
40
41
42
43
44
45
46
47
48
49
50
# 用下面的命令可以查看可以安装的版本

yum list docker-ce --showduplicates | sort -r

[root@localhost ~]# yum list docker-ce --showduplicates | sort -r
 * updates: mirrors.neusoft.edu.cn
Loading mirror speeds from cached hostfile
Loaded plugins: fastestmirror
 * extras: mirrors.huaweicloud.com
docker-ce.x86_64            3:20.10.8-3.el7                     docker-ce-stable
docker-ce.x86_64            3:20.10.7-3.el7                     docker-ce-stable
docker-ce.x86_64            3:20.10.6-3.el7                     docker-ce-stable
docker-ce.x86_64            3:20.10.5-3.el7                     docker-ce-stable
docker-ce.x86_64            3:20.10.4-3.el7                     docker-ce-stable
docker-ce.x86_64            3:20.10.3-3.el7                     docker-ce-stable
docker-ce.x86_64            3:20.10.2-3.el7                     docker-ce-stable
docker-ce.x86_64            3:20.10.1-3.el7                     docker-ce-stable
docker-ce.x86_64            3:20.10.0-3.el7                     docker-ce-stable
docker-ce.x86_64            3:19.03.9-3.el7                     docker-ce-stable
docker-ce.x86_64            3:19.03.8-3.el7                     docker-ce-stable
docker-ce.x86_64            3:19.03.7-3.el7                     docker-ce-stable
docker-ce.x86_64            3:19.03.6-3.el7                     docker-ce-stable
docker-ce.x86_64            3:19.03.5-3.el7                     docker-ce-stable
docker-ce.x86_64            3:19.03.4-3.el7                     docker-ce-stable
docker-ce.x86_64            3:19.03.3-3.el7                     docker-ce-stable
docker-ce.x86_64            3:19.03.2-3.el7                     docker-ce-stable
# docker-ce.x86_64            3:19.03.15-3.el7                    docker-ce-stable
docker-ce.x86_64            3:19.03.14-3.el7                    docker-ce-stable
docker-ce.x86_64            3:19.03.1-3.el7                     docker-ce-stable
docker-ce.x86_64            3:19.03.13-3.el7                    docker-ce-stable
docker-ce.x86_64            3:19.03.12-3.el7                    docker-ce-stable
docker-ce.x86_64            3:19.03.11-3.el7                    docker-ce-stable
docker-ce.x86_64            3:19.03.10-3.el7                    docker-ce-stable
docker-ce.x86_64            3:19.03.0-3.el7                     docker-ce-stable
docker-ce.x86_64            3:18.09.9-3.el7                     docker-ce-stable
docker-ce.x86_64            3:18.09.8-3.el7                     docker-ce-stable
docker-ce.x86_64            3:18.09.7-3.el7                     docker-ce-stable
docker-ce.x86_64            3:18.09.6-3.el7                     docker-ce-stable
docker-ce.x86_64            3:18.09.5-3.el7                     docker-ce-stable
docker-ce.x86_64            3:18.09.4-3.el7                     docker-ce-stable
docker-ce.x86_64            3:18.09.3-3.el7                     docker-ce-stable
docker-ce.x86_64            3:18.09.2-3.el7                     docker-ce-stable
docker-ce.x86_64            3:18.09.1-3.el7                     docker-ce-stable
docker-ce.x86_64            3:18.09.0-3.el7                     docker-ce-stable
docker-ce.x86_64            18.06.3.ce-3.el7                    docker-ce-stable
docker-ce.x86_64            18.06.2.ce-3.el7                    docker-ce-stable
docker-ce.x86_64            18.06.1.ce-3.el7                    docker-ce-stable
docker-ce.x86_64            18.06.0.ce-3.el7                    docker-ce-stable
docker-ce.x86_64            18.03.1.ce-1.el7.centos             docker-ce-stable
docker-ce.x86_64            18.03.0.ce-1.el7.centos             docker-ce-stable
3.2.Docker安装
安装版本19.03.*
1
2
3
4
5
6
7
$ wget https://mirrors.aliyun.com/docker-ce/linux/centos/docker-ce.repo -O /etc/yum.repos.d/docker-ce.repo
$ yum -y install docker-ce-19.03.15-3.el7
$ systemctl enable docker && systemctl start docker
$ docker --version

# 参考  本次安装版本有问题
yum -y install docker-ce-19.03.*
3.2.添加阿里云加速镜像
1
2
3
4
5
6
7
# 添加阿里云加速镜像

cat > /etc/docker/daemon.json << EOF
{
   "registry-mirrors": ["https://gcctk8ld.mirror.aliyuncs.com"]
}
EOF
- 重启docker
1
2
#重启docker
systemctl restart docker
4.Harbor
4.1.安装 docker-compose
1
2
3
4
5
6
7
8
9
#下载源码
curl -L https://github.com/docker/compose/releases/download/1.25.0/docker-compose-Linux-x86_64 -o /usr/local/bin/docker-compose


#给docker-compose添加执行权限
sudo chmod +x /usr/local/bin/docker-compose

#查看docker-compose是否安装成功
docker-compose -version
1
2
3
4
5
6
7
# 方法二

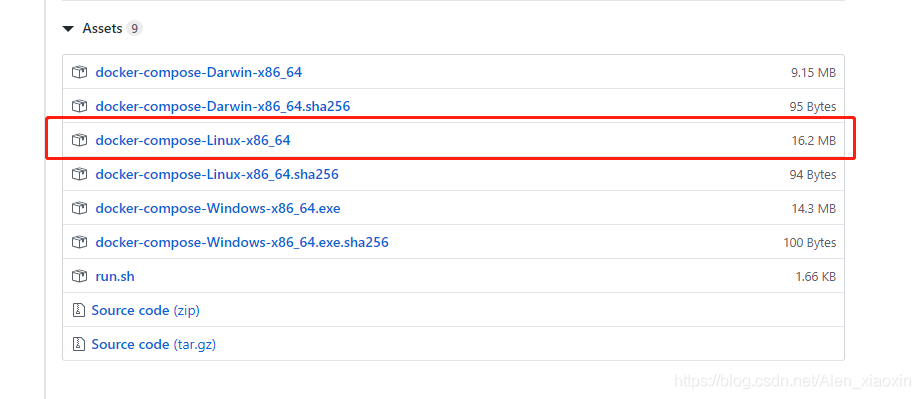
去github手动下载文件:https://github.com/docker/compose/releases/tag/1.25.0-rc4

将文件上传到/usr/local/bin/ 目录下,重命名为docker-compose,修改文件权限:

chmod +x /usr/local/bin/docker-compose
4.2.安装Harbor
1
2
3
4
5
6
7
8
9
10
11
12
13
14
15
16
17
18
19
20
21
22
23
24
25
26
27
28
29
30
31
32
33
34
35
36
37
38
39
# 1.下载Harbor的压缩包
链接:https://pan.baidu.com/s/1W0eawaqMmq3ijx-jvrQqXQ  提取码:acby


# 2.解压
/devops/harbor

# tar -xzf harbor-offline-installer-v2.1.0.tgz
# cd harbor
# cp harbor.yml.tmpl harbor.yml


# 3.修改配置文件
vi harbor.yml

hostname: 172.51.216.89
port: 16888
harbor_admin_password:默认admin 密码  Harbor12345  修改为:admin

注释https
#https:
  # https port for harbor, default is 443
  #port: 443
  # The path of cert and key files for nginx
  #certificate: /your/certificate/path
  #private_key: /your/private/key/path


# 4.安装Harbor
./prepare
# 安装,并开启 hlem charts 功能
./install.sh  --with-chartmuseum


# 5.启动Harbor
docker-compose up -d 启动
docker-compose stop 停止
docker-compose restart 重新启动
devops节点配置docker私有镜像源
1
2
3
4
5
6
7
8
9
10
11
12
13
14
15
16
# 6. 配置docker私有镜像源(k8s所有节点、cicd节点)

#把Harbor地址加入到Docker信任列表, 注意:worker节点都需要修改配置

vi /etc/docker/daemon.json
"insecure-registries": ["http://IP:端口"]

{
   "registry-mirrors": ["https://gcctk8ld.mirror.aliyuncs.com"],
   "insecure-registries": ["http://172.51.216.89:16888"]
}


#重启Docker
systemctl daemon-reload
systemctl restart docker
登录
1
2
3
4
5
6
7
8
9
10
11
12
13
# 7.登陆harbor

# docker login -u 用户名 -p 密码 http://IP:端口
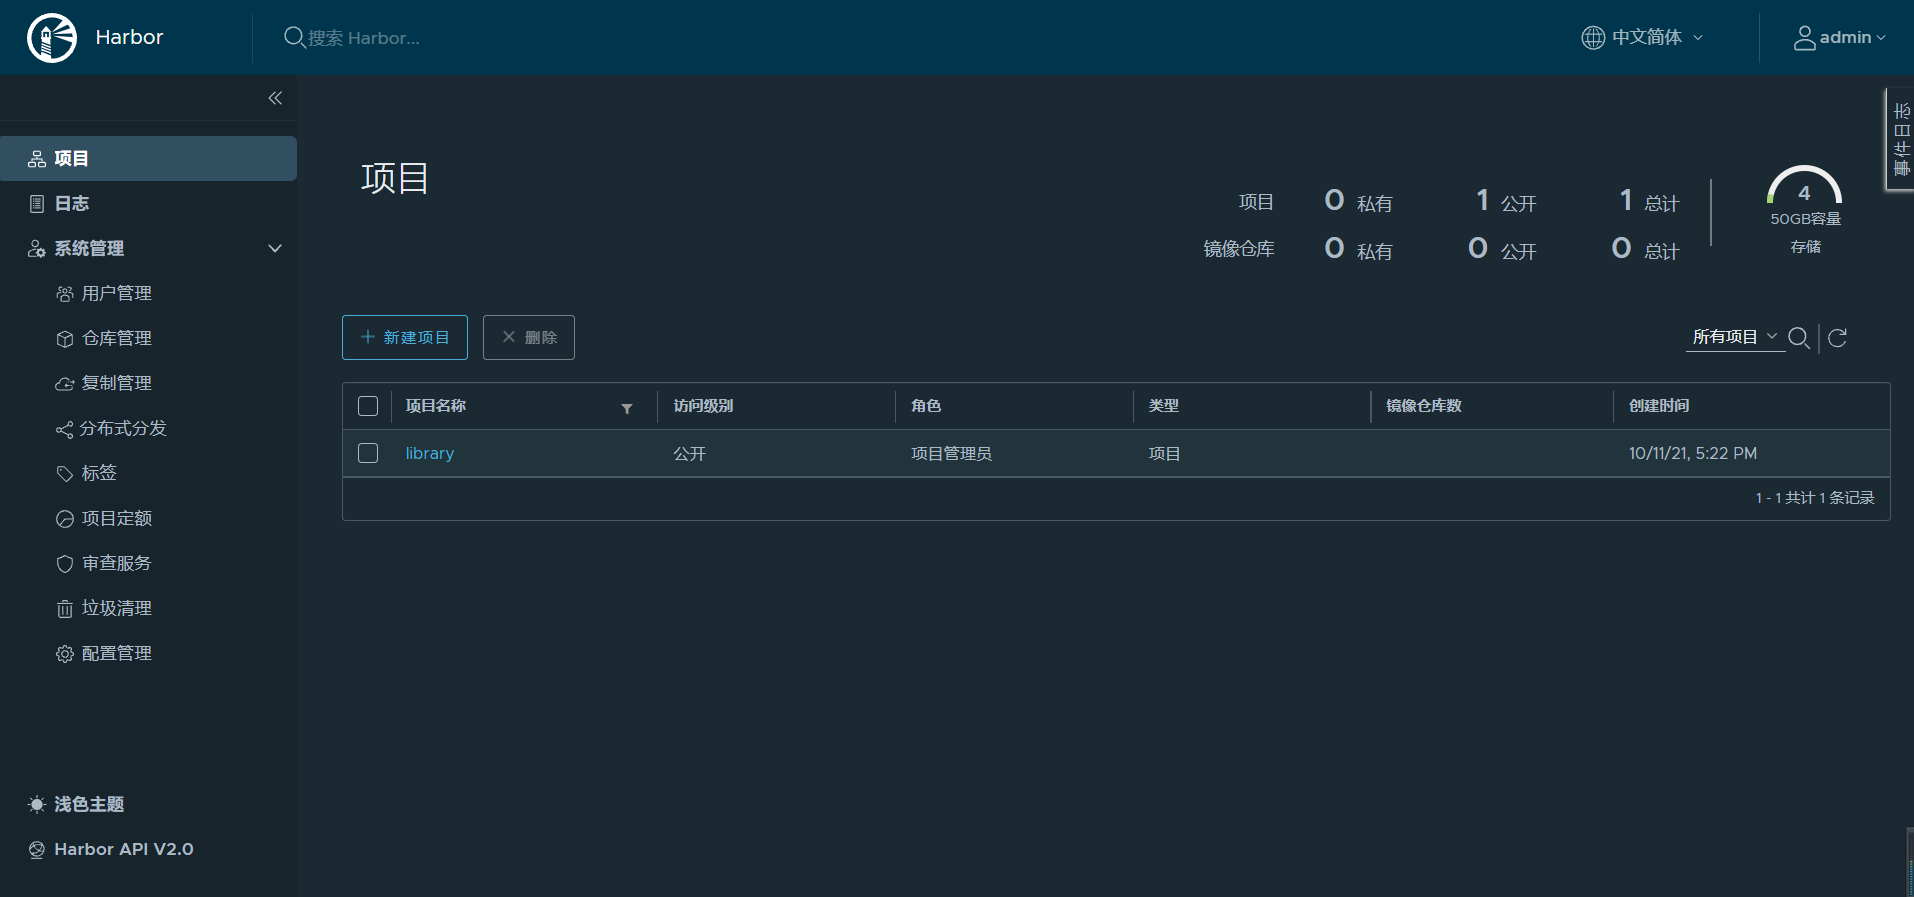
docker login -u admin -p admin http://172.51.216.89:16888

# 登出:
docker logout http://172.51.216.89:16888


# 外网地址:
http://172.51.216.89:16888
admin
admin
4.3. harbor 作为 charts 仓库
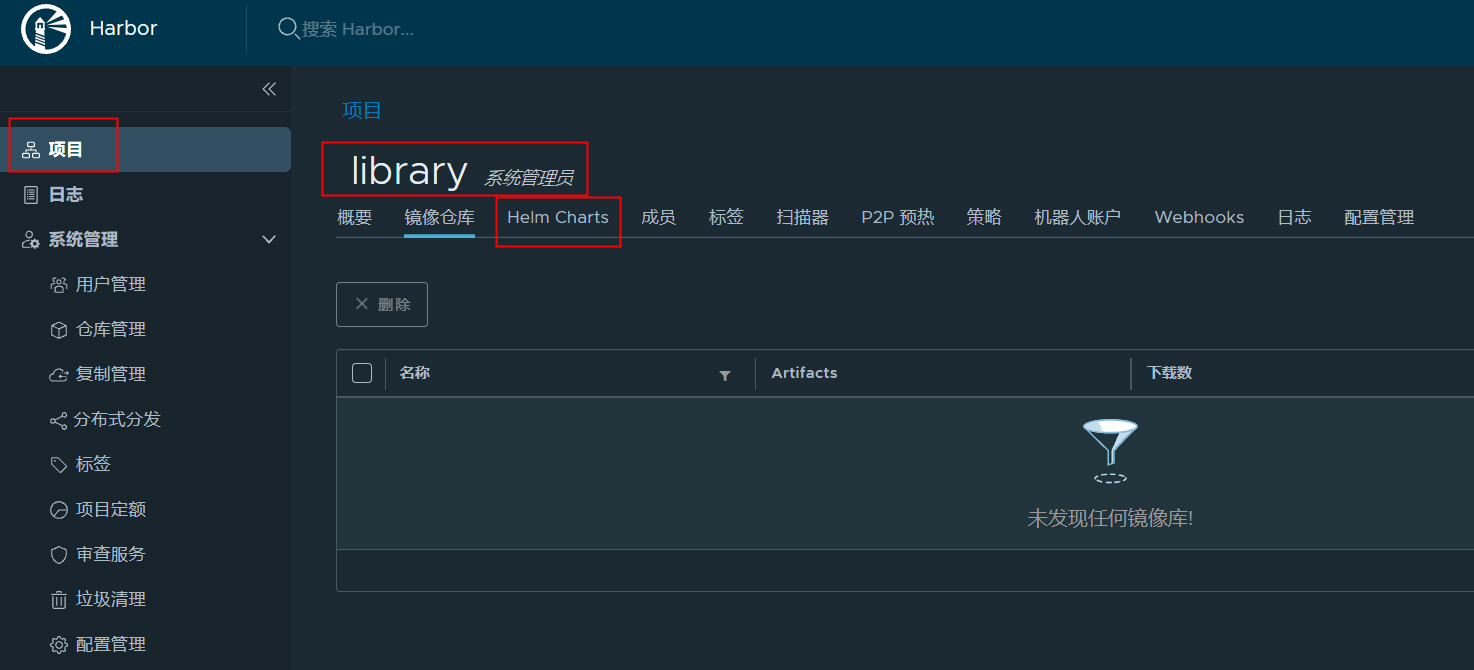
- 用 Harbor 管理 Helm Charts,并开启 hlem charts 功能
1
2
3
4
5
6
7
8
9
10
11
12
13
14
15
16
17
18
19
20
# 安装,并开启 hlem charts 功能
./install.sh  --with-chartmuseum


[root@dev harbor]# ./install.sh  --with-chartmuseum
......
[Step 5]: starting Harbor ...
Creating network "harbor_harbor" with the default driver
Creating network "harbor_harbor-chartmuseum" with the default driver
Creating harbor-log ... done
Creating redis         ... done
Creating registry      ... done
Creating harbor-db     ... done
Creating registryctl   ... done
Creating chartmuseum   ... done
Creating harbor-portal ... done
Creating harbor-core   ... done
Creating nginx             ... done
Creating harbor-jobservice ... done
✔ ----Harbor has been installed and started successfully.----
- 安装 push 插件
1
2
3
4
5
6
7
8
9
10
11
12
13
14
15
16
17
18
# master(172.51.216.81),安装helm服务器
# 下载太慢,如果有这个文件我们也可以直接拷贝到如下目录里:
/root/.cache/helm/plugins/https-github.com-chartmuseum-helm-push


# 安装
helm plugin install https://github.com/chartmuseum/helm-push
# 查看已成功
helm plugin list


# 安装
[root@k8s-master ~]# helm plugin install https://github.com/chartmuseum/helm-push

# 查看已成功
[root@k8s-master ~]# helm plugin list
NAME   	VERSION	DESCRIPTION
cm-push	0.10.0 	Push chart package to ChartMuseum
4.4.控制harbor服务
启动和重启
1
2
3
4
5
6
7
8
9
10
11
12
13
14
Harbor 的日常运维管理是通过docker-compose来完成的,Harbor本身有多个服务进程,都放在docker容器之中运行,我们可以通过docker ps命令查看。

# 暂停Harbor
docker-compose pause

# 停止Harbor
docker-compose stop
docker-compose down -v

# 开启harbor服务
docker-compose start

# 重启Harbor
docker-compose up -d
1
2
3
4
5
6
7
8
9
10
11
12
13
14
15
16
17
18
19
20
21
22
23
24
25
26
27
28
29
30
31
32
# 进入目录
[root@dev harbor]# cd /k8s/harbor/harbor
[root@dev harbor]# pwd
/k8s/harbor/harbor


# 停止Harbor
[root@dev harbor]# docker-compose stop
Stopping nginx             ... done
Stopping harbor-jobservice ... done
Stopping harbor-core       ... done
Stopping harbor-portal     ... done
Stopping registry          ... done
Stopping chartmuseum       ... done
Stopping harbor-db         ... done
Stopping registryctl       ... done
Stopping redis             ... done
Stopping harbor-log        ... done


# 开启harbor服务
[root@dev harbor]# docker-compose start
Starting log         ... done
Starting registry    ... done
Starting registryctl ... done
Starting postgresql  ... done
Starting portal      ... done
Starting redis       ... done
Starting core        ... done
Starting jobservice  ... done
Starting proxy       ... done
Starting chartmuseum ... done
5.SonarQube
5.1.安装PostgreSQL
1
2
3
4
5
6
7
8
9
10
11
12
13
14
15
16
17
18
19
20
21
22
23
24
25
1.创建目录
# mkdir -p /cicd/pg/data/psql


2.运行容器
docker run -d --network host --name pg12 --restart=always \
-e LANG="C.UTF-8" \
-e 'TZ=Asia/Shanghai' \
-e "POSTGRES_DB=postgres" \
-e "POSTGRES_USER=postgres" \
-e "POSTGRES_PASSWORD=postgres" \
-v /devops/pg/data/psql:/var/lib/postgresql/data \
postgres:12


3.进入容器
# docker exec -it pg12 /bin/sh

切换用户
# su - postgres
$ psql
# \l


4.创建数据库:sonar
1
2
3
4
5
# 访问地址

172.51.216.89
5432
postgres/postgres
5.2.安装SonarQube
1
2
3
4
5
6
7
# 运行sonarqube容器

docker run -d --name sonarqube --restart=always --network host \
-e sonar.jdbc.username=postgres \
-e sonar.jdbc.password=postgres \
-e sonar.jdbc.url=jdbc:postgresql://172.51.216.89:5432/sonar \
sonarqube:7.6-community
1
2
3
4
# 访问地址

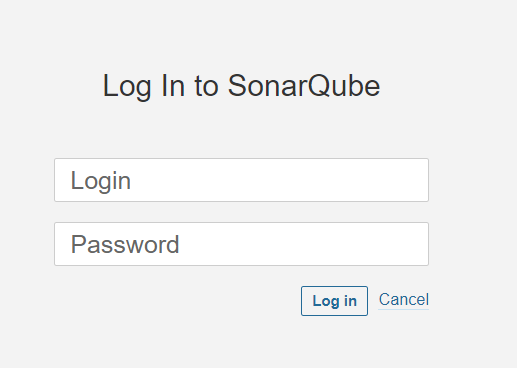
http://172.51.216.89:9000/
admin/admin
5.3.访问SonarQube
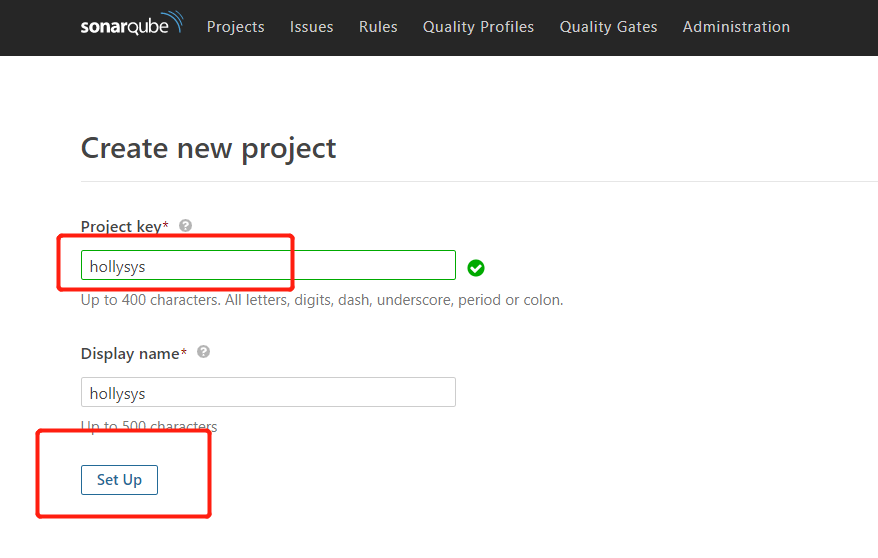
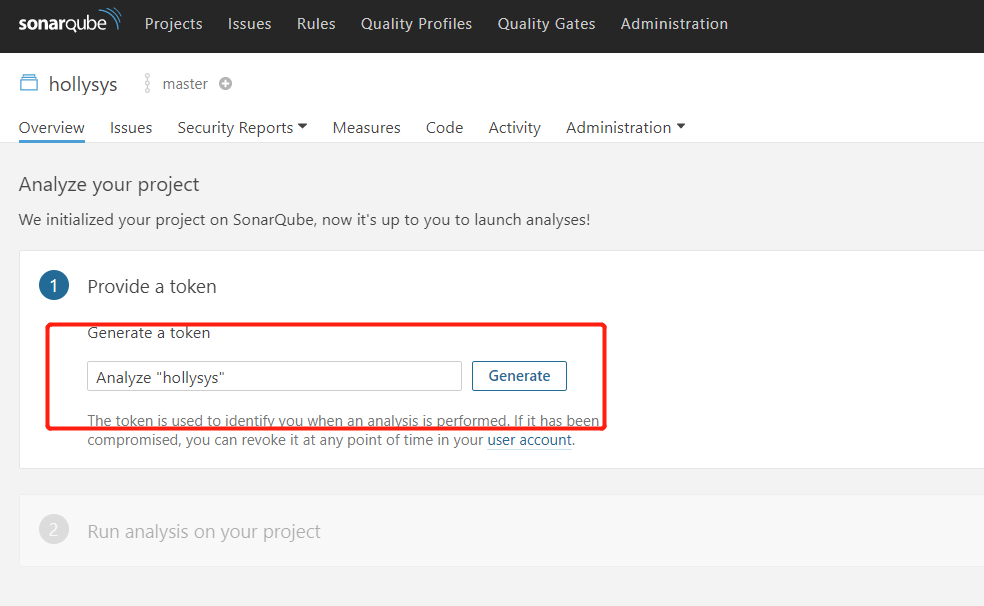
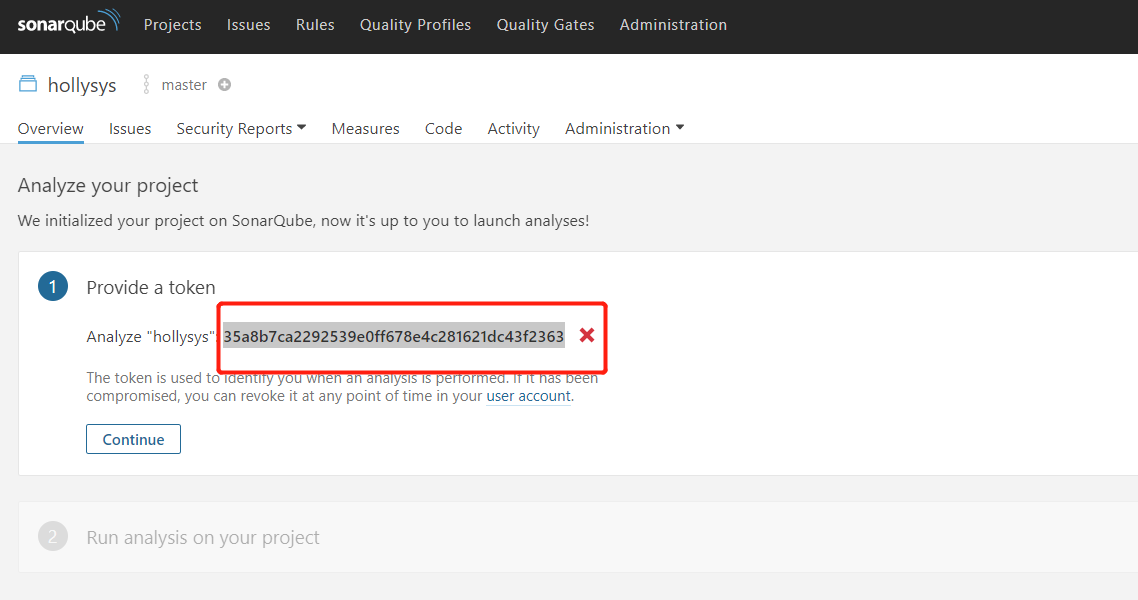
1
2
3
4
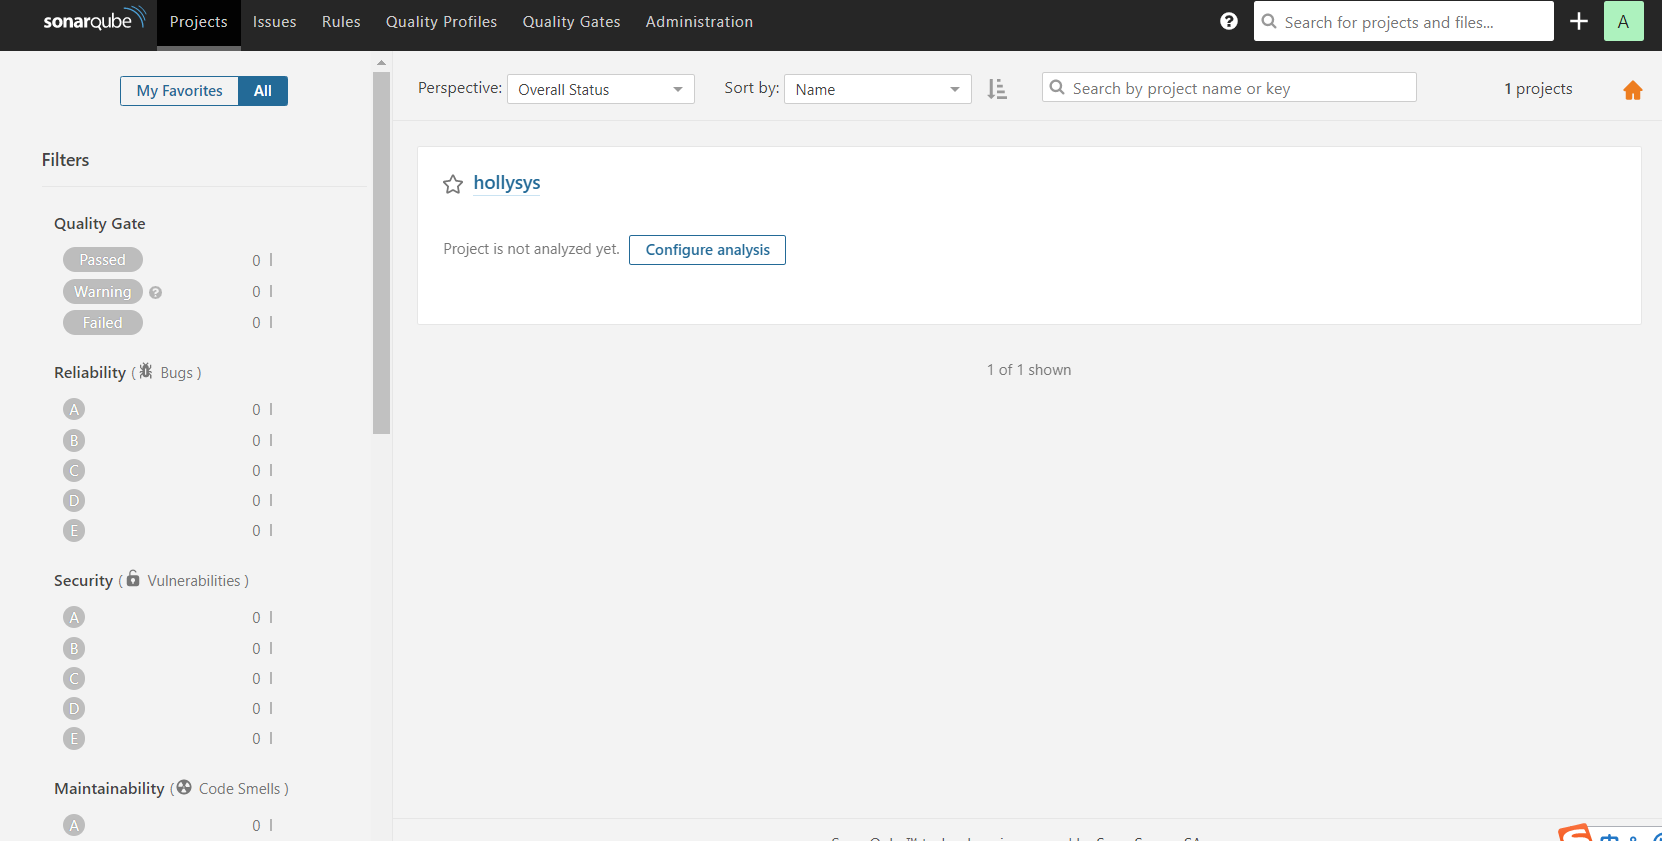
# token
# token要记下来后面要使用

21d25f74a19eb065cd262a72e87f1fe1acbf1592
